December 1, 2017–Italian Sand Cookies

Standard

Whoa, is it that time of year again? My tree is up, Elf is on prime time, and I have a pile of final exams to grade. Yup, it must be December!

It was a little up-in-the-air whether or not I’d do this, and in the spirit of openness, the way I was feeling in December, I didn’t know if I could ever get in the Christmas Spirit again. But I’ve prevailed against the doldrums, and here I am.

I’m starting the season off with one of my favorites–Italian Sand Cookies. I got this recipe a few years ago off the internet and they are always a crowd-pleaser.

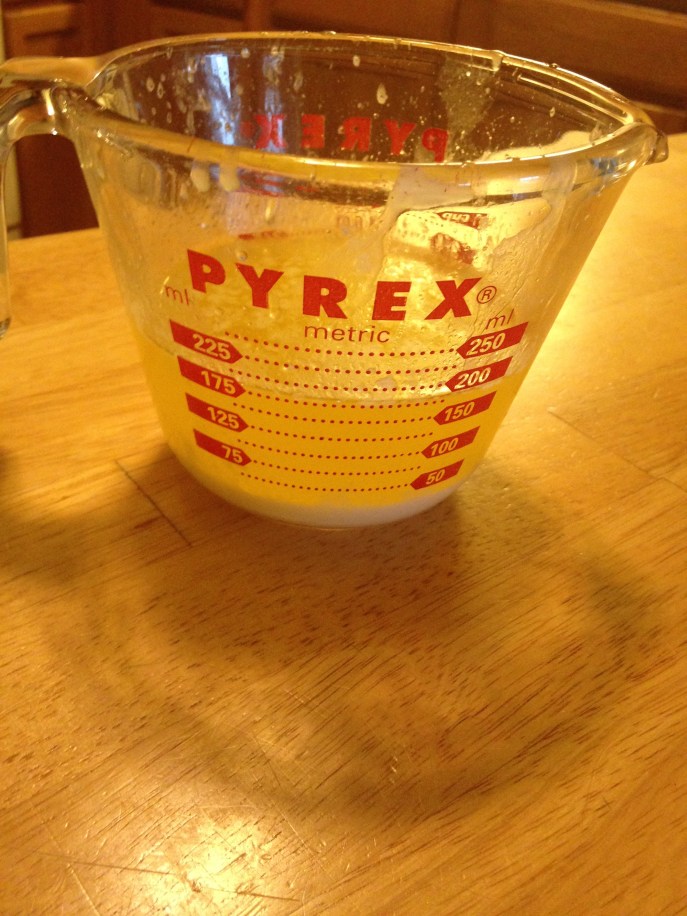
Tonight, as I was starting to bake, I couldn’t find cornstarch. So, despite my best efforts, I was not prepared, and back to the store I went. Sigh.

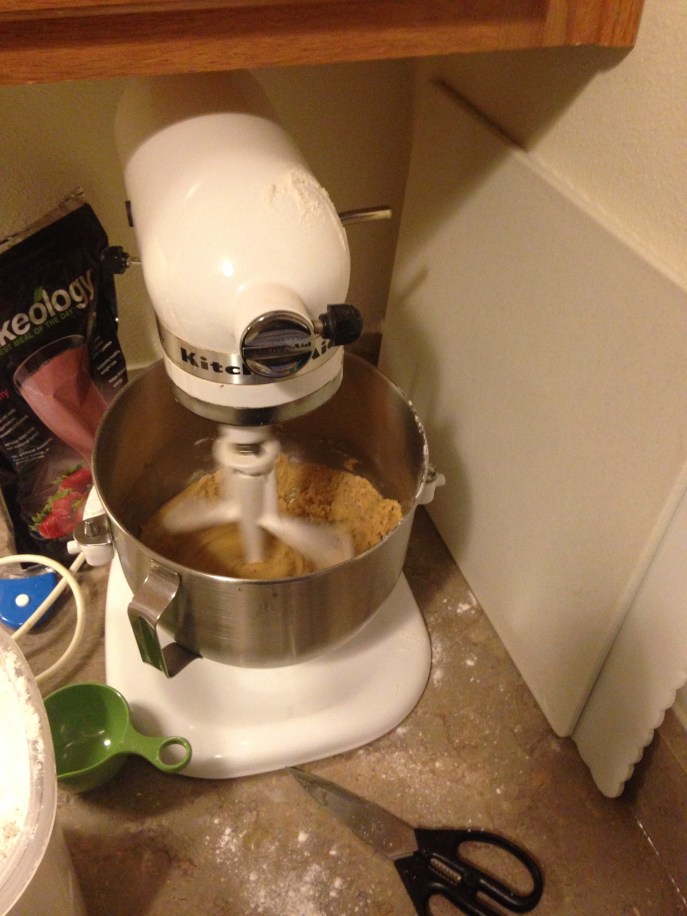
Mixed it all together and piped it on a cookie sheet (I also didn’t have parchment paper, which I discovered after I got home from the store for the second time today. I was not about to return for a third.)

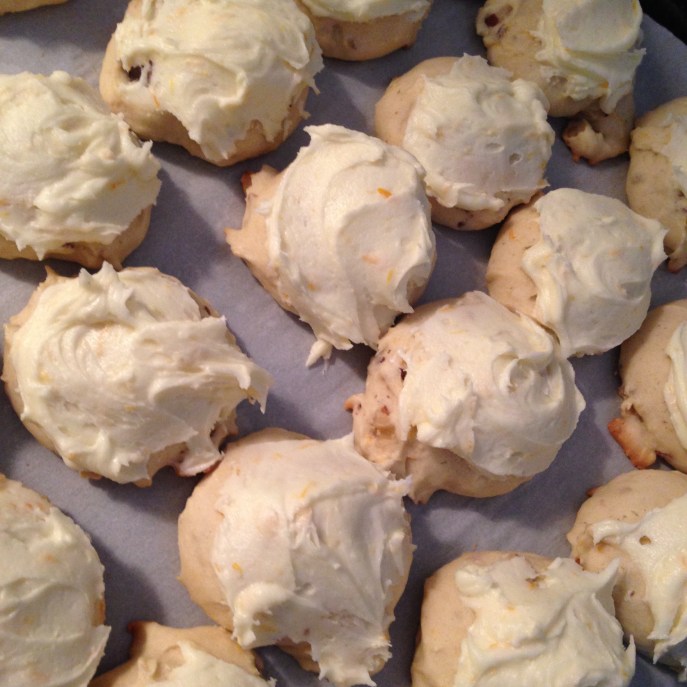
Now, when I lived in Wisconsin and made these, the piping came through a lot better.

See?

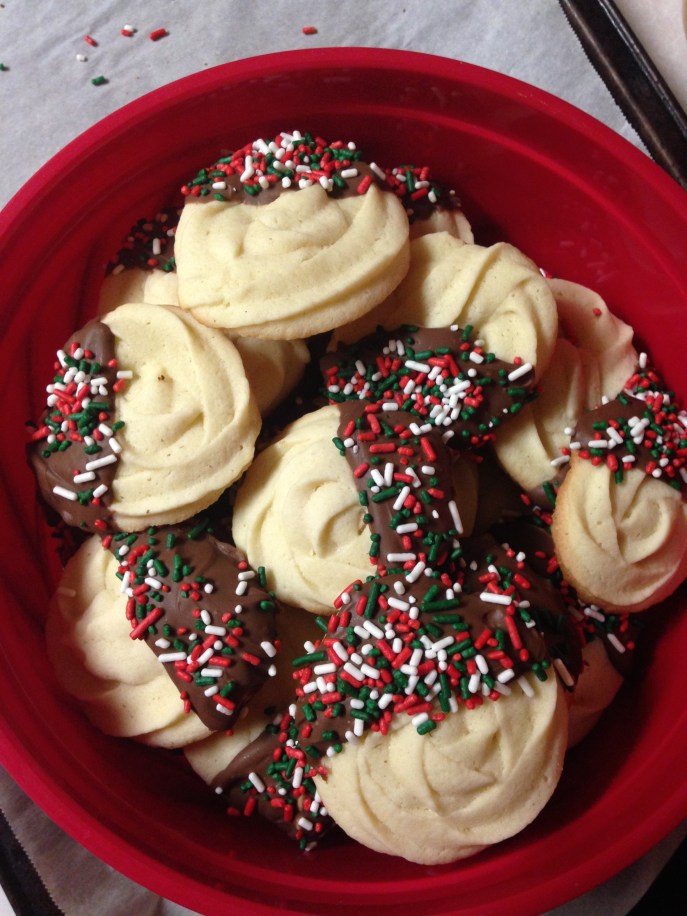
Now, I don’t know why it is that these have spread out so much the past few years, but my inclination is that it has something to do with humidity and general Louisiana-ness. (50th in everything, except humidity.) If you happen to know the real reason, please let me know.

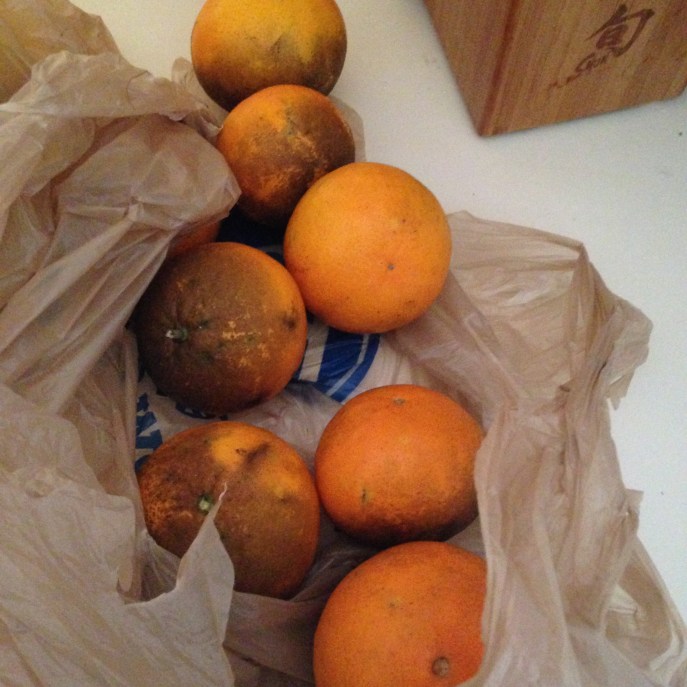
To celebrate my first day (night?) of holiday baking, I picked up a little something at Albertsons when I went for corn starch.

No, not the cat. That’s Zelda, and she’s a new addition. I’m talking about the glass of Prosecco, also a new addition of sorts.

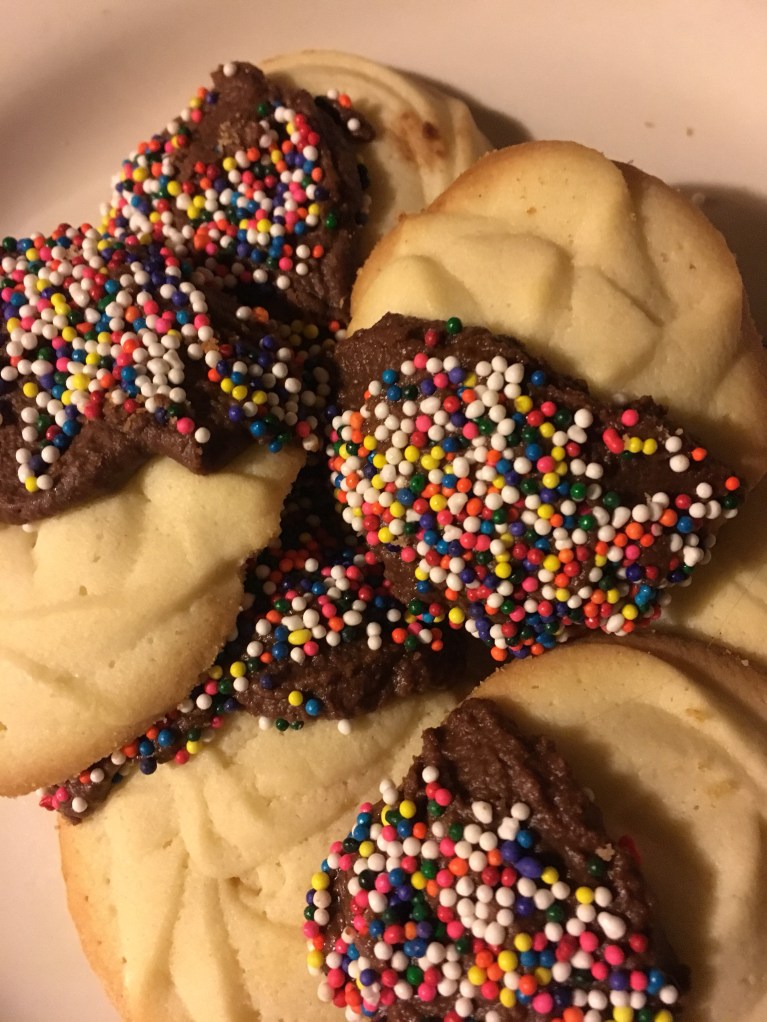
When they were cooled, I melted some milk chocolate with a little coconut oil and dipped them, and then added the mandatory sprinkles.

My best friend once caught a glimpse of all the sprinkles on my shelf via FaceTime and made me count them for her. There were 20 different kinds. This was a few years ago, and the collection has indeed grown. I don’t have a problem; I can stop any time I want!

Welcome to December friends. Now would anyone like to write a 20 page paper for me this weekend?

SAND COOKIES

(from www.cheftessbakeresse.com)

1 1/2 cups flour (we used AP)
1/2 cup cornstarch
1/2 cup shortening
1/2 cup butter
1 1/4 cups confectioners sugar *
1 1/2 t. vanilla extract
2 eggs
*(we also liked 3/4 c. conf sugar & 1/4 c. granulated which made them a slight bit sweeter)

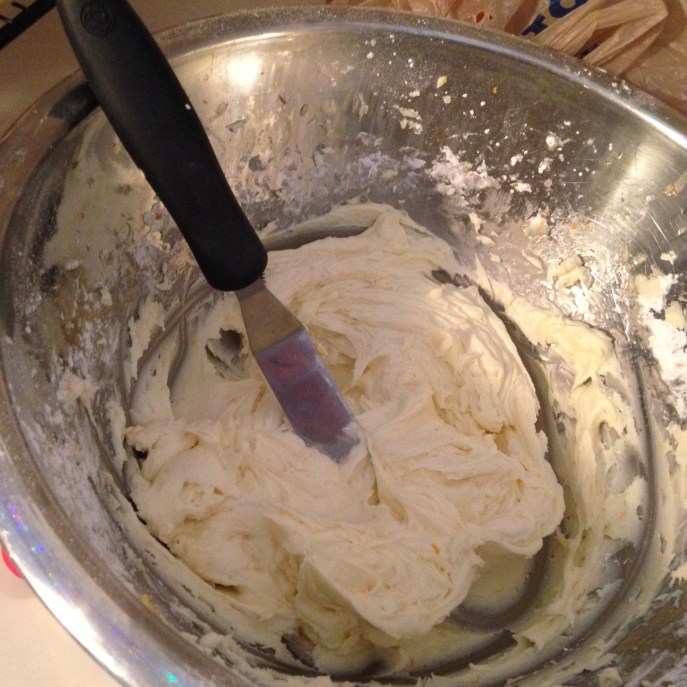
Creaming method. Put through bag with large star tip. Bake @ 375 F for 12-15 minutes or until lightly brown. Decorate with choc chips, sprinkles or leave plain and dip half in melted choc., etc.

Soft Lemon Cream Cheese Cookies

Standard

When I think of the flavors I love, the top two are lemon and caramel. (What, you don’t sit around and think what two flavors you would want if you could only have two flavors for the rest of your life? Yeah…me either…) And since I live in the south now, sometimes I am blessed with a bag of lemons straight from someone’s tree. img_0028

(You can grow LEMONS and other citrus fruit down here! It still blows my Northern Girl mind!)

Mini- Me’s friend’s grandma gave us a bag of lemons and satsumas before Thanksgiving, and I thought there had to be a recipe out there for a deliciously lemon cookie.

I found one on Pinterest and went to work. Though as tasted the dough, I realized that it was not lemony enough for my liking. And then this Northern Girl realized that the lemons that grow down here are Meyer Lemons, and not as sour as your everyday lemons. Oh well.

To try and rectify my sourpuss sensibilities, when it came time to make the lemon icing, I improvised a little. Instead of just powdered sugar and water, as the recipe calls for, I tried to make a sour lemon icing with the juice from the Meyer Lemons and sugar, boiled and reduced in a pot, and then added to powdered sugar.

img_0022img_0023img_0024

The result? Lemony icing, but still not sour enough. Oh well. They still taste good to the non-lemon flavor purists out there, and that’s a success in my book.


Soft Lemon Cream Cheese Cookies

(from Swankyrecipes.com)

  • 1/2 cup butter, softened
  • 1/4 cup cream cheese, softened
  • 1 cup granulated sugar
  • 1 large egg
  • 1/2 teaspoon vanilla extract
  • 2 tablespoons lemon zest
  • 3 tablespoons lemon juice
  • 2 1/2 – 2 3/4 cup all-purpose flour
  • 2 teaspoons cornstarch
  • 1 teaspoon baking soda
  • 1/4 teaspoon salt

For the Icing (as they wrote it, not my 24daysofcookies.com variation)

  • 1 1/2 tablespoons water
  • 3/4 cup to 1 cup powdered sugar

Combine butter and cream cheese in a bowl fit with a paddle attachment of a mixer. Cream together for about 1 minute. Add granulated sugar and continue to mix. Add egg and vanilla extract and continue to beat on medium to high speed until light and fluffy, about 5-7 minutes. Add half the flour, all the baking soda, salt, cornstarch and lemon zest. Add lemon juice and the remaining flour. Mix to combine until the dough starts to form like a ball. Add a little more flour until slight ball starts to form. Cover and refrigerate dough at least 2-3 hours or up to a few days.

Preheat oven to 350 degrees F. Prepare baking sheet and spray with cooking spray or parchment paper. Using a cookie scoop, scoop about 1 1/2 tablespoon cookie dough. Roll cookie dough between hands to get a nice round ball and place on prepared cookie sheet.Bake for 8-10 minutes, removed from oven and while still hot, slightly press down if desired. Allow cookies to cool down completely before transferring. Cookies will slightly harden overnight a little more so don’t bake them much longer.

To make the glaze, combine powdered sugar and water together in a small bowl. Whisk fast until ingredients are combined with no lumps. Dip cookies upside down into icing or drizzle icing over the top and allow to harden.

Chocolate No-Bake Cookies

Standard

Greetings and Salutations! So for those playing at home, baking generally involves the oven. Okay, technically it ALWAYS involves the oven. But what if you don’t have an oven? Or any aptitude to work an oven? (I’m looking at you, J-Dub.)

Or, what if you’re like me and it’s not the oven issue you need to overcome, but that you maybe run a cookie blog and your KitchenAid mixer bowl is in the fridge because you have another recipe that needs to chill in it for a few hours and you have a few spare hours that you could squeeze in another recipe?

I know there are a lot of you with this exact situation.img_0025

Anyway, no bake cookies exist, and this is a good one to try. I like to ask my friends what their favorite cookie is (I get a lot of great ideas from this, actually) and this is one friend’s favorite.

No Bake Chocolate Cookies

  • 1 cup sweetened coconut
  • 3 cups old fashioned oats
  • 2 cups sugar
  • 1/3 cup cocoa powder
  • 1/2 cup butter
  • 1/2 cup milk
  • 1 teaspoon vanilla
  1. In a large bowl, stir the coconut and oats and set aside.
  2. In a pot over medium heat, stir the sugar,cocoa, butter and milk together. Stir constantly until sugar dissolves. Bring to a boil for about 4 minutes. Remove from heat and add vanilla.
  3. Immediately pour into the bowl of coconut and oats mixture.
  4. Working quickly, drop spoonfuls onto wax paper and let stand until cool.


Cesca’s White Chocolate Dipped Ginger Cookies

Standard

I made these last year–another Pinterest find–and when I brought an assortment to the hungry hungry grad students, my friend Cesca tried a few and then got to this one. Well, since then, whenever the conversation turns towards cookies (and because she and I now share an office, it often does) I hear about “those ginger cookies,” often in a lyric detail only a poet could describe them, and always with the ending sentence, “And I don’t even like cookies that much.”

So, I’m sorry Pinterest and site where this recipe originated, I have changed the name of these to Cesca’s White Chocolate Dipped Ginger Cookies, after their biggest fan and bad-ass poet/songwriter/journalist. I hope these hold up to her memory from last year!

img_0018

White Chocolate Dipped Ginger Cookies

(from http://www.cookingclassy.com)

Ingredients

  • 2 1/4 cups all-purpose flour
  • 1 tsp baking soda
  • 1/2 tsp salt
  • 2 tsp ground ginger
  • 1 tsp ground cinnamon
  • 1/4 tsp ground cloves
  • 1/4 tsp ground nutmeg
  • 3/4 cup unsalted butter, softened
  • 1/2 cup + 3 Tbsp granulated sugar, divided
  • 1/2 cup packed light-brown sugar
  • 1 large egg
  • 1/4 cup molasses
  • 2 tsp vanilla extract
  • 3 cups white chocolate chips
  • 3 Tbsp shortening
  • sprinkles

Directions:

  • In a mixing bowl whisk together flour, baking soda, salt, ginger, cinnamon, cloves and nutmeg for 20 seconds, set aside.
  • In the bowl of an electric stand mixer fitted with the paddle attachment, cream together butter, 1/2 cup granulated sugar and brown sugar until well blended. Mix in egg, then blend in molasses and vanilla. With mixer set on low speed, slowly add in dry ingredients and mix until combined. Cover bowl with plastic wrap and chill 1 hour. Preheat oven to 350 degrees during last 10 minutes of chilling.
  • Scoop dough out about 1 1/2 Tbsp at a time, shape into balls then roll in remaining 3 Tbsp granulated sugar. Transfer to Silpat or parchment paper lined baking sheets, spacing cookies 2 inches apart (keep dough chilled that is not currently baking), flatten tops just slightly (to evenly level). Bake in preheated oven 8 – 10 minutes. Cool on baking sheet several minutes then transfer to a wire rack to cool completely.
  • In a microwave safe bowl, melt 1 cup white chocolate chips with 1 Tbsp shortening at a time in microwave on HIGH power in 10 second intervals, stirring between intervals, until melted, smooth and fairly runny (I did batches of it because it will cool as your dipping, plus its easy to burn so you don’t want to work with too much of it at a time. Then once you’ve used it up melt more, you may not need all 3 cups). Dip half of each cookie in melted white chocolate mixture then run bottom of cookie slightly along edge of bowl to remove excess, then return to Silpat or parchment paper to set at room temperature.
  • Sprinkle sprinkles on top, after the long journey to decide which ones to use


The Best Damn Chocolate Chip Cookies Ever

Standard

My first batch of 2016 was to pay off a debt.

No, no. The local casinos aren’t taking cookies as currency, nor has my bookie Vito figured out where I live.

I probably shouldn’t call it a debt actually. It was a thank you gift…because my cats are assholes. Over Thanksgiving, my friend came over to take care of my cats Mo and Gil, and at least one hid from him a good chunk of the time, causing him to worry that he’d lost one of my cats. This was all unbeknownst to me until I got back. I felt bad he had worried so much over these two jerks, and I know he enjoys cookies. img_0017

I made these last year (December 13: Chocolate Chip Cookies) and they never disappoint.

(The recipe is one I found on Pinterest a few years ago, which makes me want to point out that I started doing this nutty cookie thing in 2004, before Pinterest. You know, pointing this out is like when I tell my students that I went to college before Google–I think I am making a point of how awesome and smart I am, but really I’m pointing out just how old I am.)

img_0016


Thick and Chewy Chocolate Chip Cookies

(from http://www.smells-like-home.com)


  • 2 cups plus 2 tbsp (10 5/8 oz) all-purpose flour
  • ½ tsp baking soda
  • ½ tsp salt
  • 12 tbsp unsalted butter, melted and cooled until warm
  • 1 cup brown sugar, packed (7oz)
  • ½ cup granulated sugar (5oz)
  • 1 large egg plus 1 egg yolk
  • 2 tsp vanilla extract
  • 1 – 1 ½ cups semi-sweet chocolate chips
  1. Adjust oven racks to upper and lower-middle positions.Preheat oven 325°.Line two cookie sheets with parchment paper.
  2. Whisk dry ingredients together in a medium bowl; set aside.With electric mixer, or by hand, mix butter and sugars until thoroughly combined.Beat in egg, yolk, and vanilla until combined.Add dry ingredients and beat at low-speed just until combined.Stir in chocolate chips.
  3. Roll a scant half-cup of dough into a ball.Holding dough ball in fingertips of both hands, pull apart into two equal halves.Rotate halves 90 degrees and, with jagged surfaces facing up, place formed dough onto cookie sheet, leaving ample room between each ball.Bake, reversing position of cookie sheets halfway through baking, until cookies are light golden brown and outer edges start to harden yet centers are still soft and puffy (approximately 11-14 minutes).Do not overbake.


December 18: Meringue Cookies

Standard

I had a little help making these.

IMG_4598

Larry Potter–now a fully grown 13 year-old man-boy–wanted to make some cookies unassisted. The four egg whites needed to make this recipe turned into about 8, due to some mistakes in de-yolking. But he finally did it.When the egg whites were whipped, he added the rest of the ingredients and left. It’s okay. I told him to. The next step involved a pastry bag, and I make a big enough mess as it is.

IMG_4600

Now, here’s the awful truth: it’s nearly impossible to make meringue cookies in 100% humidity. They need to be whipped and dried, and the barometric pressure just doesn’t care. Even still, we (or at this point, I) forged on. About 15 minutes later (WAY longer than it should have taken), my mixture was stiff enough to pipe on to cookie sheets.

The recipe says to leave them out at room temperature. That was not going to happen.

IMG_4602

Even for Louisiana, it’s a weird and too warm Christmas. I put the trays in the oven at 200 and checked on them frequently. After about 20 minutes, I had some cookies.

IMG_4603

Snowflake Meringue Cookies
(from The Spirit of Christmas Cookbook, Volume 4)

Ingredients:

4 egg whites
1 1/2 c. powdered sugar
1 t. almond extract
1/2 t. ground cinnamon
1/2 t. cream of tartar
decorating sugar

Directions:

1. Cover baking sheets with waxed paper.
2. In a large bowl, beat egg whites until foamy. Add powdered sugar, almond extract, cinnamon, and cream of tartar; beat until very stiff.
3. Spoon meringue into a pastry bag fitted with a small star tip. Make snowflake design. Add decorating sugars.
4. Let sit at room temperature for 30 minutes.

December 17: Gingerbread Wookie Cookies

Standard

There’s a fad on FB (and probably other forms of social media and internet-ing) where someone takes a recipe and does a fast-action shoot of it. They’re interesting. I’ve never made a recipe from a video like that. But that all changed.

This fast little video amused me so much, I had to try it.

Because the video already exists (and in viral form), I decided not to take pictures of the actual making of the dough. That, and I forgot. But here’s when I took it out of the fridge to start cutting out my wookies.

IMG_4582

I did what I was supposed to…stretch out the gingerbread men. I found that starting with the legs one at a time was easier, but as the dough warmed, I could stretch them head first. (This kinda sounds like a mafia how-to.)

IMG_4583

I pricked them with a butter knife and baked them for 10 minutes at 350. Every time I pulled a batch out of the oven, I just laughed. I was baking Wookies!

IMG_4585

When it came time to decorate them, I lined them up like playing cards and went to town. Melted chocolate chips makes for a good medium.

IMG_4586

Insert Chewbacca roar.

IMG_4589

And, in case you are wondering, they are delightfully Chewie. 😉

IMG_4588

Gingerbread Wookie Cookies

(from http://www.buzzfeed.com)

Ingredients:

  • 3 cups flour
  • 3/4 cup melted butter
  • 3/4 cup sugar
  • 1/2 cup molasses
  • 1/2 cup water
  • 1 tsp baking soda
  • 1 tsp ginger
  • 2 tsp cinnamon
  • 1 tsp salt
  • 1 egg

Directions:

Combine all ingredients in a medium mixing bowl. Once dough begins to form a ball in the center, dust generously with flour. Separate into three sections to make rolling easier. Cover dough with plastic wrap or wax paper and chill for at least 4 hours, or overnight.

Dust a smooth surface with flour, and roll out a section of the dough to about 1/4 inch thick. Use a gingerbread man cookie cutter, or a knife to slice out your Wookiees.

Wookiees are tall, so you may want to stretch out the head and feet! Place on parchment paper on a baking sheet, and score the cookie’s surface to look like fur.

Bake at 350ËšF/180ËšC for 10-12 min. Your Wookiees will puff up quickly! Next, with melted chocolate in a piping bag, add the bandolier, eyes and nose.


December 16: Stroopwafels

Standard

Truth be told, these are the fanciest cookies I make. They are also the ones that take longest to create. They are ALSO my personal favorites of any of the cookies I make, and if you get one, it’s because I really, really like you. Actually, with this economy, I’m going to need to bump that up to love now.

(They are also the cookie that got me an award and some serious poetic street cred because I wrote a poem about making them. But we don’t need to talk about that.)

(I can see you’re not going to let this go…here’s the link.)

I don’t expect any one to have a pizzelle iron at home (or even better, an actual Stroopwafel one), but on the off hand chance you do, well, let me introduce you to my favorite of the favorites.

This one needs yeast. Don’t be afraid of yeast. Just make sure the water you’re using is warm, not hot. You don’t want to kill the yeast.

IMG_4556
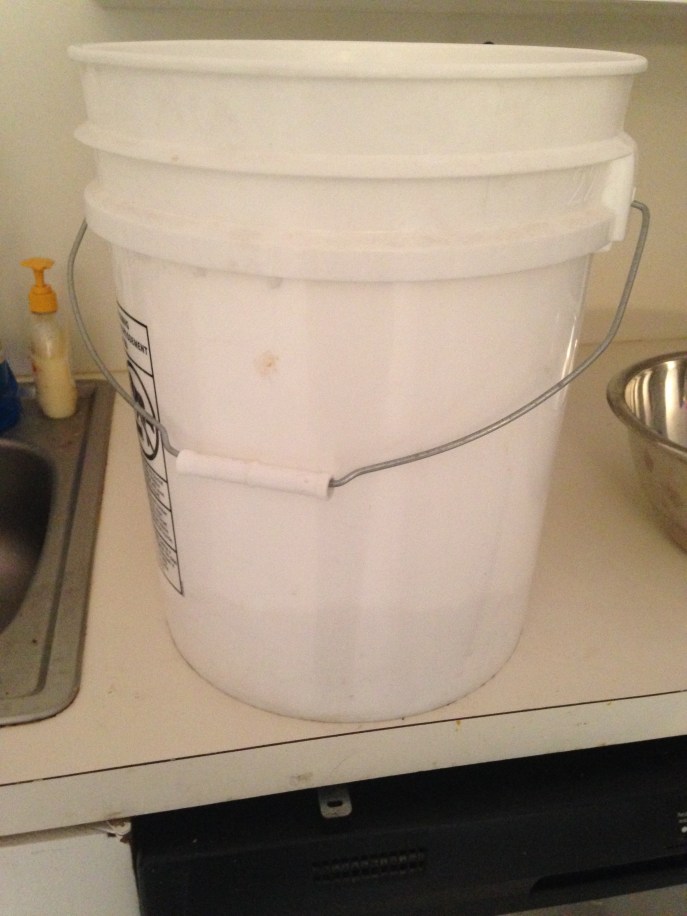
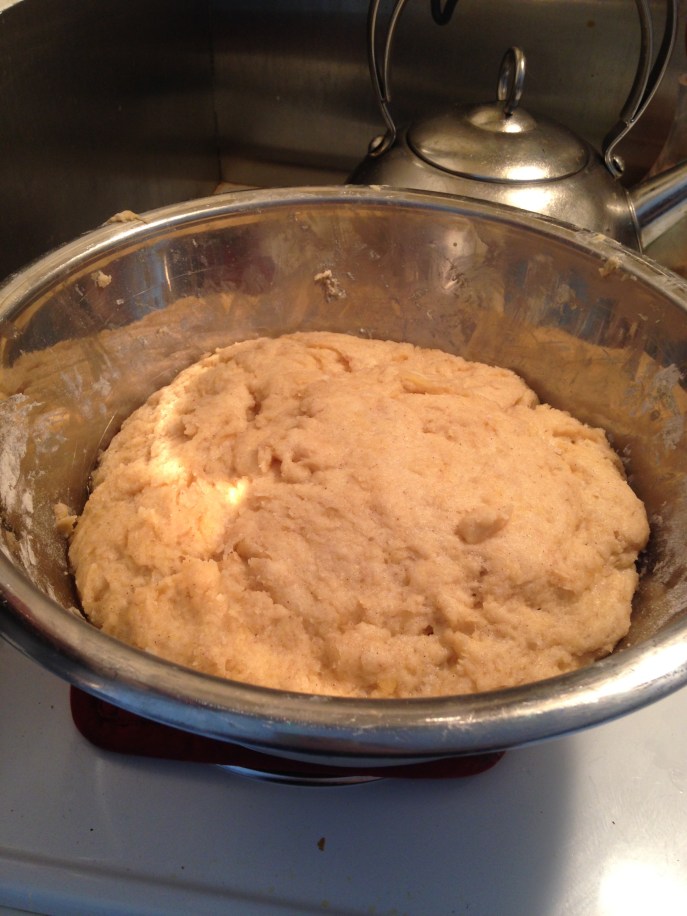
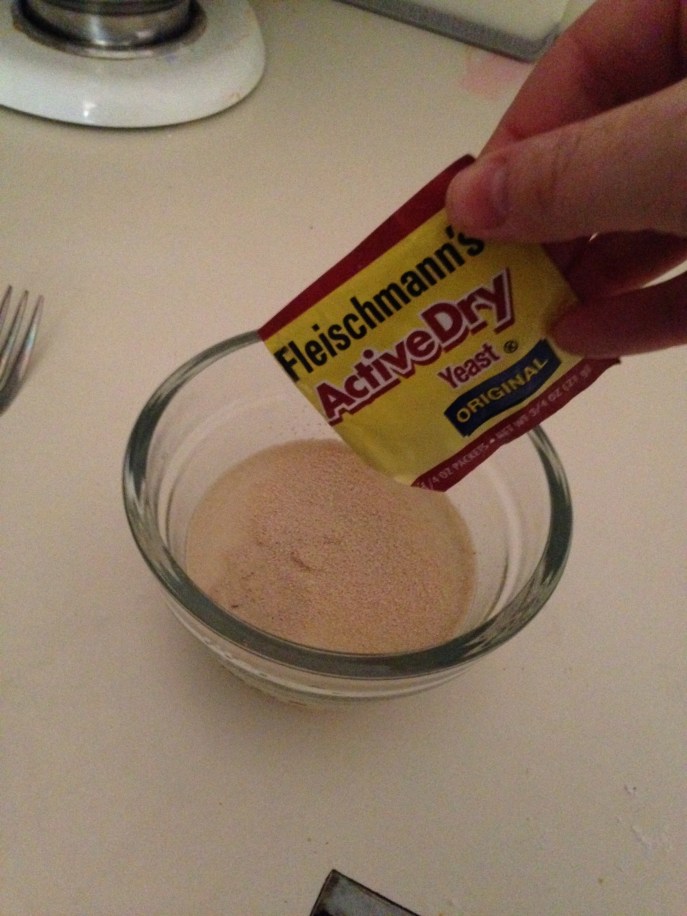
While my yeast was yeasting, I went to get my flour. I was digging at the bottom of the barrel (bucket) for this recipe, but thankfully, I had enough.

(Also, I keep flour and sugar in food grade buckets. Write a cookie blog sometime and tell me you won’t do the same.)

IMG_4558IMG_4557

You have to cut the butter into the flour, and I find it’s easier if you cube the butter first.

IMG_4560

Anytime I bring out my pastry cutter, I think of my friend Jenny B., who once had some very important questions about using such a device. You don’t need one–you can do the same thing with two knives–but I’ll tell you it’s easier to use the pastry cutter.

IMG_4561

After I added in all the other ingredients, I mushed it into a ball and let it rise for an hour.

IMG_4562

And through the magic of the Internet…

IMG_4569

Time to make the heavenly filling for the Stroopwafel. It’s pretty easy–butter, brown sugar, dark Karo syrup, and cinnamon. This is the Karo syrup, in my Pampered Chef measuring cup–a measuring cup that has paid for itself many times over because of it’s syrup-measuring (and peanut butter, and mayonnaise) abilities.

IMG_4567

Let it boil until it reaches the soft ball stage. Don’t let it go any further than that, or you will have crunchy cookies that take your fillings out.

IMG_4571

Once the filling is done, I like to pour mine into an extra large measuring cup.

IMG_4572

The dough needs to be made into cookies. I take biggish balls (okay, 8th grade boy…) and press them until they are juuuust lightly golden. It takes a few tries. You want it just on the brink of being fully cooked.

IMG_4570

I take a serrated knife and cut through the cookie. This is why you want the cookie to be just almost done. It helps you find the sweet spot in the cookie without tearing the whole thing apart. I would have had a picture of this for you, but I’m a safety gamble using two hands doing this, and I wasn’t about to try it with one, just so there’d be a picture.

(Adulting kind of blows, btw.)

I filled the cookies with the delicious insides. I don’t know why this picture is sideways. Deal with it.

IMG_4573

And then I quickly put the tops on the cookies, pressing lightly.

IMG_4574

As you can see above, these cookies make my counters look like there’s been a struggle. Or neglect. Or both. But all in the name of good cookies.

It’s recommended that you put a Stroopwafel on top of a hot cup of coffee or tea to really get the insides gooey. This was a coffee cup I painted at one of those “Paint your own ceramics” places a few years ago. It’s holiday-themed and says exactly what you think it does.

IMG_4576

Again, you are only getting my stash if I love you.

IMG_4578

Stroopwafels

(from http://www.food.com)

Ingredients

Waffle cookies

4 cups all-purpose flour
1/2 teaspoon ground cinnamon
1/2 cup granulated sugar
1 cup unsalted butter
2 large eggs
1 (1/4 ounce) package active dry yeast
1/2 cup warm water

Filling

1 1/2 cups packed brown sugar
1 cup unsalted butter
1 teaspoon ground cinnamon
6 tablespoons dark corn syrup

Directions

Preheat a pizzelle iron.
To Make Waffles: Dissolve the yeast in the warm water. Cut butter into the flour. Mix in the sugar, cinnamon, eggs and yeast mixture. Mix well and set aside to rise for 30 to 60 minutes.
Roll dough into 12 small balls; Squeeze each ball into the preheated pizzelle iron and bake for about 30 seconds. Cut the waffles into two thin waffles and spread with filling.
To Make Filling: In a saucepan boil the brown sugar, the remaining one cup of the butter, cinnamon (this is a must-have ingredient), and dark corn syrup until it reaches the soft ball stage (234-240°F, 112-115°C), stirring constantly.

To Assemble: Cut each waffle (only if home-made waffles) into 2 thin waffles and spread with filling. Repeat this process until all the filling is used. If using store bought, simply spread about 1 tablespoon of filling on one waffle cookie, let it cool about 1 minute, and squeeze a second cookie on top.


December 15: Orange Drop Cookies

Standard

This cookie comes with a story. I mean, they all come with a story, but this one comes with a recent story.

We had an apple tree at our old house in Wisconsin. We got it (and another one that didn’t make it) many years ago when our city cut down our large tree for power line reasons, and we got three new trees out of the deal. (Other one was a beautiful Blaze Maple.) Hoover, our middle son, loves apples, which is why we chose an apple tree.

Fast forward to now, and we live 30 miles from the Gulf of Mexico, where we have no apple trees (I don’t know if they grow here or not, but we don’t have access to one anymore).

Hoover has always been obsessed with seeds and planting and all sorts of stuff. He used to save his orange seeds in Wisconsin to try and plant orange trees. Guess what; it didn’t work.

But, do you know what does grow in Southwest Louisiana?

The other day, our grandfatherly neighbor came to the door with a grocery bag full of oranges from his tree. Hoover’s enthusiasm seemed to charm him, and he then offered Hoover the chance to pick oranges whenever he liked. Hoover and I went to his side yard and encountered a 20 foot Satsuma Orange (or tangerine, possibly…jury is still deliberating what a Satsuma really is–other than a scent at The Body Shop) tree.

Walter (not the neighbor’s name, but it’s something like that) is lousy with oranges, and looks to be quite sick of them, much like my dad was when he had two giant apple trees. He emphasized that any time he wanted to pick oranges, Hoover (and his brother and sister) could and should, otherwise they’d just go to waste.

Didn’t have to tell this kid twice.

IMG_4511

He asked me if I could make orange cookies with the oranges. Many years ago, I made Orange Drop cookies, so I knew I could. And how can you resist fresh oranges?

IMG_4533

This is some of Hoover and Mini-Me (my daughter)’s second stash, after they juice a half-gallon of juice by hand. (And then drank it.)

IMG_4535

Luckily, I had a helper in juicing.

IMG_4536

Had to strain it so I’d just get the juice.

IMG_4537

Chopping a half cup of walnut, graciously given to me by my poetry professor Amy!

IMG_4538

Into the oven it went. Now, I’ll say this. These cookies come out looking light and airy if you do it right. I did it right. 🙂

IMG_4539

Seriously, don’t they look like meringue tarts?

IMG_4540

The frosting involved a pound of powdered sugar, and more orange juice and zest. This is probably the tastiest frosting I make, and the fresh ingredients only enhance it!

IMG_4541


As my kids noted, they aren’t all that orange. When I’ve made these with regular store-bought juice, they aren’t all that orange, either. But, they sure do taste (and smell…holy smokes, the smells in my kitchen…) great!

Orange Drop Cookies

(I’m sorry, I can’t remember where I got it from! If you do, let me know and I’ll credit it accordingly!)

1/2 c shortening                                   2 1/2 c flour

1 c sugar                                             1/2 t salt

2 eggs                                                 1 T grated orange peel

1/2 c orange juice                                 1/2 c walnuts

1 1/2 t baking powder

Cream together shortening and sugar, add eggs one at a time and beat well. Add orange juice and mix. Blend in dry ingredients. Drop onto cookie sheet. Bake at 350 for 10 minutes.

Orange Frosting:

6 T Butter                                              2 t grated orange peel

1 lb. bag of powdered sugar                    2 T orange juice

1 1/2 t vanilla

Cream together butter and orange peel; gradually add about half of the sugar, blending well. Beat in orange juice and vanilla. Add enough sugar to make spreading consistency.

December 13: Chocolate Chip Cookies

Standard

(I took a week mental health break, but I’m back at documenting what was made. And they were made!)

It’s the old standard. The cookie everyone lists as their favorite. The kind that will evoke happy memories of home and love and deliciousness.

I try not to do a Chocolate Chip cookie for the blog, as I know there are so many others out there that beg for airtime. But, as I was home in Wisconsin for a weekend, two friends invited me to their home for Friend Christmas. They insisted I needn’t bring anything. I was okay with that, but thought I should bake a batch of cookies. Another friend, hearing all of this, went on a 10 minute spiel about what the perfect Chocolate Chip cookie was like. I was amused. After that, how I could I not make Chocolate Chip cookies?

I found this recipe a few years ago on Pinterest, looking to make a different kind of cookie. Well, the base for it (it was one of those “s’mores inside a chocolate chip cookie” cookie), is this recipe. The s’mores cookie turned out fine, but the real star was the Chocolate Chip cookie recipe.

IMG_4451

One of the key differences for this recipe is that it calls for 1 1/2 sticks of butter, melted, and then cooled off. It’s a weird request, and had the recipe not held up, I’d totally would have made fun of it. It holds ups, therefore, I hold my tongue.

IMG_4452

In went the rest of the ingredients into Nichole’s highly superior KitchenAid.

IMG_4454

And I balled up the dough and baked them.

Now, the recipe does have some pretentious instructions as to how to bake these. Follow it, don’t follow it, it’s up to you. I’ve done the whole “break it apart, put the jagged edges up, turn every 5 minutes” thing, and I didn’t see much of a difference.

I don’t have too many pictures for this recipe, as I was making it while waiting for my ride to the party. My ride was also the friend that gave me the cookie specifications he expected, so he was the first one to sample. He said, “Mmm. Hhghgg. Orrr!” Which was loosely translated to “You got it right.”

IMG_4461

Thick and Chewy Chocolate Chip Cookies

(from http://www.smells-like-home.com)


  • 2 cups plus 2 tbsp (10 5/8 oz) all-purpose flour
  • ½ tsp baking soda
  • ½ tsp salt
  • 12 tbsp unsalted butter, melted and cooled until warm
  • 1 cup brown sugar, packed (7oz)
  • ½ cup granulated sugar (5oz)
  • 1 large egg plus 1 egg yolk
  • 2 tsp vanilla extract
  • 1 – 1 ½ cups semi-sweet chocolate chips
  1. Adjust oven racks to upper and lower-middle positions.Preheat oven 325°.Line two cookie sheets with parchment paper.
  2. Whisk dry ingredients together in a medium bowl; set aside.With electric mixer, or by hand, mix butter and sugars until thoroughly combined.Beat in egg, yolk, and vanilla until combined.Add dry ingredients and beat at low-speed just until combined.Stir in chocolate chips.
  3. Roll a scant half-cup of dough into a ball.Holding dough ball in fingertips of both hands, pull apart into two equal halves.Rotate halves 90 degrees and, with jagged surfaces facing up, place formed dough onto cookie sheet, leaving ample room between each ball.Bake, reversing position of cookie sheets halfway through baking, until cookies are light golden brown and outer edges start to harden yet centers are still soft and puffy (approximately 11-14 minutes).Do not overbake.