These are the best damn sugar cookies you’ll ever have.
What makes me so confident? I’ve had a lot of cookies. I’ve run a cookie blog for 8 years. I’m not exactly the 120 lb. daughter my mother always wanted, and I can tell you, I didn’t get this way eating salads. I’ve conducted sugar cookie research I didn’t even know I was doing, since I was 8 years-old.
As far as Christmas cookies go, they are number 1. Fight me bro. What makes them so good are the combination of both vanilla and almond extracts.
Jessica’s Best Sugar Cookies
1 1/2 c. sifted powdered sugar
1 c. butter
1 egg
1 t. vanilla
1/2 t. almond extract
2 1/2 c. flour
1 t. baking soda
1 t. cream of tartar
Directions
1. Cream butter and sugar. Mix in egg and extracts. Blend dry ingredients and stir in.
2. Refrigerate 2-3 hours. Divide dough in half and roll out. Cut out desired shapes.
3. Bake at 375 for 7-8 minutes.
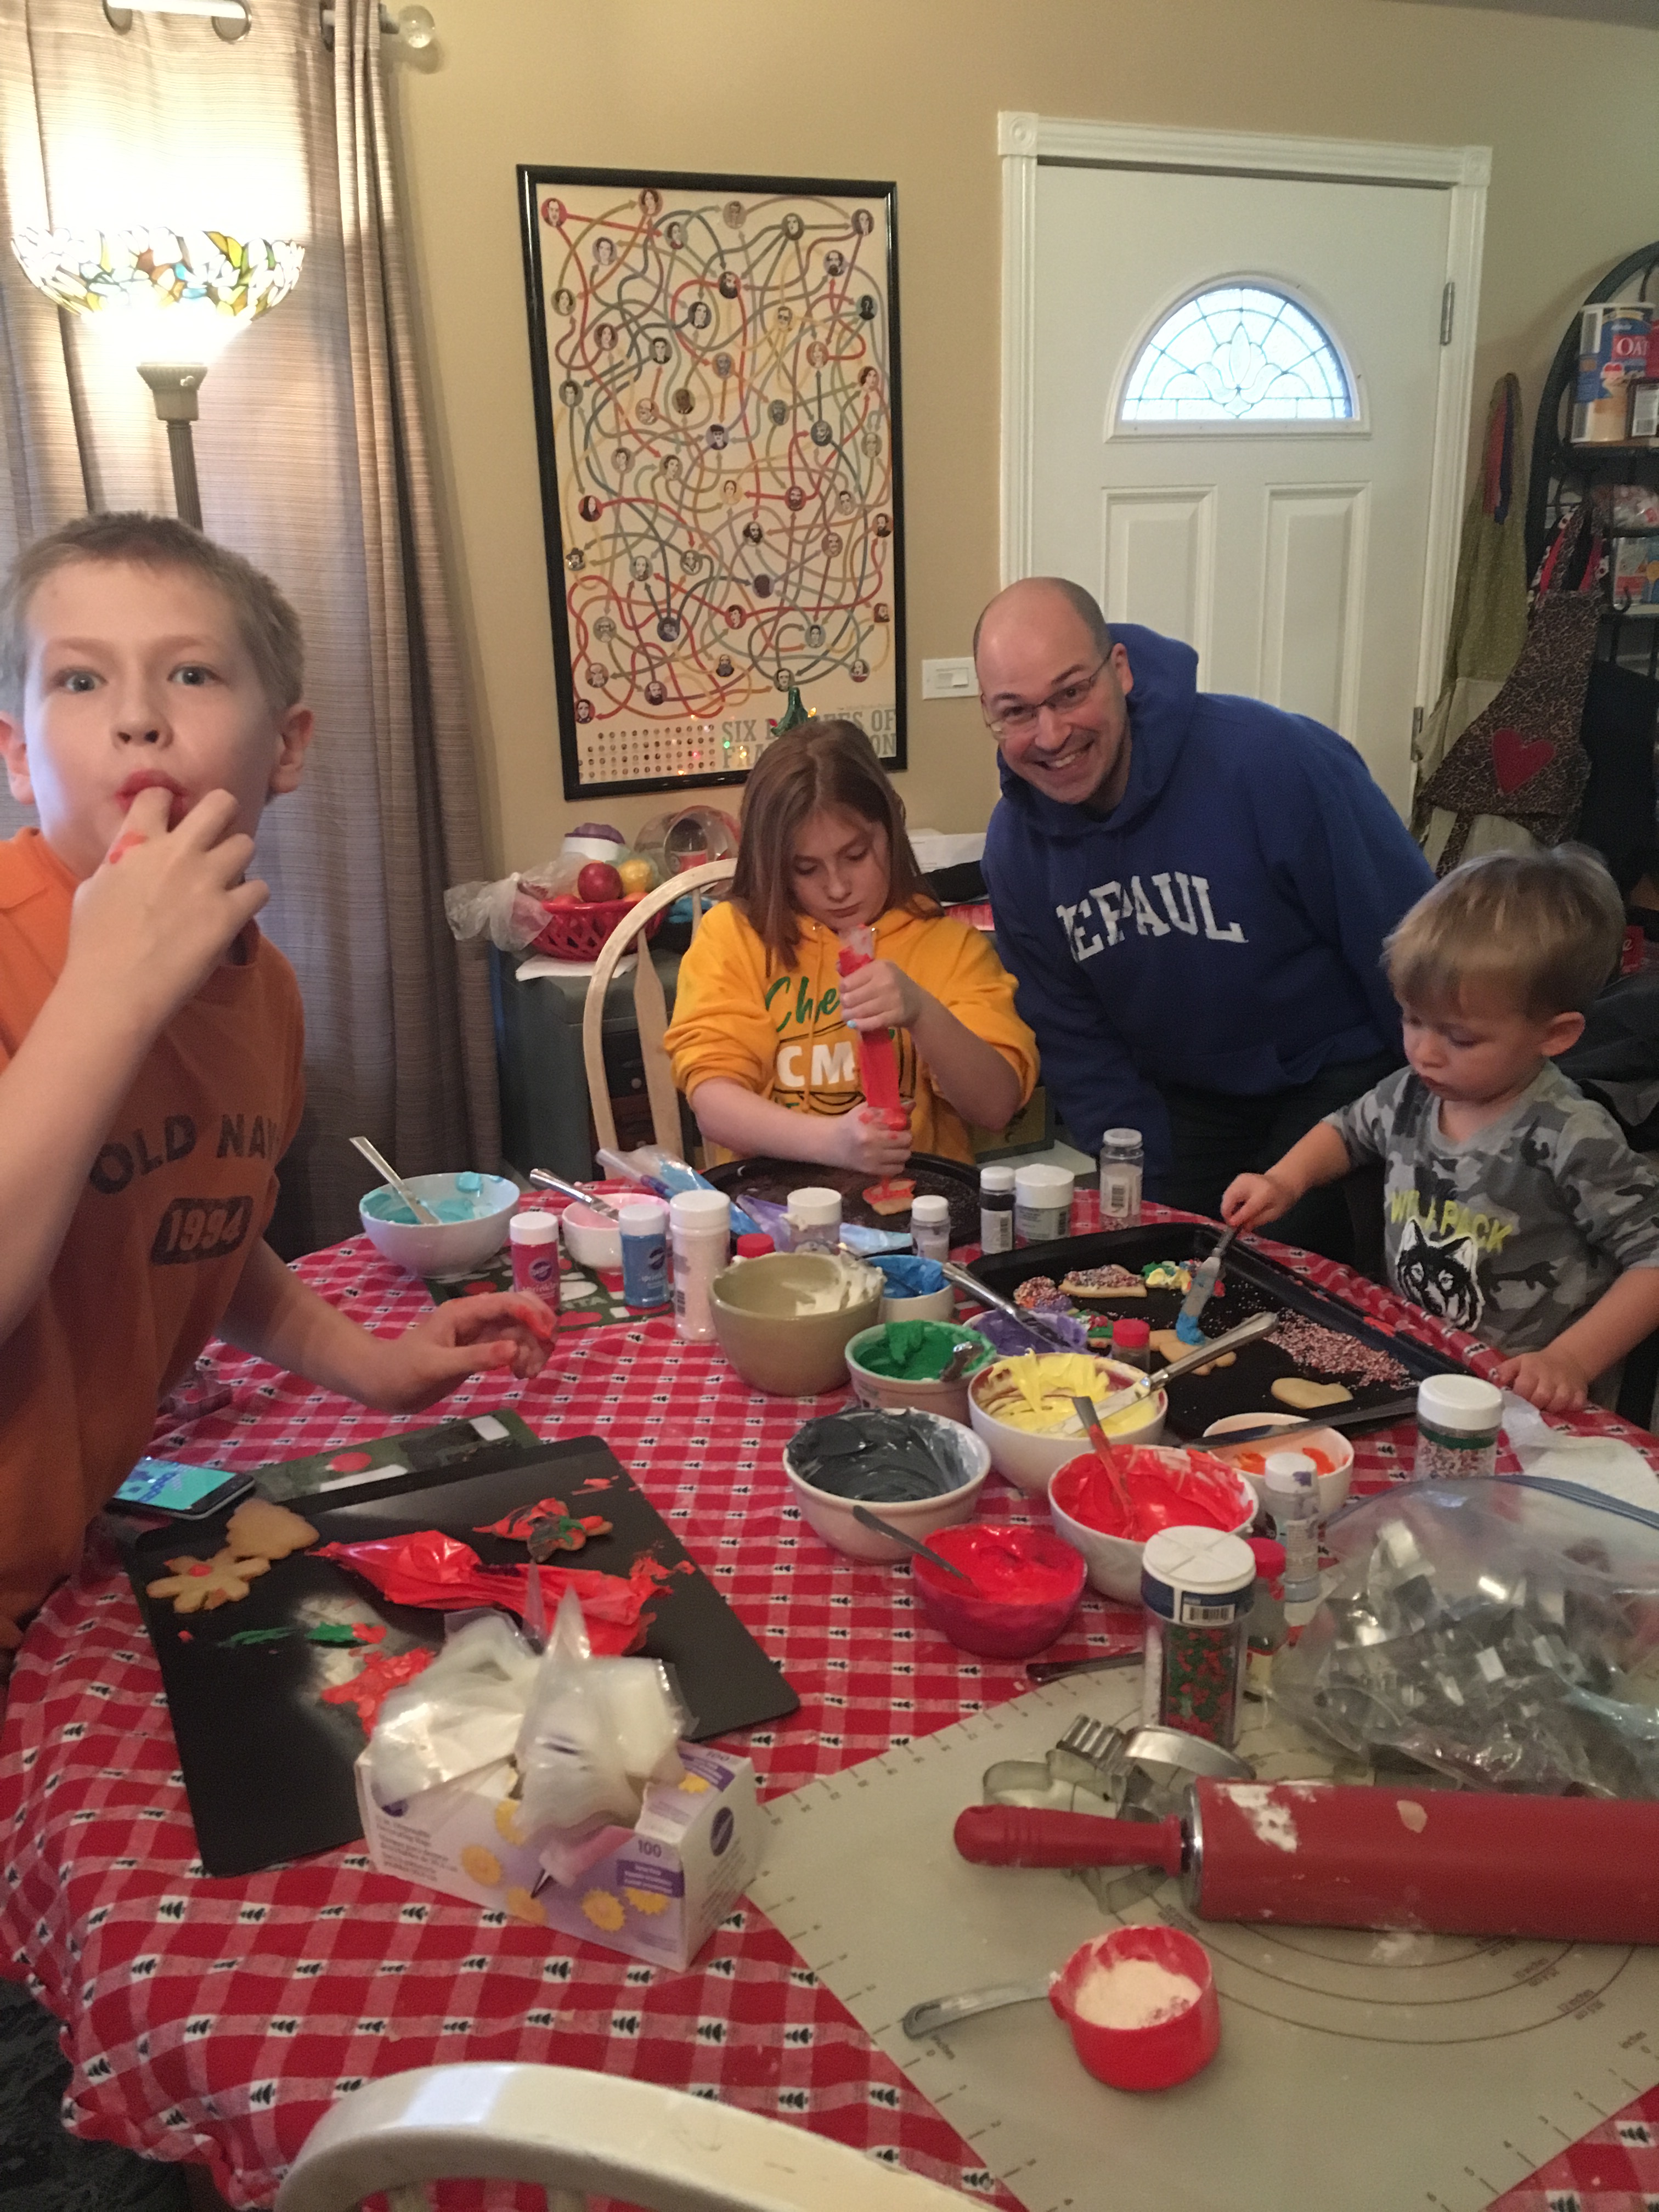
My little buddy Emmett again helped me with these cookies, since my own kids are large and old and mostly uninterested in cookie decorating these days. Emmett’s dad is one of my very best friends, and has been for 30 years. So when I need an expert kid cookie-decorator, Emmett is my go-to kid.
Emmett did a great job with decorating and saying please and thank yiu and also showing off his reading skills by taking his turn reading Christmas trivia to us.
I made these before Emmett and his chauffeur, I mean Dad, came over, just so we’d have more time to decorate them.
The day Emmett and his dad come over to do Christmas cookies is my favorite cookie day of the year. Maybe we can even do it twice this year. Love this kiddo, and his dad is pretty okay too.
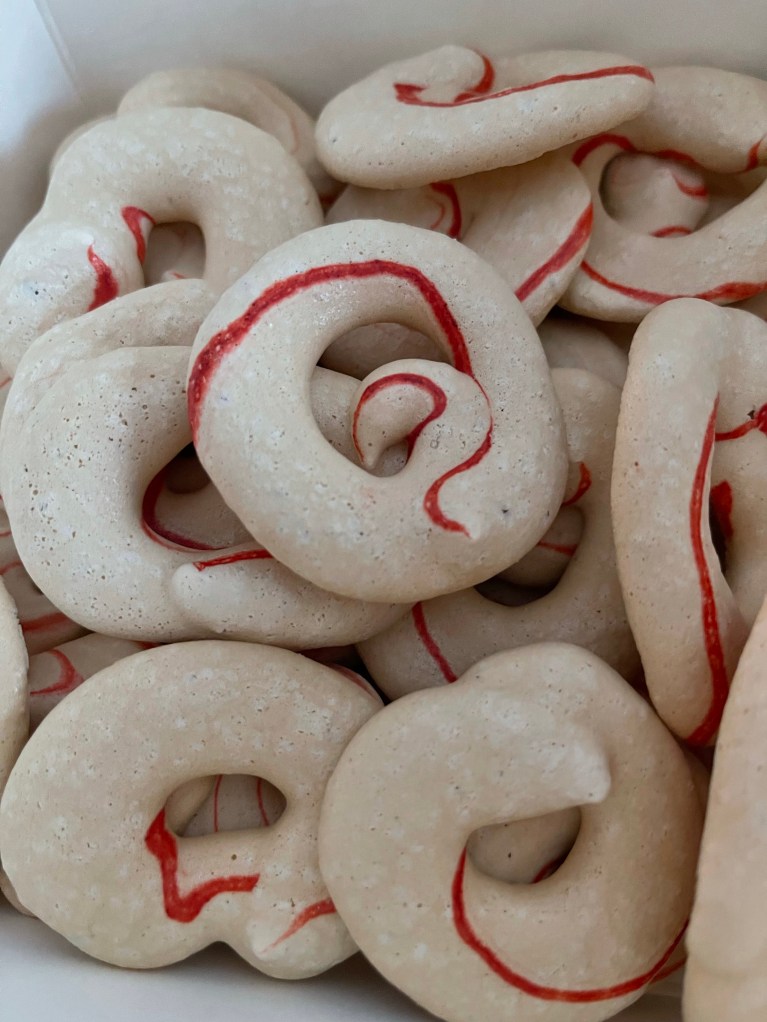
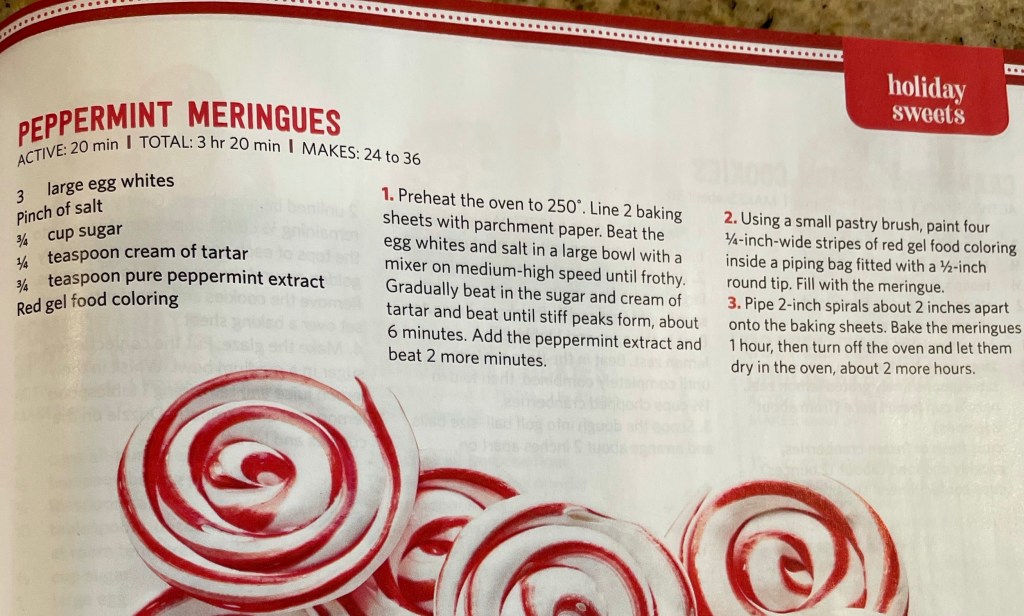
I made the Peppermint Meringues from the current Food Network magazine, and had a lot of trouble with them. Actually, nine times out of ten when I’ve made cookies from Food Network magazine, I’ve had trouble.
I’m not a baking novice by any stretch of the imagination, and if I were, this recipe would discourage me and make me think I just wasn’t cut out for baking cookies.
Again, no one is perfect. I certainly screw up. Even with cookies. At least once a year while I do my 24 days of cookies, one batch doesn’t work.
This is that batch.
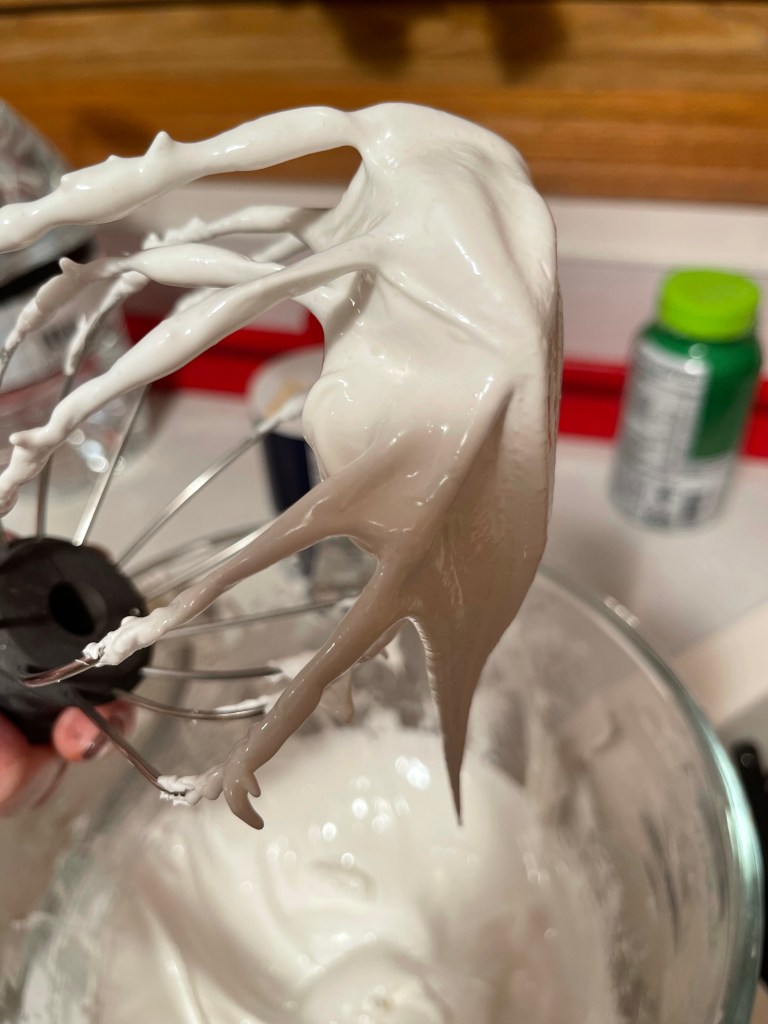
I make meringue cookies every year band have been doing so since Britney rocked a belly chain and low-rise jeans. I know the concept. So when my meringue didn’t set up (using the directions exactly as written), I was perplexed.
And then I started over. This time, I used powdered sugar instead of granular. While it wasn’t as bad as the first batch, it definitely wasn’t up to my meringue standards. That was the first problem.
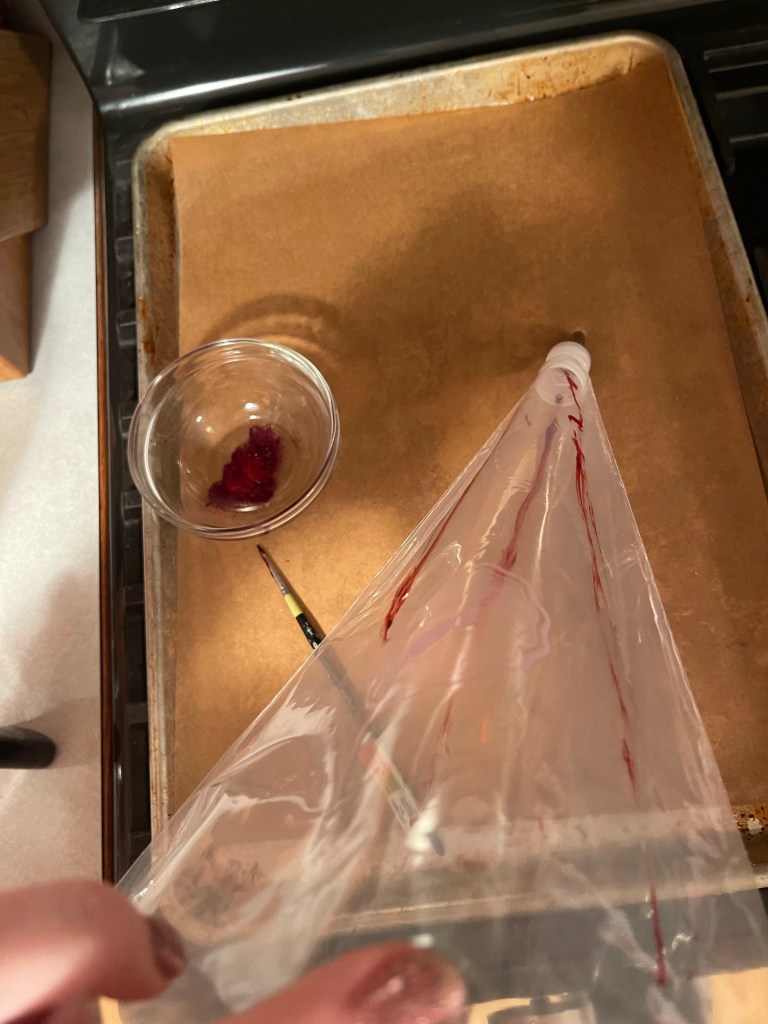
My second problem came when trying to paint the red stripes in the pastry bag. It’s tough to do, and I ended up using an unused paint brush from my arts and crafts collection. I tried a pastry brush before this, and it looked like a crime scene. It was too big, and the plastic pastry bag isn’t exactly the easiest surface to paint on.
Novice bakers aren’t going to necessarily know to try something else. Heck, I really didn’t know what to do. I totally winged it.
I piped the shapes on the parchment, and because it was a limp and runny meringue, the consistency was off. But I figured I’d try and see what happened. The red stripes did come through, but as I piped more, the color wasn’t as strong. This makes sense to me, but the photo editors at Food Network magazine didn’t get the memo that their picture was to actually look like the cookies their readers would be creating.
After the hour in the oven, I turned off the oven and had them sit in the oven for another 2 hours. As the directions state.
When I took them out, I was again not pleased.
Brown. My white runny meringues spent too long in the tanning bed before prom, and didn’t look like what they were supposed to look like. That was the final problem with this recipe.
Did anyone else make this recipe and have it turn out well? Because at this point, I’m not actually convinced anyone at the magazine tested this recipe.
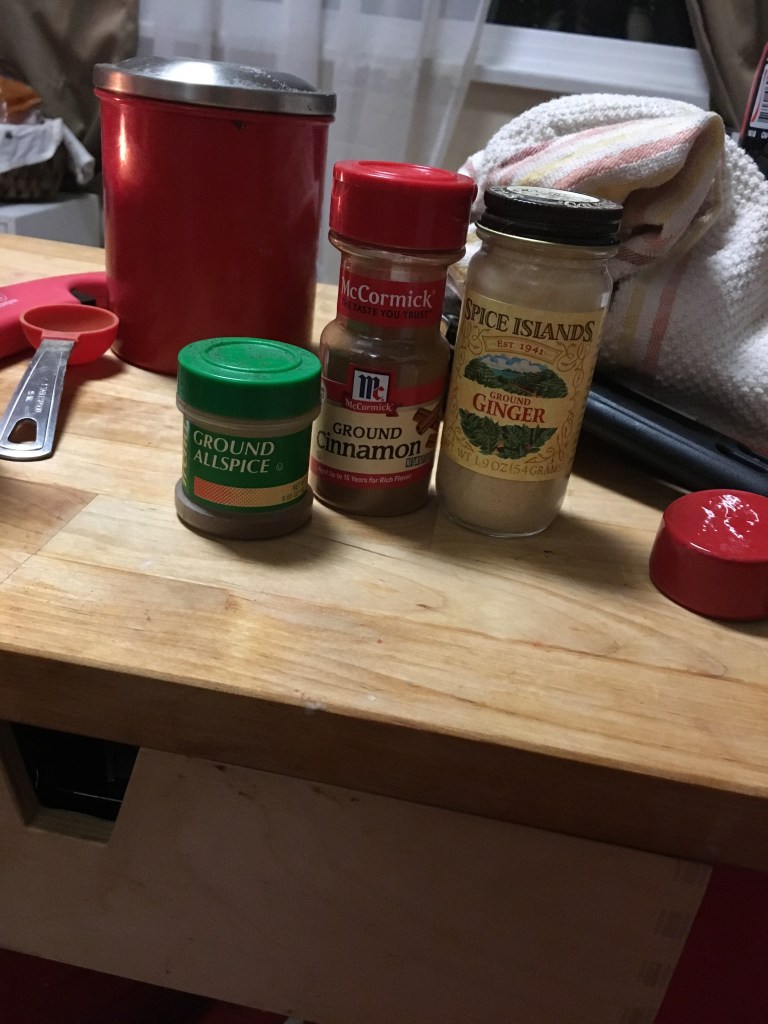
In large bowl, sift together flour, ginger, cinnamon, allspice, baking soda, and salt. Set aside.
In an electric mixer fitted with the paddle attachment, cream butter and brown sugar on medium speed until fluffy, about 3 minutes. Beat in eggs one at a time, scraping sides of bowl between additions. Add molasses and vanilla and beat until completely incorporated.
Reduce mixer speed to low and add flour mixture until thoroughly combined, about 30 seconds. Dough should be soft (not dry or crumbly) but not sticky. If sticky, add a few tablespoons of flour until desired consistency is achieved.
Divide the dough in 2, place each half on a large piece of plastic wrap, press down with the palm of your hand and make a disc about 2″ thick. Finish wrapping the disc with the plastic wrap. Chill the discs of dough for at least 2 hours.
Remove one disc and remove plastic wrap. Place on top of a large piece of lightly floured parchment or wax paper (I use a silicone rolling mat underneath to ensure it doesn’t slip while rolling, but you can even dampen counter so the parchment sticks a bit.), then place two 1/4″ wooden dowels on either side of your dough, then another sheet of parchment paper.
Roll dough (this will require a bit of elbow grease for the first few minutes until it softens up a bit) so it’s flush with dowels–they will ensure that your dough is even thickness.
Slide your parchment paper and dough onto a board, then place in refrigerator for about 30 minutes, or freezer for 15 minutes (or more).
Preheat the oven to 350˚F. Line two or three baking sheets with silicone mats or parchment. Remove the rolled dough from fridge, and cut your shapes using the cutters or template of choice, placing them on the prepared baking sheets. Bake until the edges just start to brown, about 8 minutes for medium cookies, and 10 minutes for larger cookies (such as those in the photos).Be careful not to over-bake, or cookies will be dry. Collect remaining dough and re-roll once, repeating cutting and baking steps. Dough rolled out more than once will be a little tough, so it’s best to keep it to a 2-time roll-out maximum.
Cool sheets on wire racks for 20 minutes, then gently remove cookies and place on wire racks to finish cooling. If cookies are too fragile, you can cool completely on trays.
Decorate with royal icing, candies, sprinkles, and more.
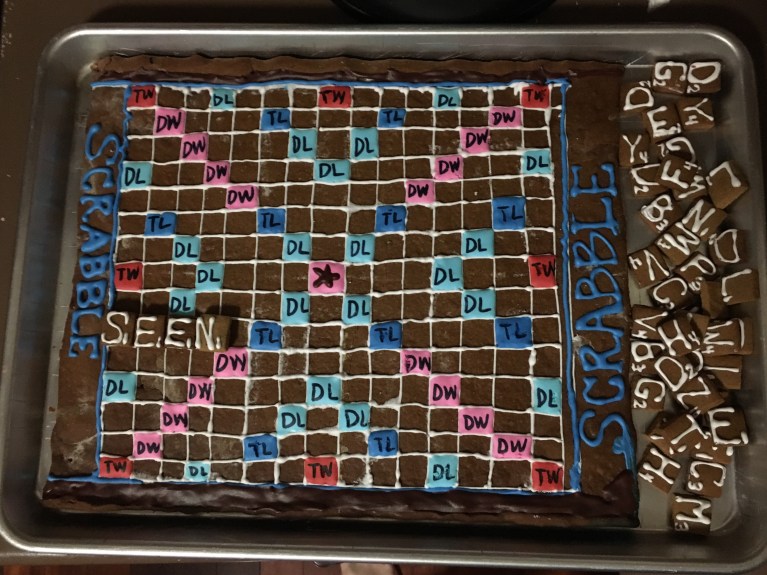
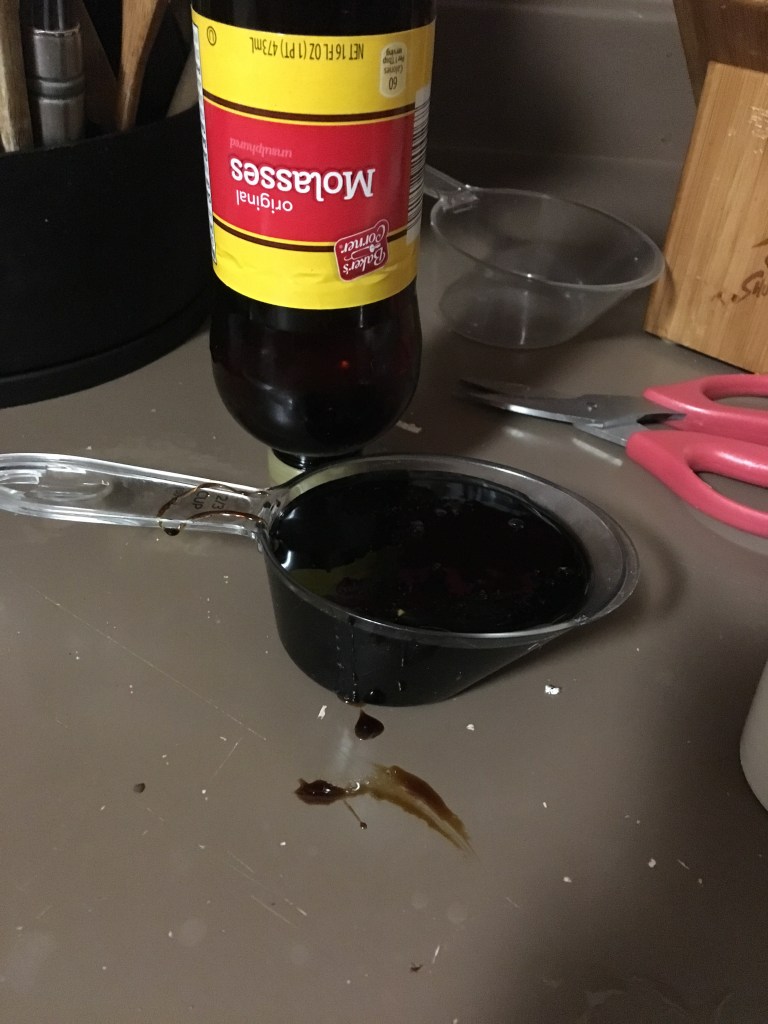
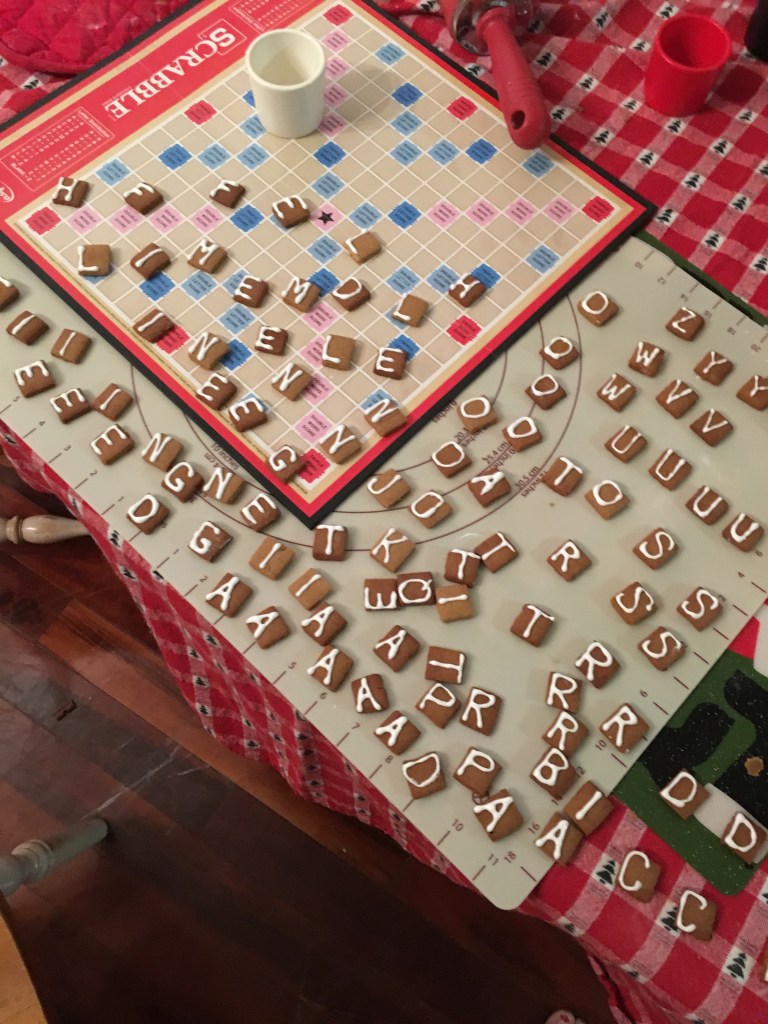
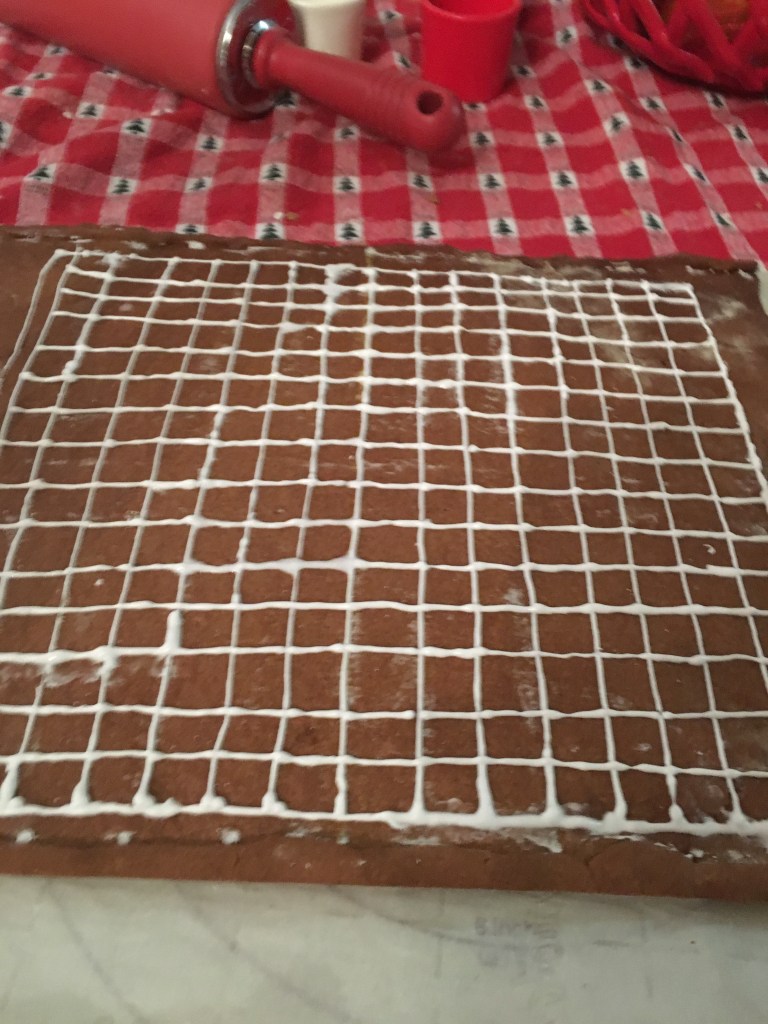
So Gingerbread. It’s the stuff of Christmas dreams and Yankee Candles (but somehow the candles never actually smell like Gingerbread to me). Every year I make this, and every year I vow to just buy a new bottle of molasses. I didn’t this year. Again. That makes 15 years in a row! Through a biblical-esque miracle much like loaves and fishes, I had exactly the right amount of molasses this time around. It took about an hour to get it all out and at one point, I was wondering what was wrong with the specific gravity at my house.
I still got a little more out of it too!
But I digress.
I’ve always wanted to make an epic Gingerbread Scrabble board. I’ve thought about it for years, and for some reason, I always had to have it be Gingerbread. I think it has something to do with going to Disney World around Christmastime and seeing the things they build at the Grand Floridian out of Gingerbread.
If it’s good enough for the Mouse, it’s good enough for me.
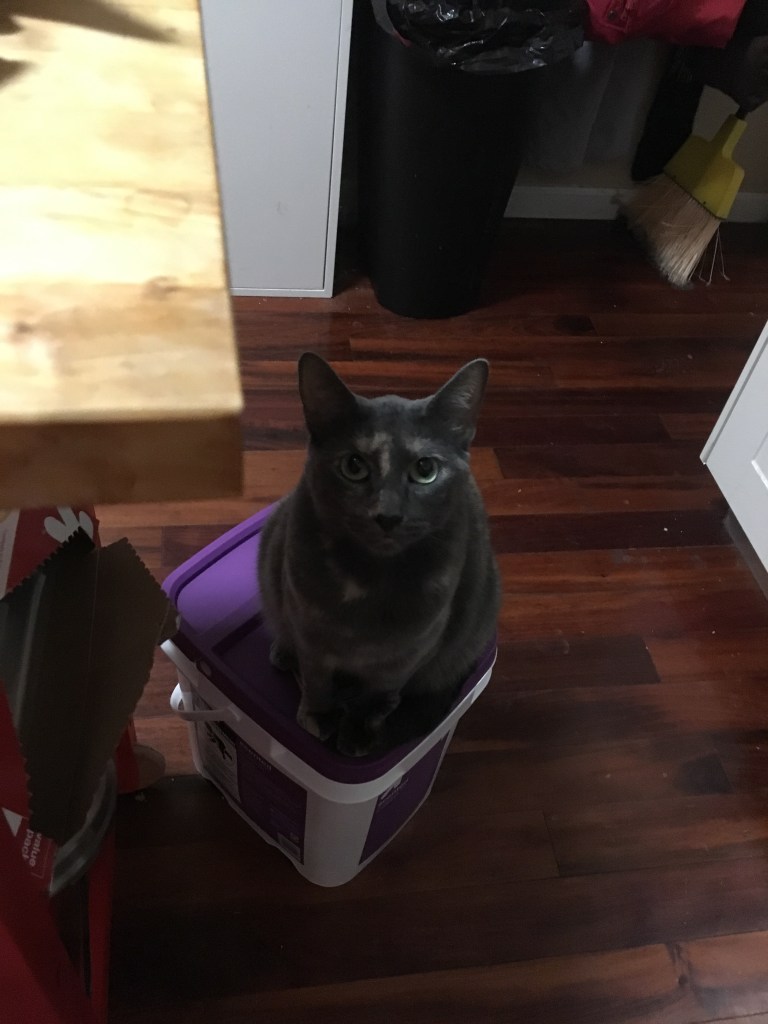
Good kitty Zelda, watching me make her favorite cookies.
I found my spice girls and went to town. Now, I also did a few actual Gingerbread men too, but more on this later.
I won’t bore you with the details of how I measured and baked and frosted and screwed up so many times, my gingerbread started to go gray from royal icing. Well, if I’m being honest, it’s not about boring you, it’s about reliving the trauma.
There was math involved. And rulers. And at one point, I googled “equation for Scrabble board squares” and I was then mocked by Google.
But, it turned out pretty cool. I don’t think I’ll be eating this, but the whole point is I COULD. If there’s a problem and I’m the only survivor, I can live for at least 2 weeks on my Scrabble board.
Oh, and about the actual Gingerbread Men and Women. I made a few. One of my students comes to school everyday wearing a different heavy metal t-shirt. So I made this for him.
Breaking the law, breaking the law…
Honestly, it’s way cooler than the Gingerbread Scrabble game, and way less aggravating!
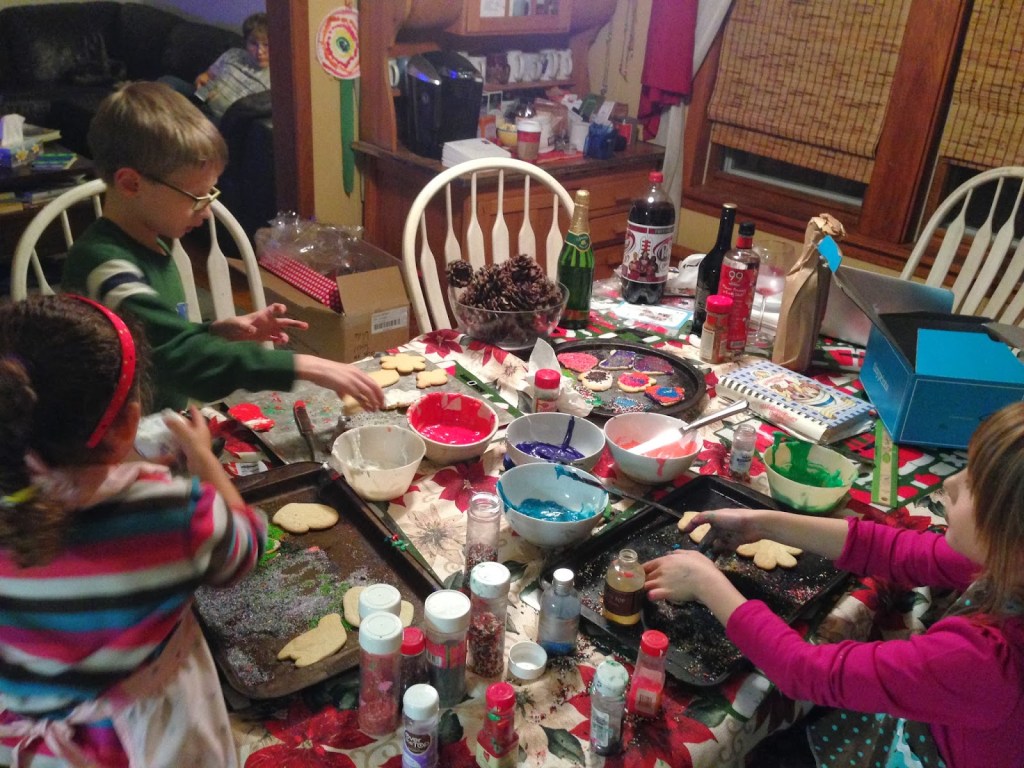
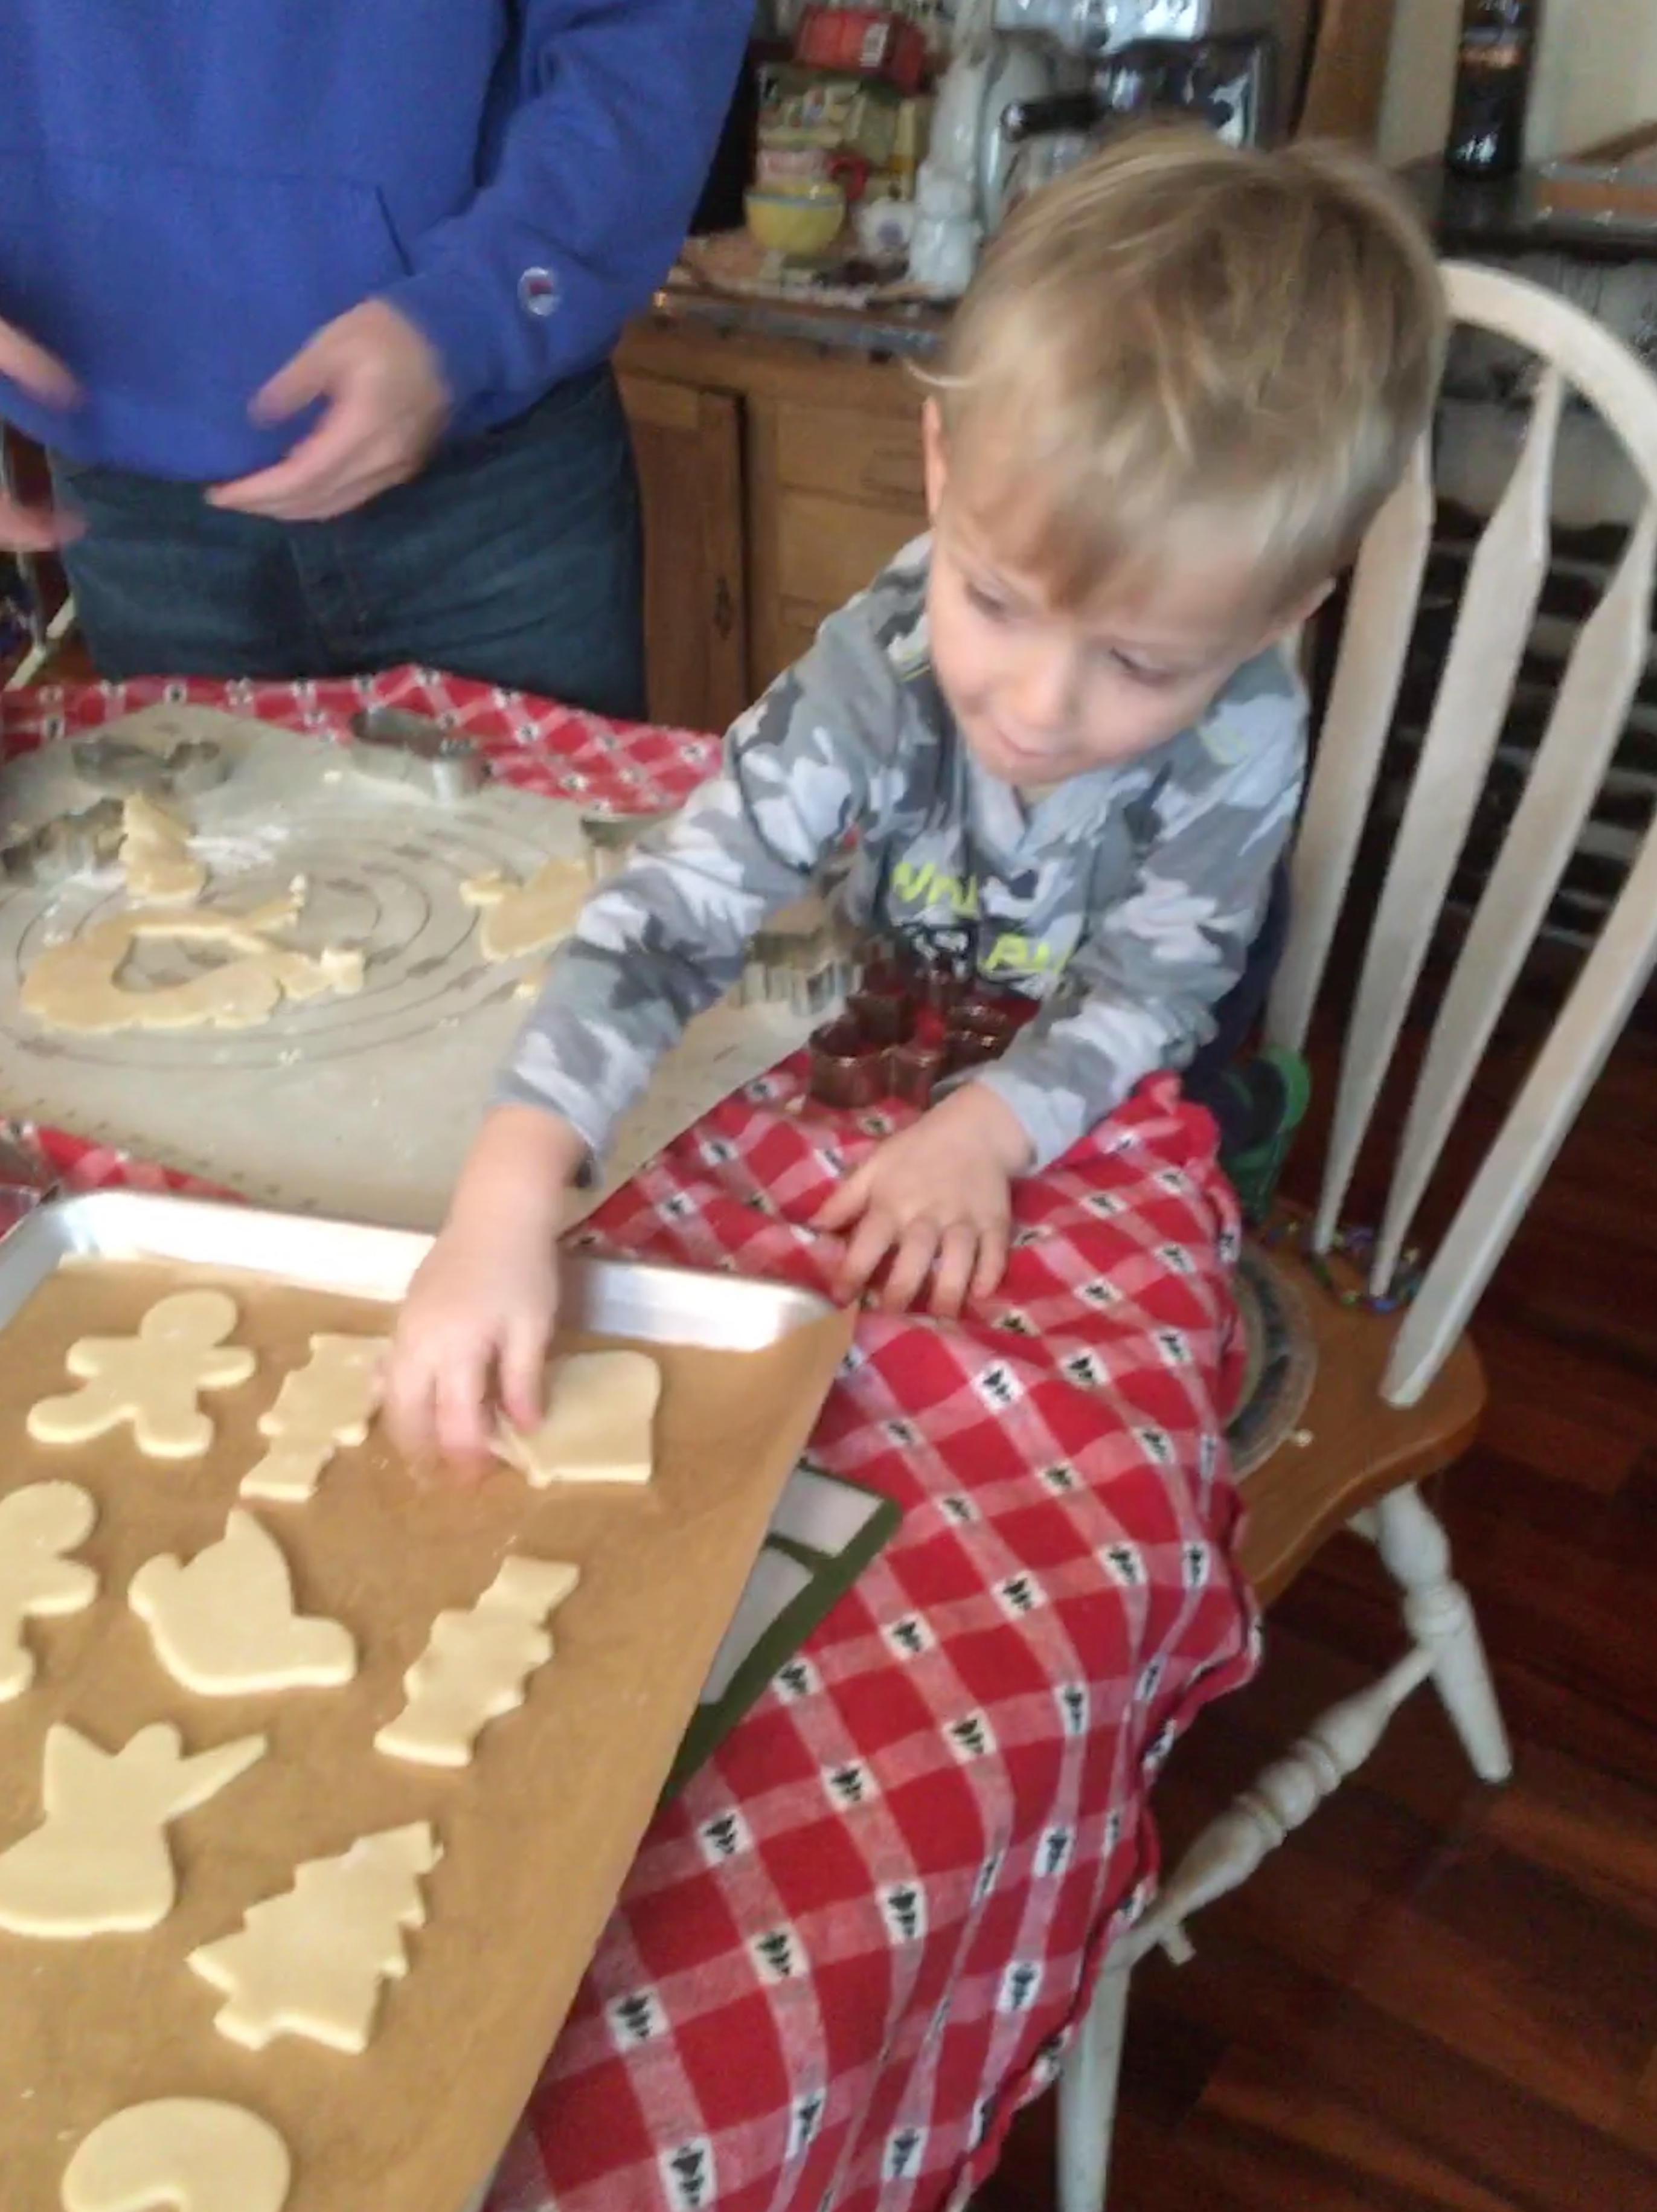
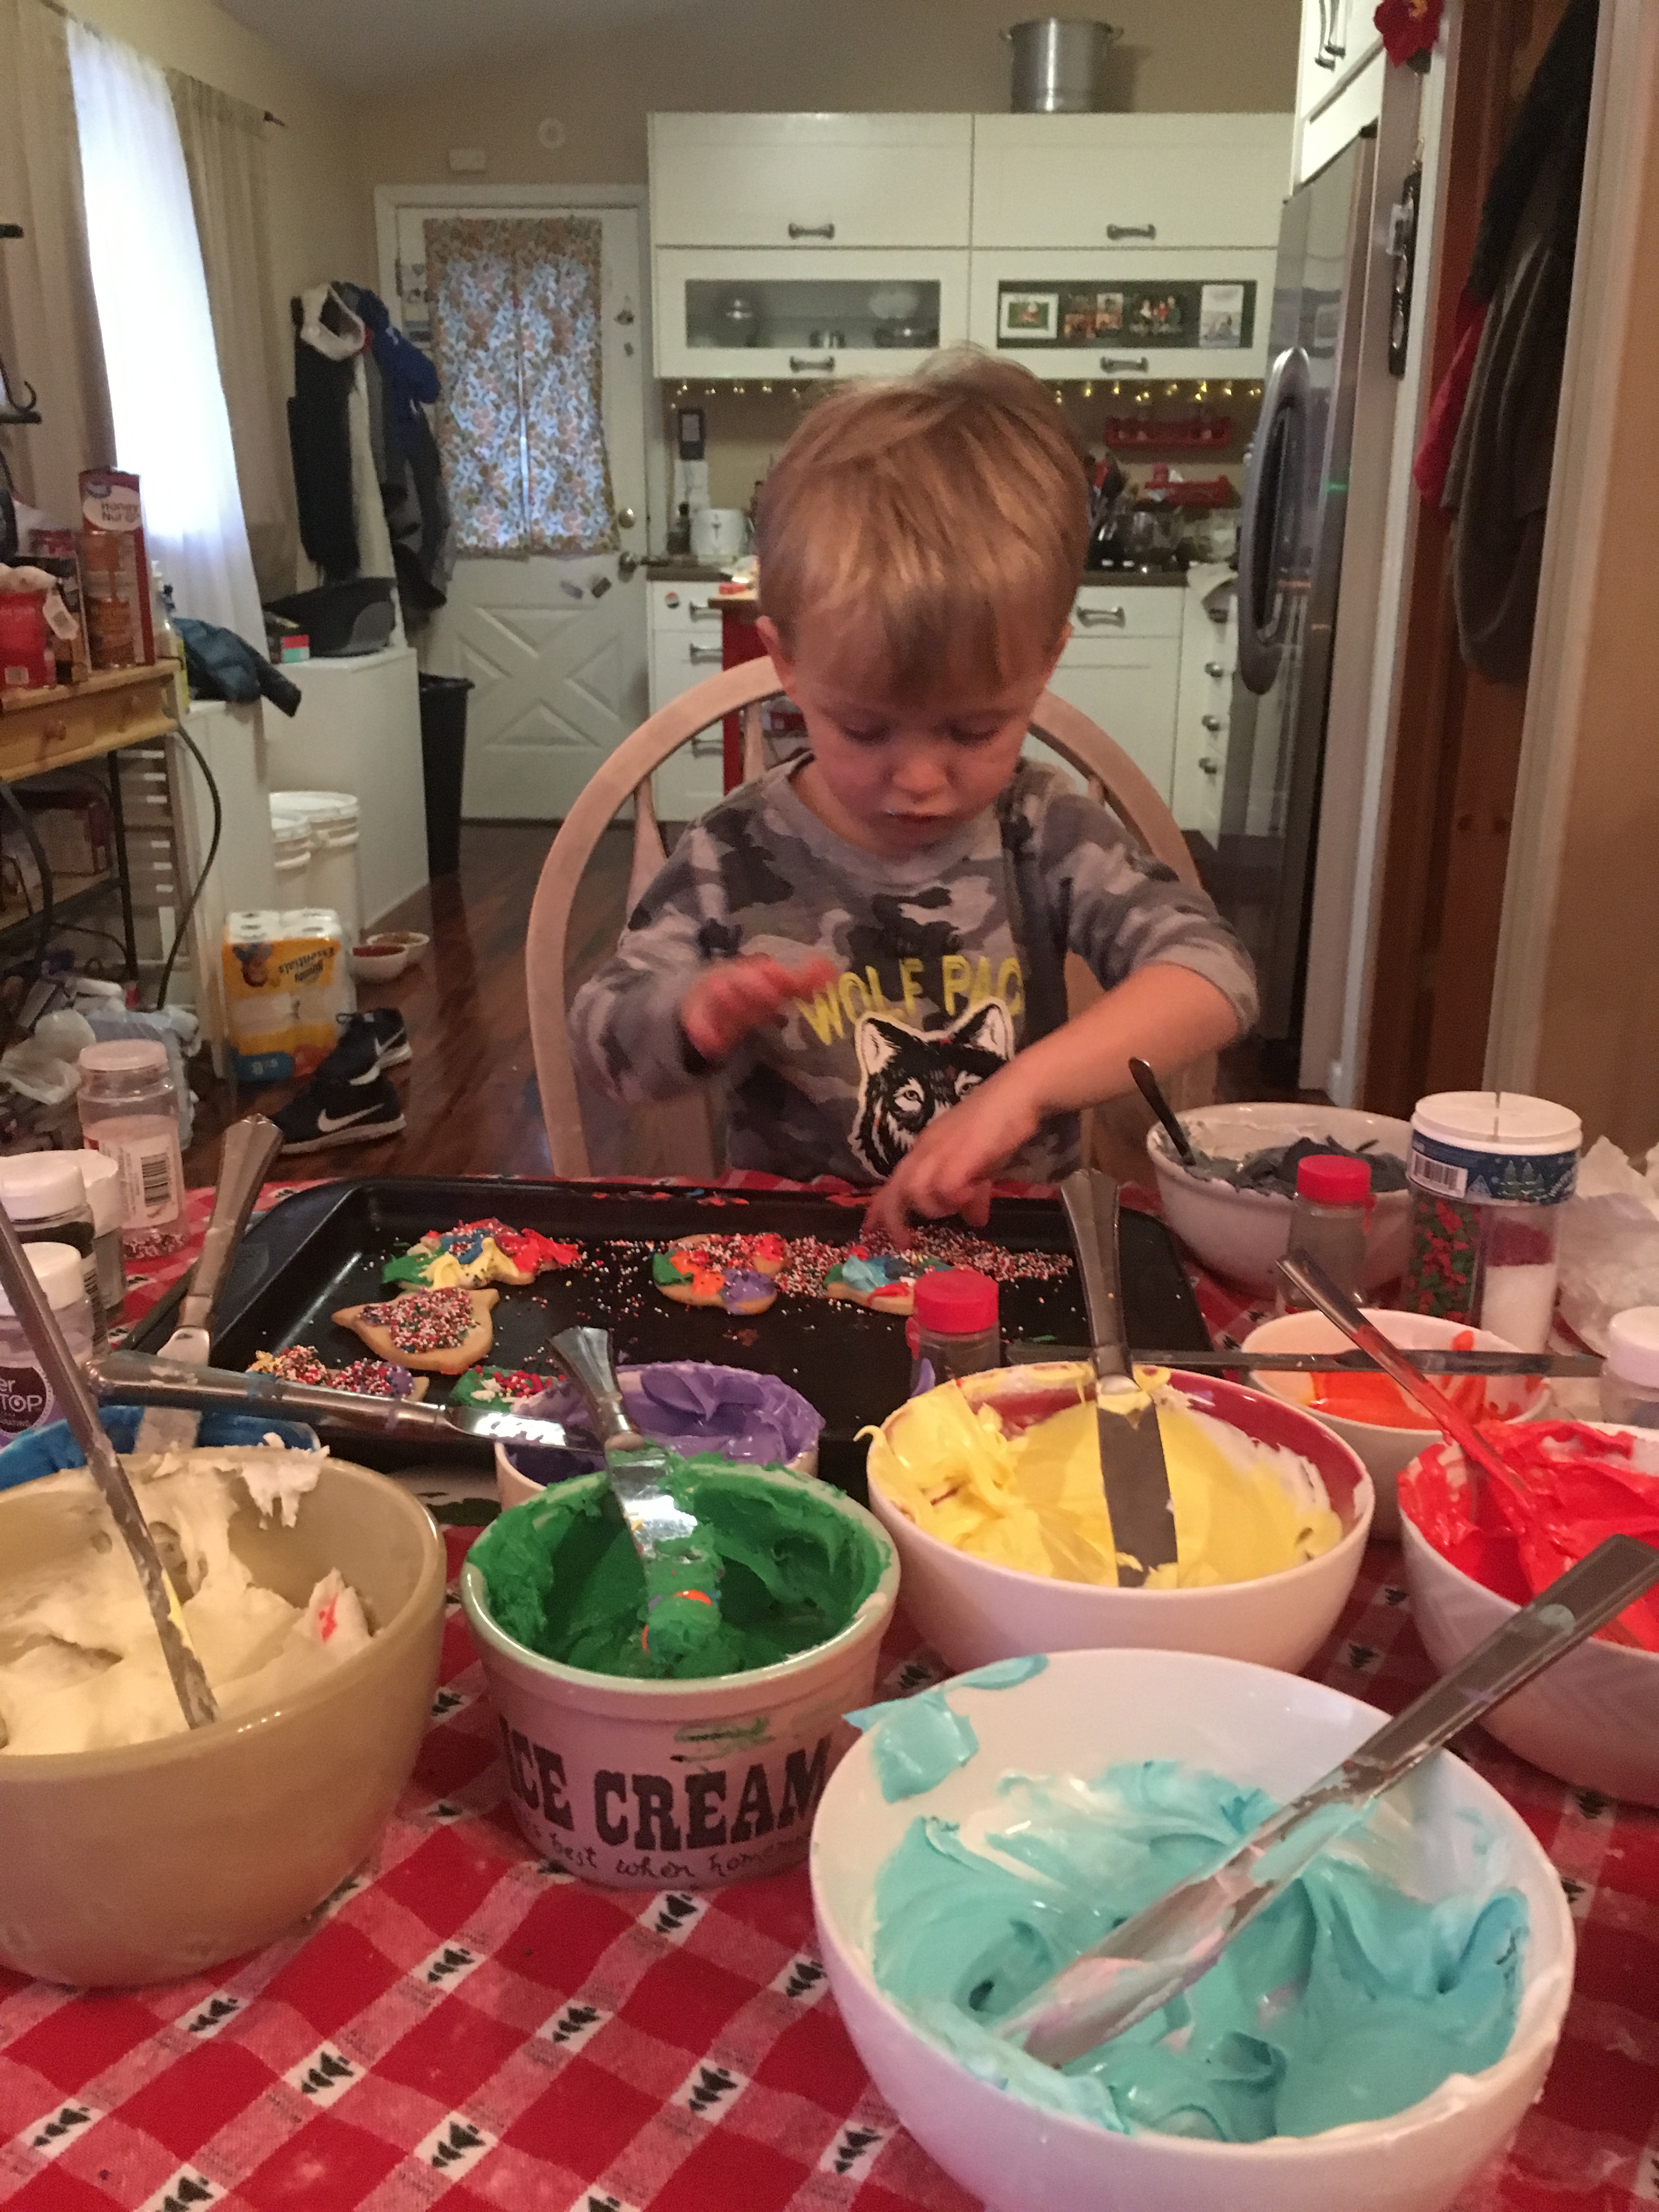
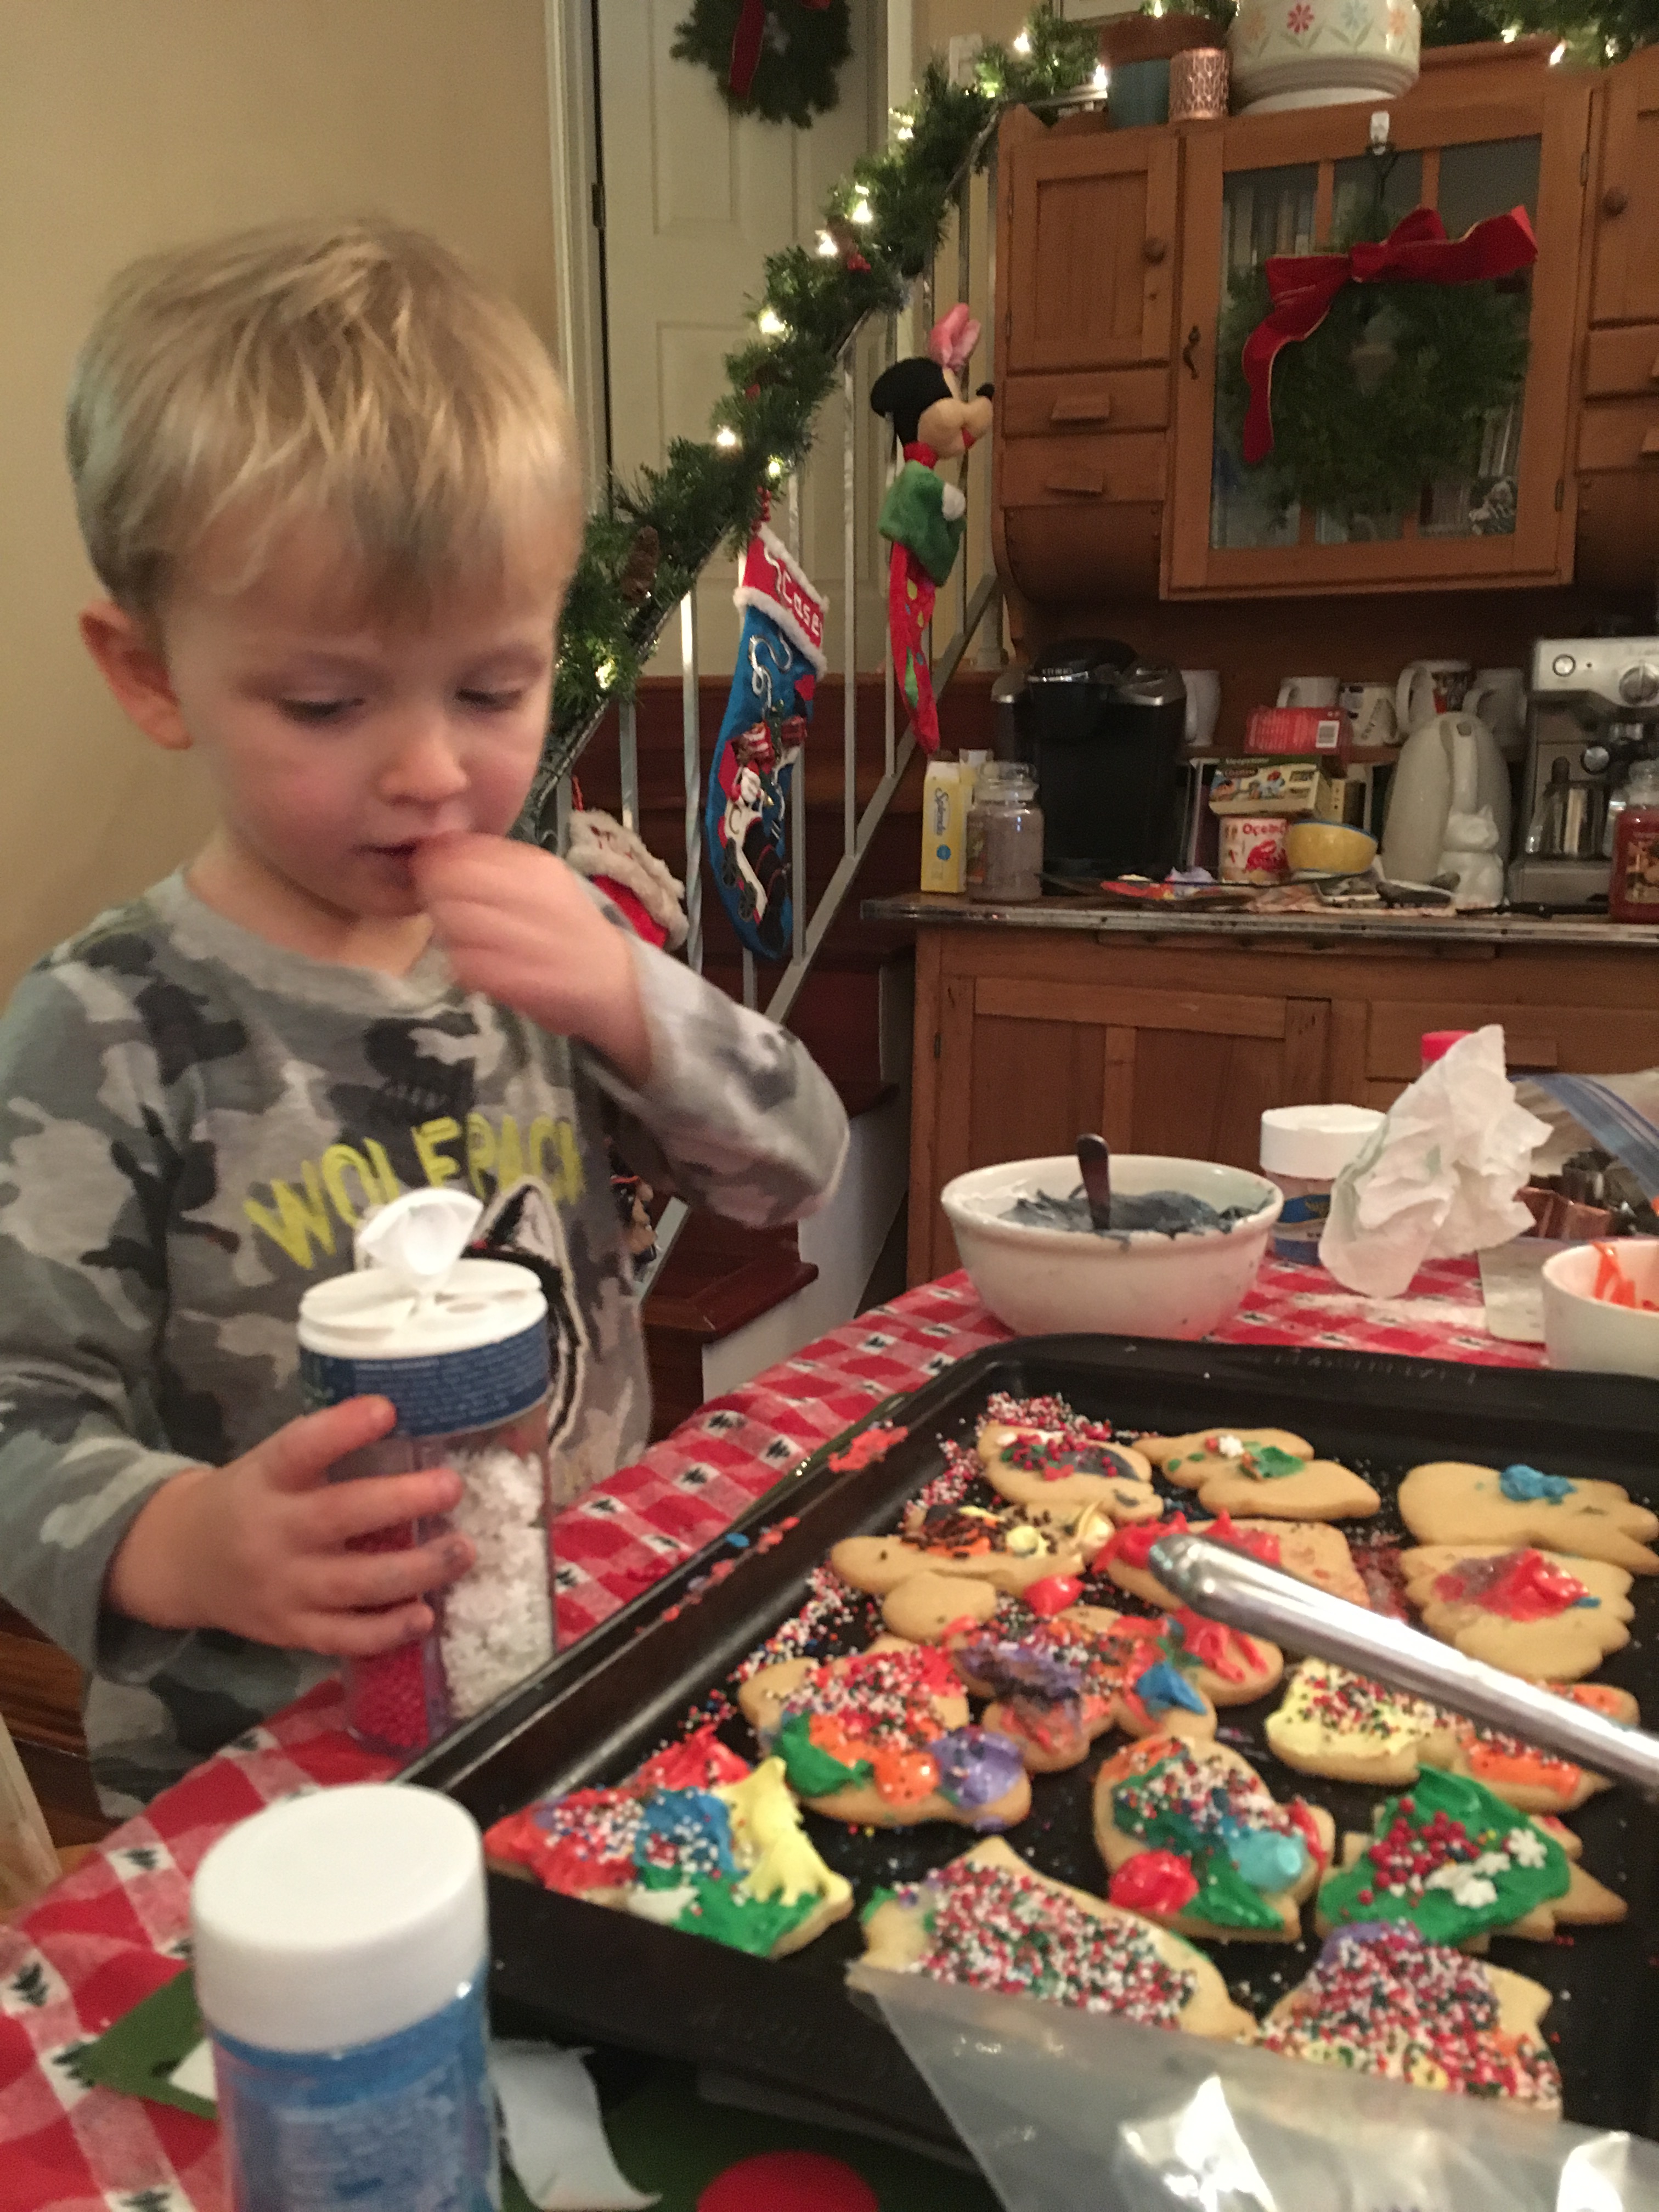
I had some special guest stars helping me today: my three kids, and our friend Todd and his son Emmett. Emmett is 3 and embodies all the things I remember fondly about my children when they were that age. Somehow, Christmas with teenagers and a pre-teen doesn’t have the same magic and mystery that it did when they were little. Enter Emmett.
I invited Todd and Emmett over to help make and decorate cookies today, something I used to do with my kids every year, but only one day in December. It’s exhausting. It’s messy. It’s absolutely nutty. And I miss it. Sure, the kids will help me with cookies and maybe decorate a few, but it’s not the same as when it was when they were little, and I could create magic for them with some powdered sugar, food coloring, and sprinkles.
My little ones a few years ago, decorating to their hearts’ content!
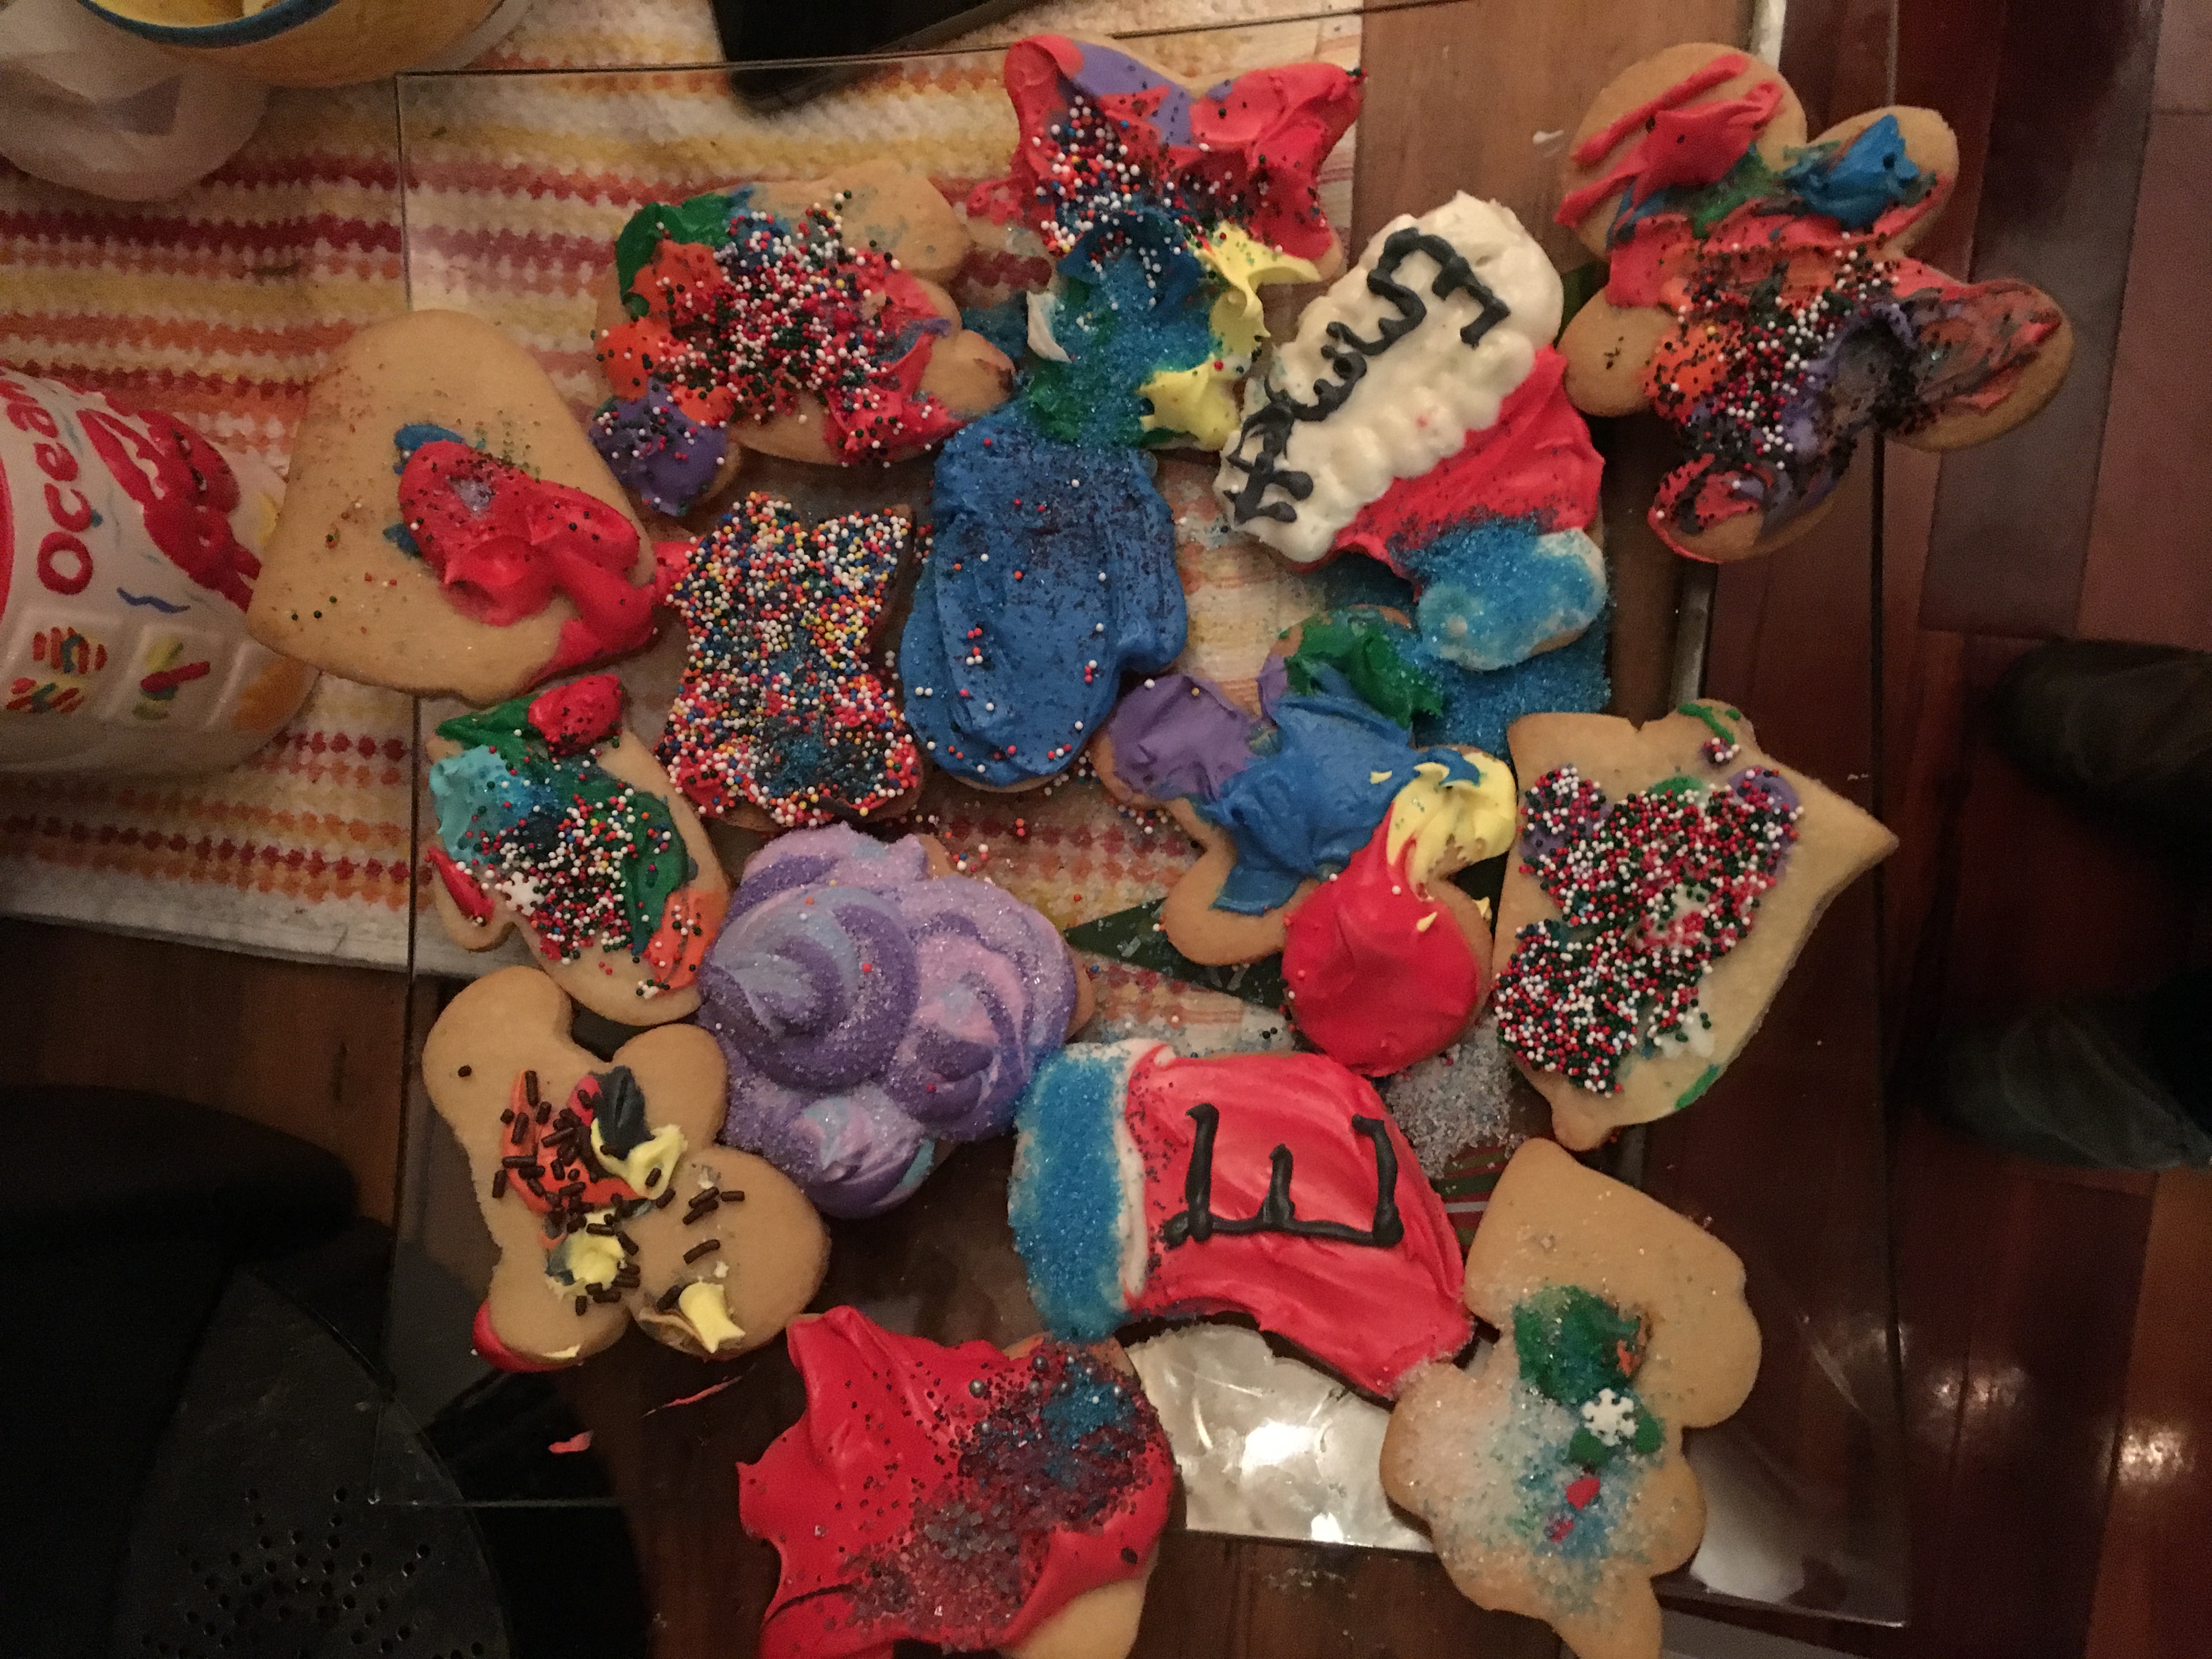
I made the dough before our friends arrived and it chilled in the fridge for a couple of hours. Once they got here, we got to work rolling and cutting cookies. Emmett said he had never cut out cookies before. Even if it’s not true (not that I’m doubting a three-year-old), I’m choosing to believe that his first adventure into Christmas cookies happened with me.
We used two mixing bowls of frosting–one royal and one butter cream–and I think it was 8 different colors I mixed up. I brought the sprinkles to the table, and there we sat for about 90 minutes, frosting and laughing and watching Emmett’s eyes dance as he chose sprinkles for his creations.
When Emmett and Todd come over, suddenly my children leave their rooms to play with our favorite 3 year-old.
There’s nothing like letting kids frost cookies. It’s the wonder of childhood in its purest form.
We sent father and son home with all they made, ready for Santa to eat on Christmas Eve.
And about 30 minutes after they left, I crawled into bed, where I’m writing this from, and will shortly fall asleep. Little kids are amazing and funny and so damn cute. But they are exhausting. It was all worth it though.
Sugar Cookies (from Gooseberry Patch’s Old Fashioned Country Cookies)
Ingredients: 1 1/2 c. sifted powdered sugar 1 c. butter 1 egg 1 t. vanilla 1/2 t. almond extract 2 1/2 c. flour 1 t. baking soda 1 t. cream of tartar
Directions:
1. Cream butter and sugar. Mix in egg and extracts. Blend dry ingredients and stir in. 2. Refrigerate 2-3 hours. Divide dough in half and roll out. Cut out desired shapes. 3. Bake at 375 for 7-8 minutes.
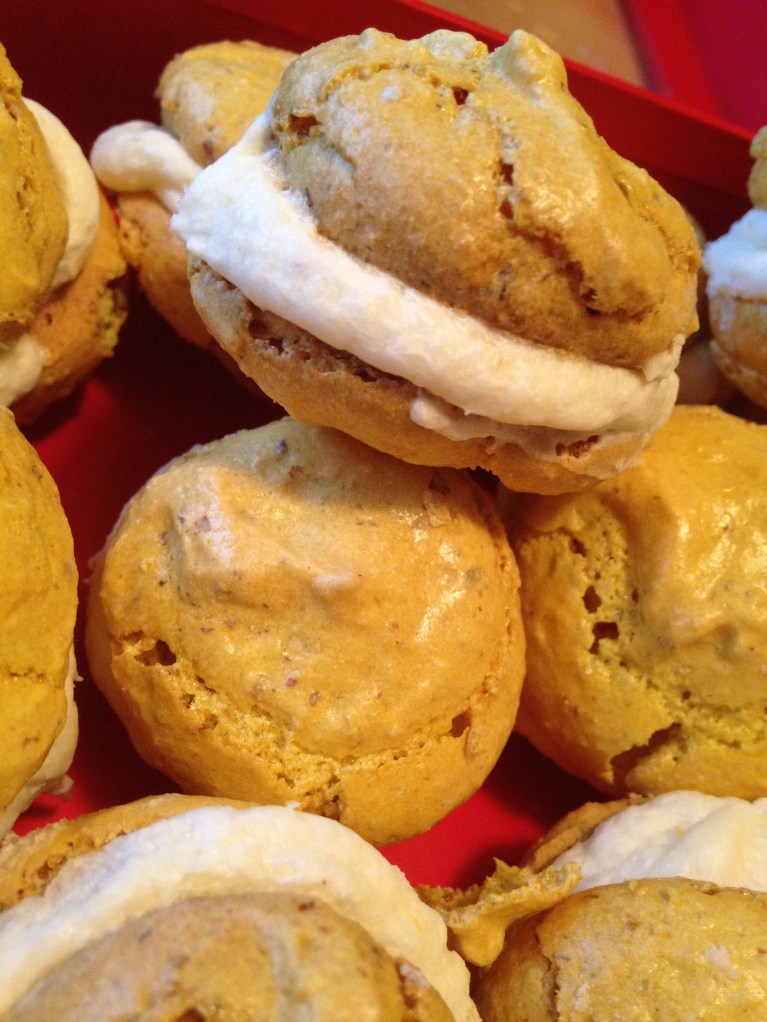
I’ll make a real sugar cookie before Christmas, because I don’t really consider these sugar cookies. They’re actually a little better than that. I make them nearly every year, and the cream cheese gives it a nice smooth texture and mellowness. It’s so good, in fact, I’d rather give them to people that savor them rather than eat them mindlessly by the dozen (like one tends to do with regular sugar cookies).
Plus, I’ve gotten into royal icing and flooding and making my own pastry bags this year, and I wanted to try decorating some cookies on my own before the kids get off from school.
My mother is an artist, and let’s just say I’m…not. I’m a writer and a poet, and while those are surely artistic endeavors, I can’t color in the lines to save my live. Never have been able to. (Looking back now, this must have frustrated my mom, kinda like how it frustrates me when my kids end a sentence in a preposition or opt for a haiku when the school assignment is to write a poem of their own. #thestruggleisreal.)
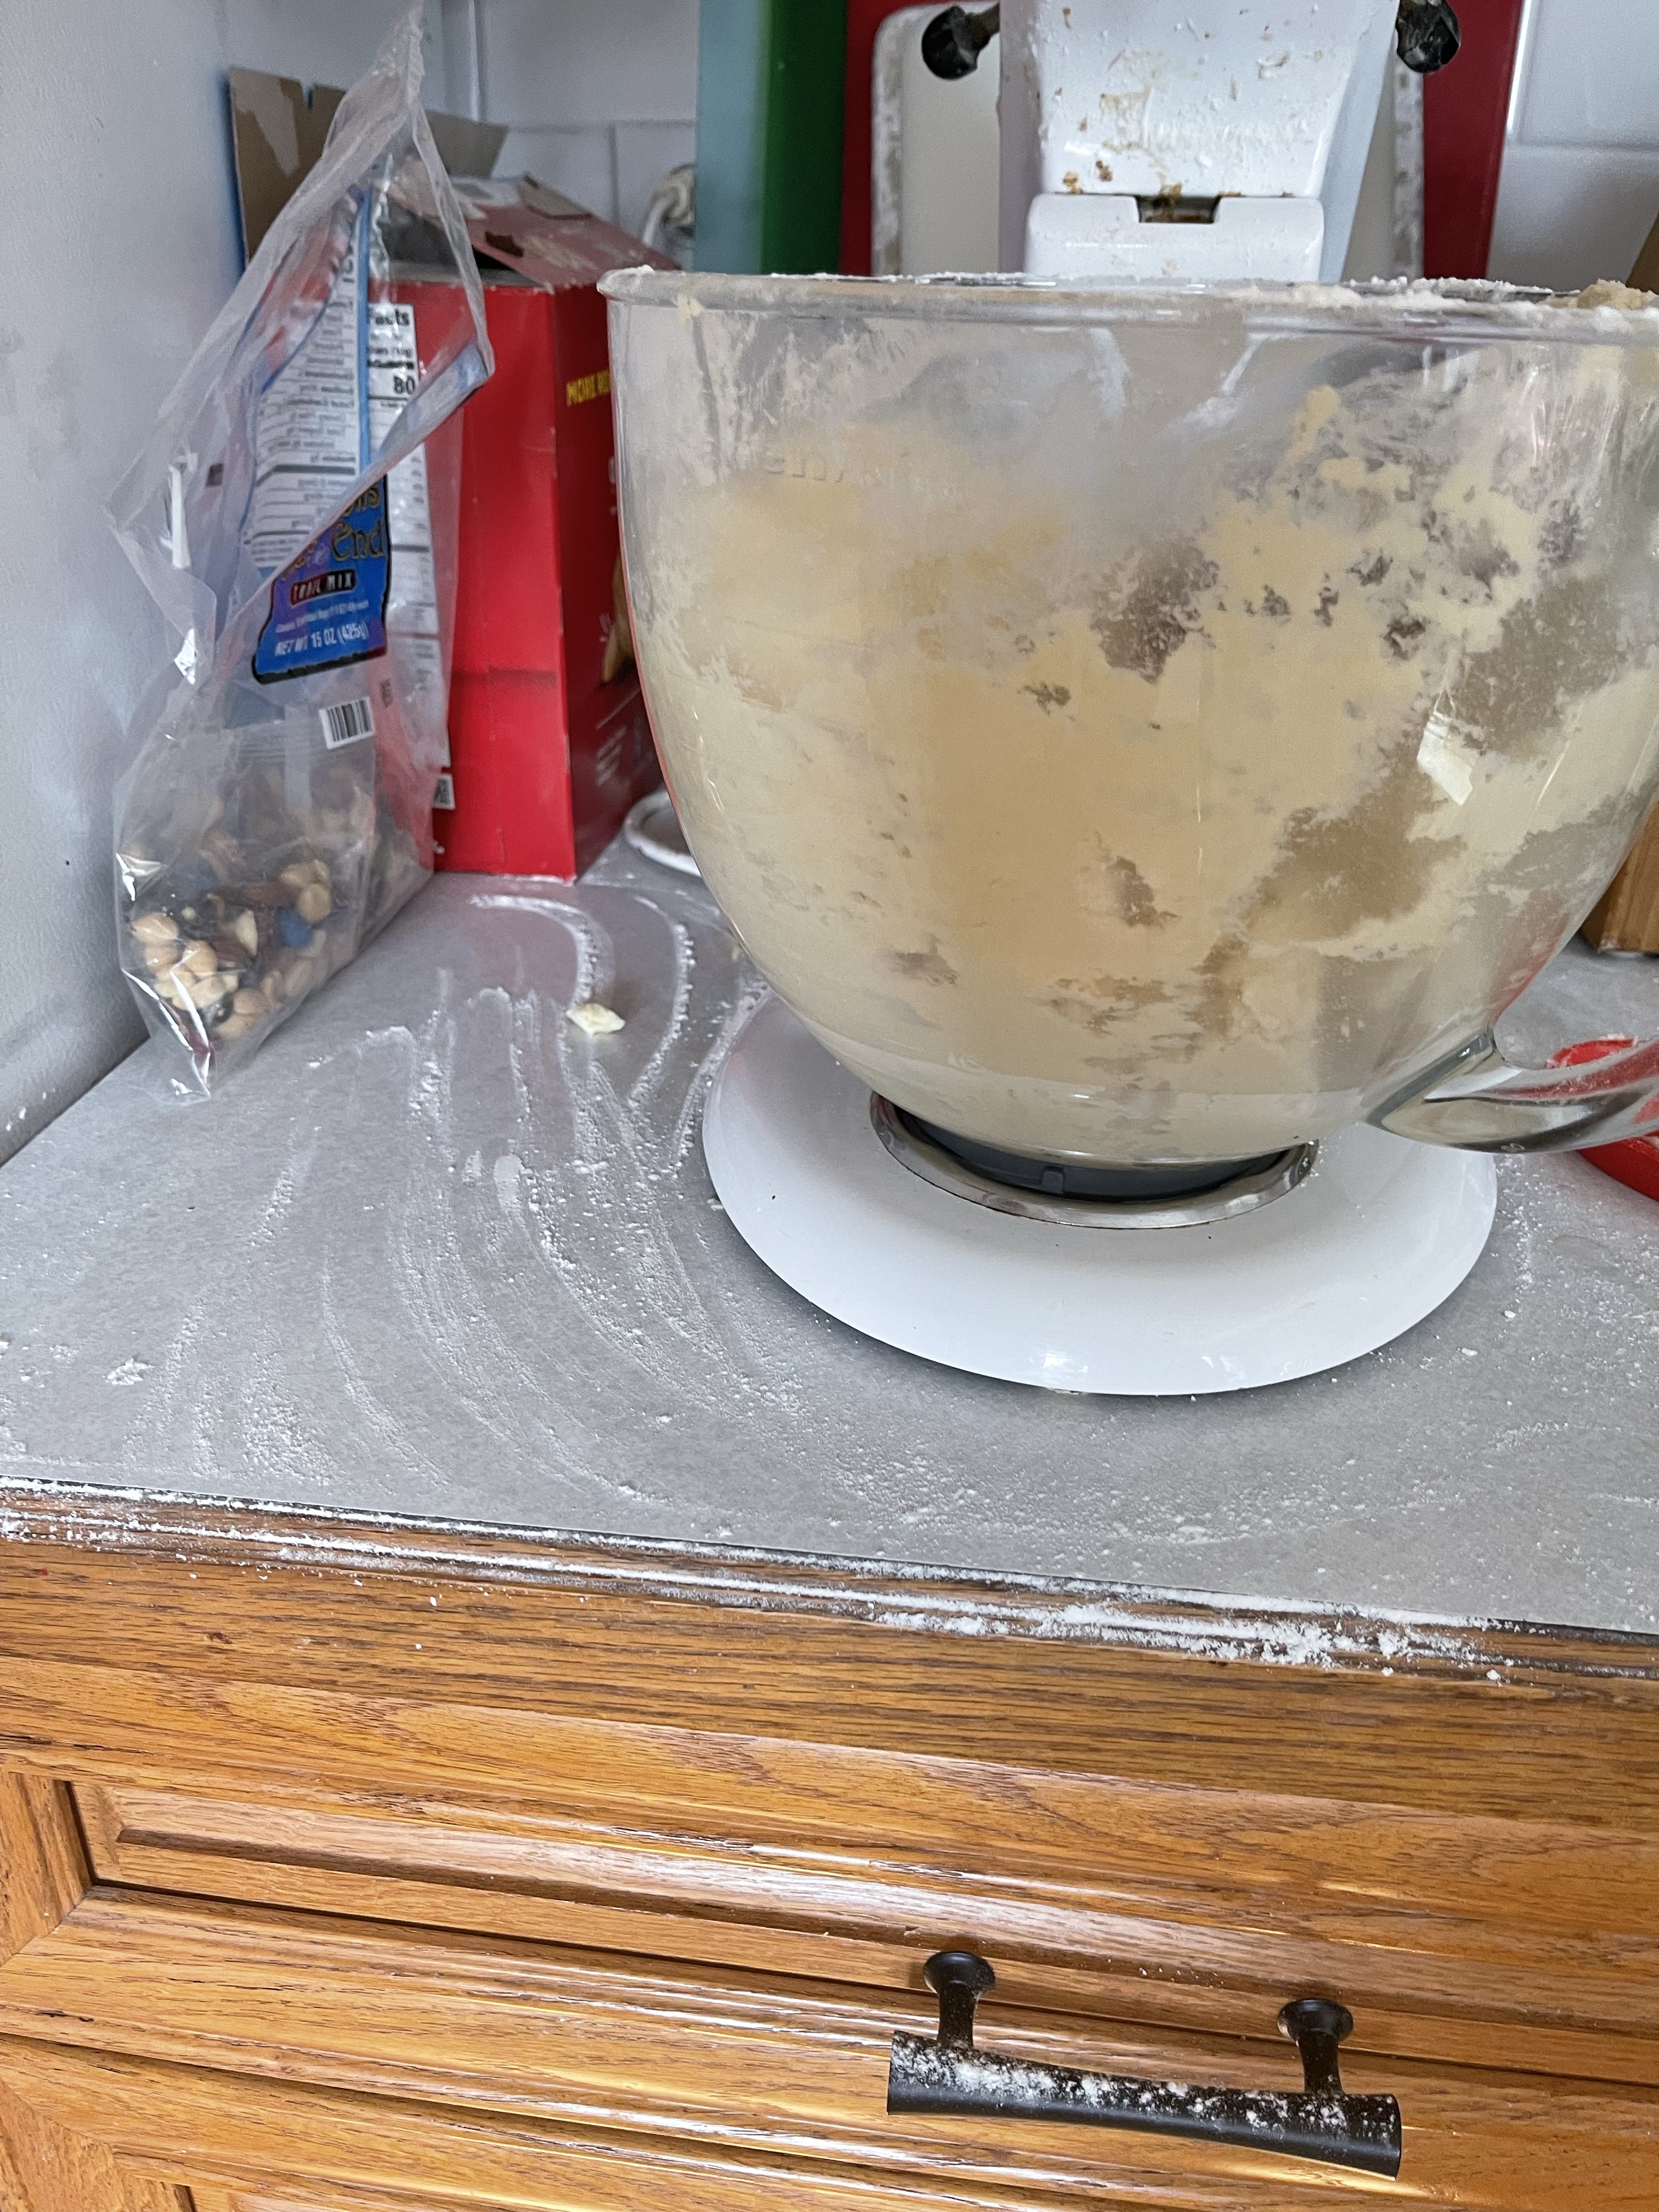
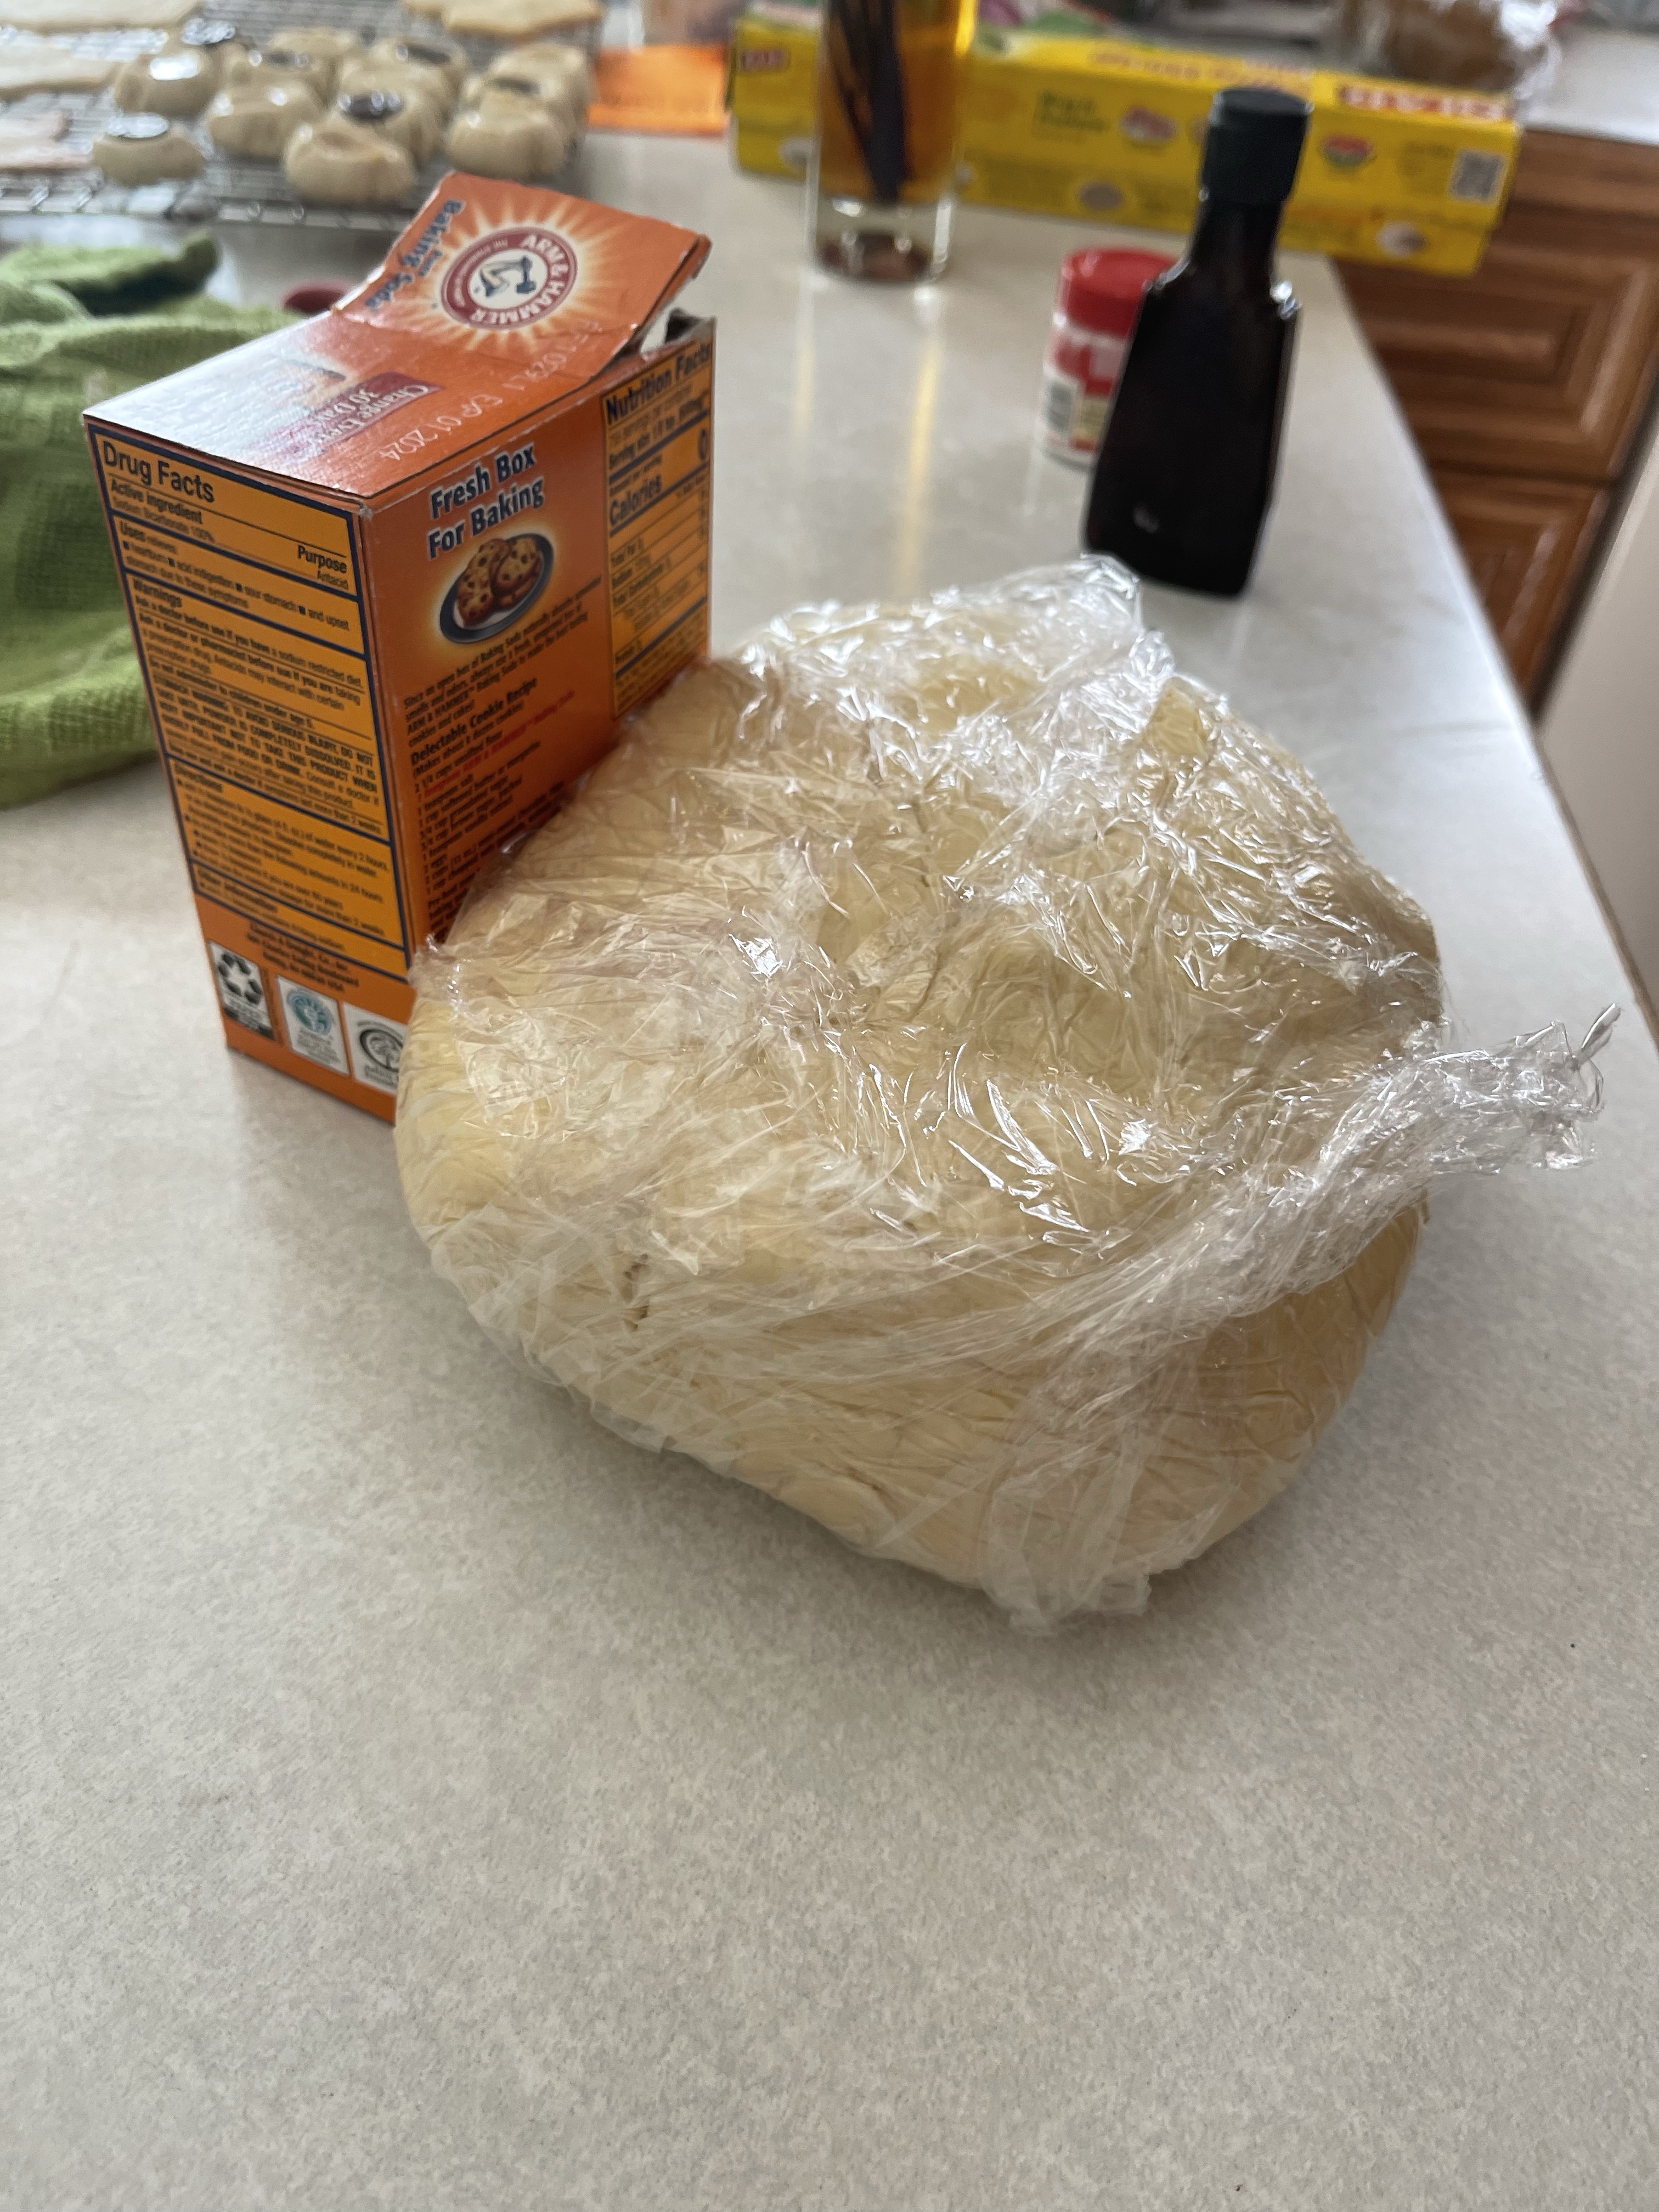
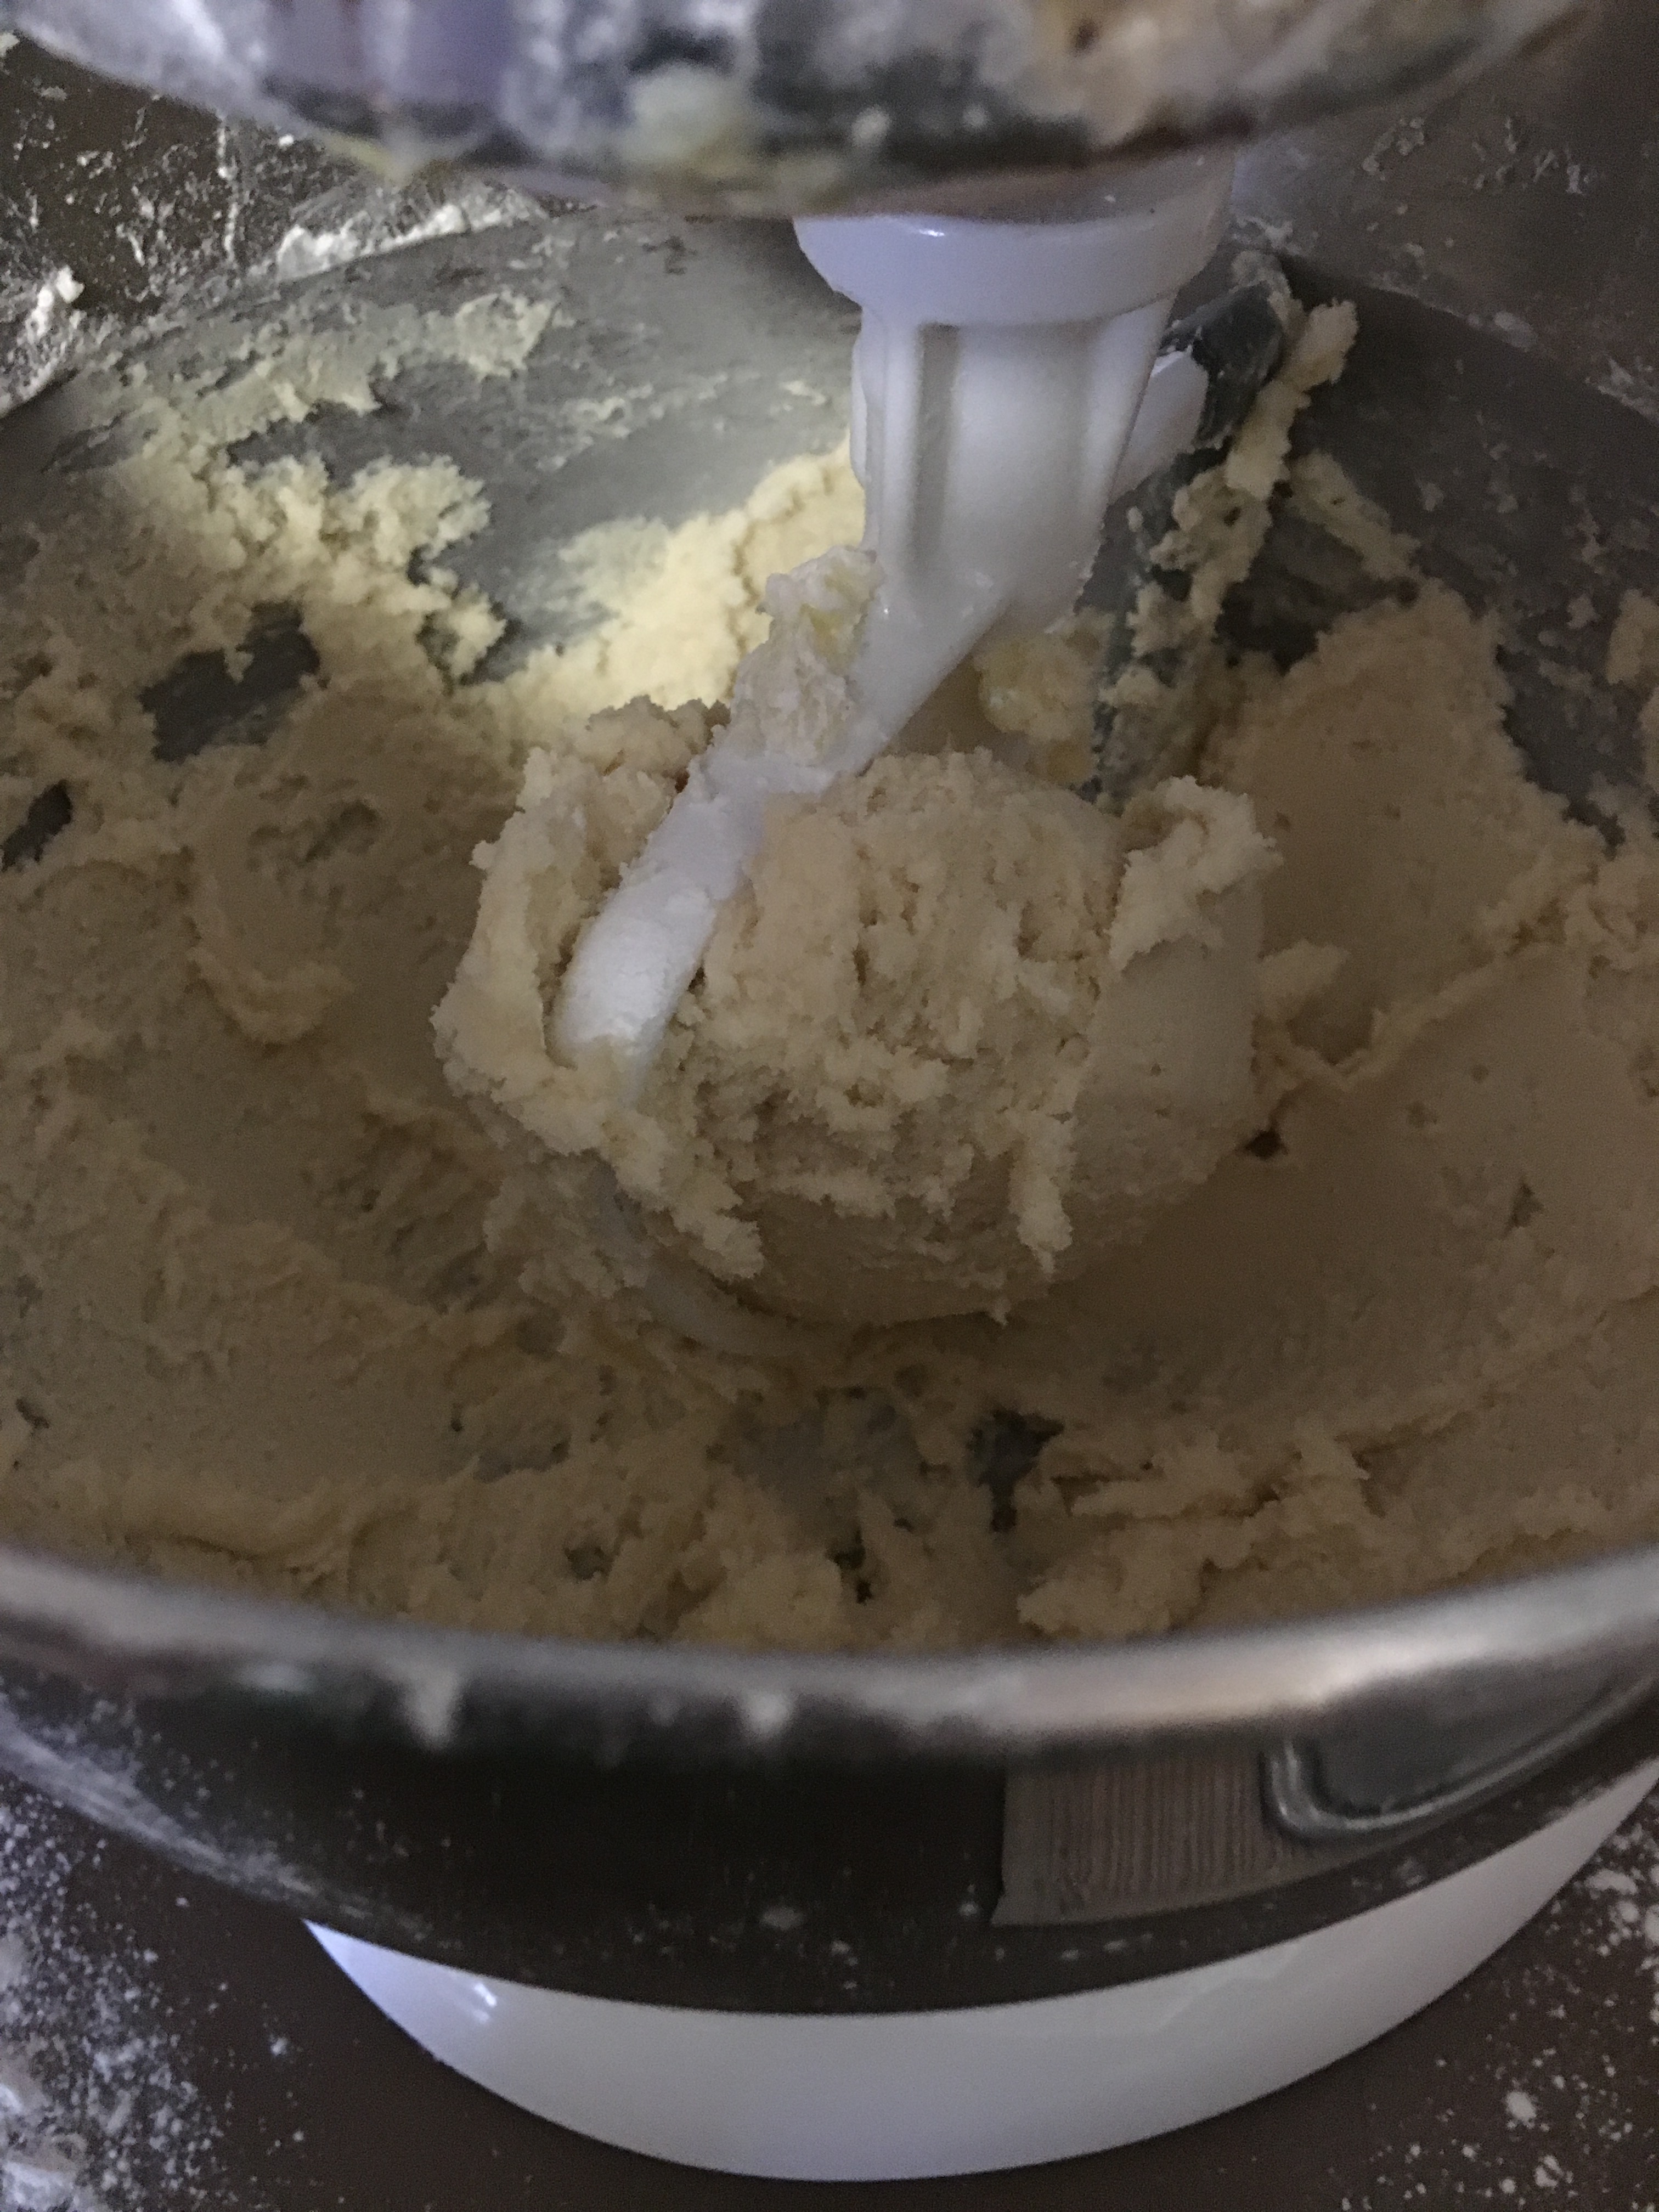
The dough is one you mix together and put in the fridge overnight. Because I’ve been on deadline, let’s just say that this dough might have lived a few nights in the fridge.
And let’s also just say that maybe I was busy with jobs I actually get paid for, so I forgot to take a picture of me mixing this dough together. Hey, something’s got to pay for all the butter I use, you know?
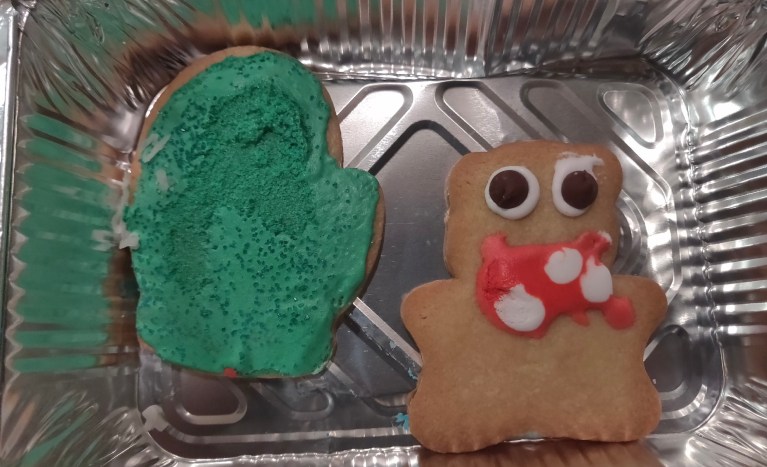
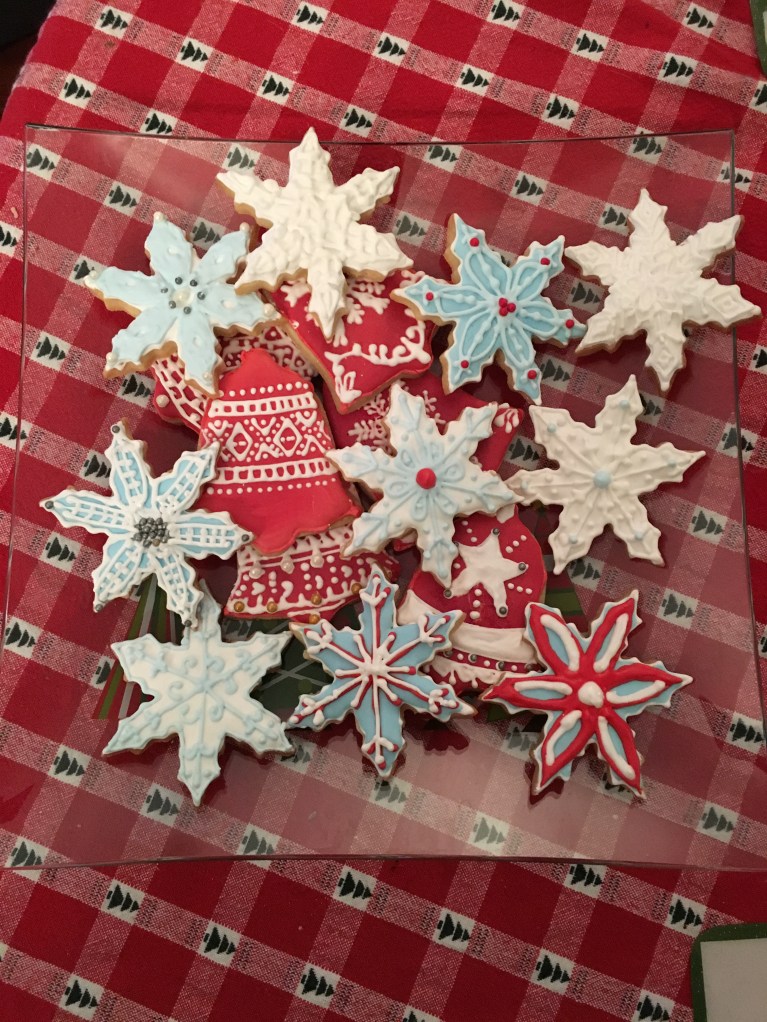
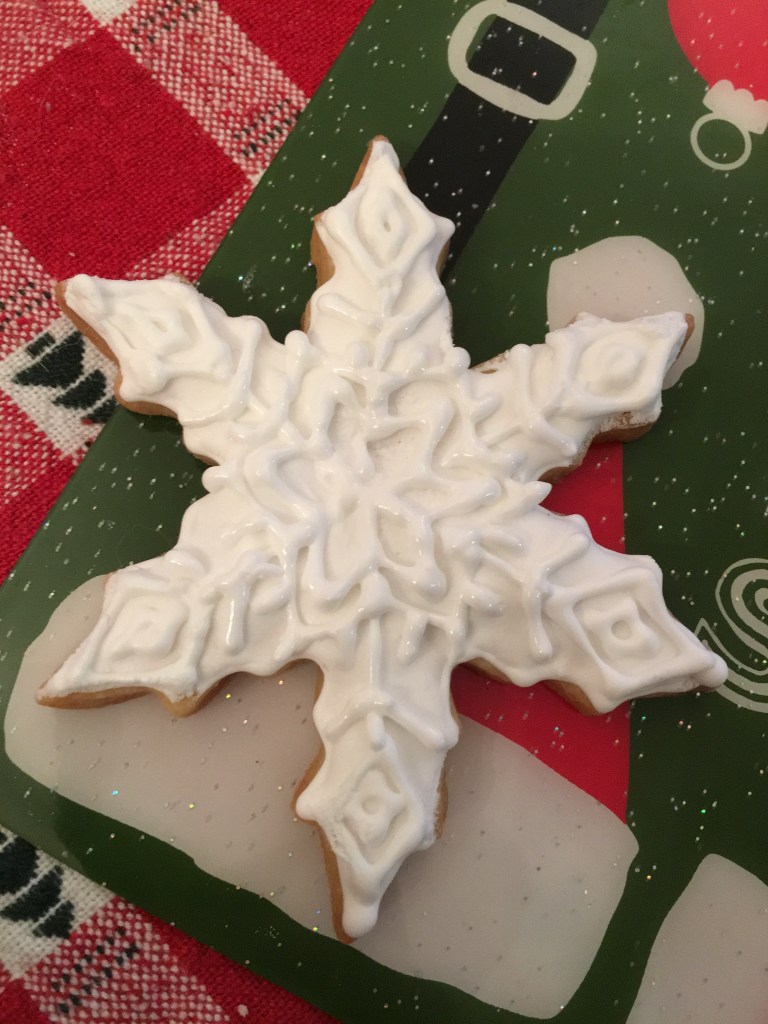
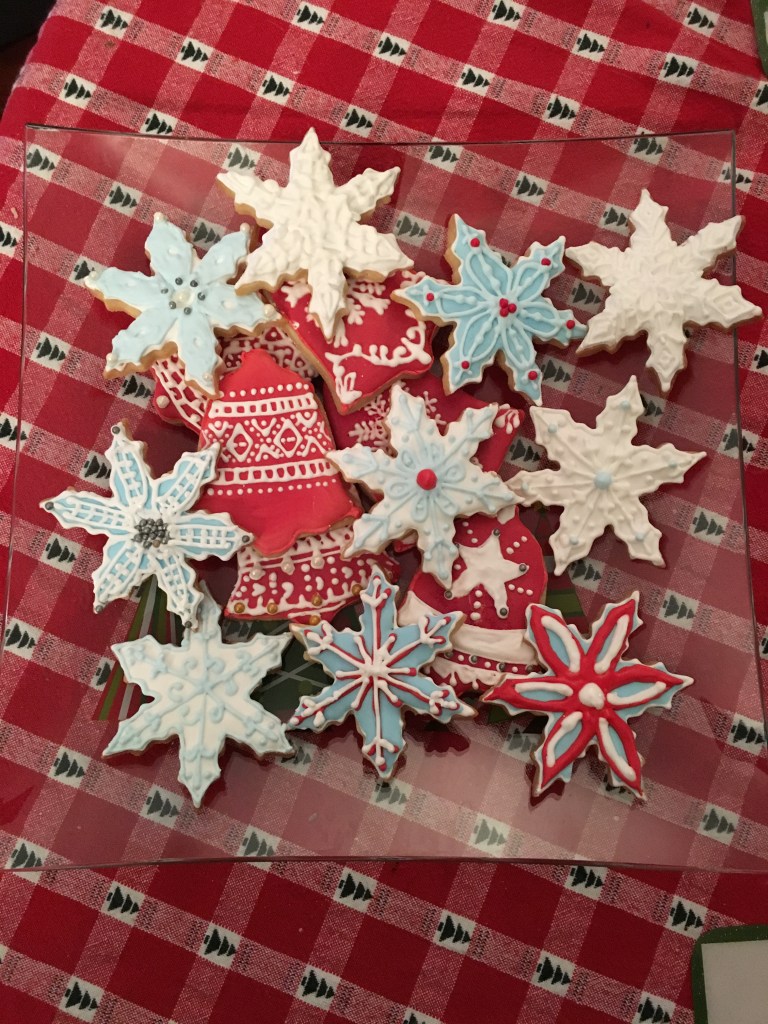
Generally, I make these cookies into bells because that was the first cookie cutter I ever had, and I love it and the person that gave it to me, and I have a hard time letting go.
So I made one pan of bells, but then I decided my antidepressants are working better than ever, so I ventured out into snowflakes. There were no tears. I consider it a moment of personal growth.
So let’s talk royal icing, shall we? I ventured into royal icing at the beginning of the month with my gingerbread people and my Louisiana cookies, and it went pretty well…after a while. So I mixed up some more for these cookies. I think I watched one too many episodes of the Holiday Baking Championship, because suddenly I’m all “You have to flood the cookies” and “these still aren’t dry.” Armed with my royal icing, some pastry bags, and Google images, I decorated my first pretty cookie…well, pretty much ever.
I decorated other bells too, but this one turned out the best.
So then I turned my sights towards my snowflakes and ventured out into other colors. I’m still quite shocked they turned out as well as they did.
I need to get my frosting consistency right and maybe a smaller tip, but for the most part, I’m pretty happy.
These might go in the freezer next to the macarons that no one’s allowed to touch.
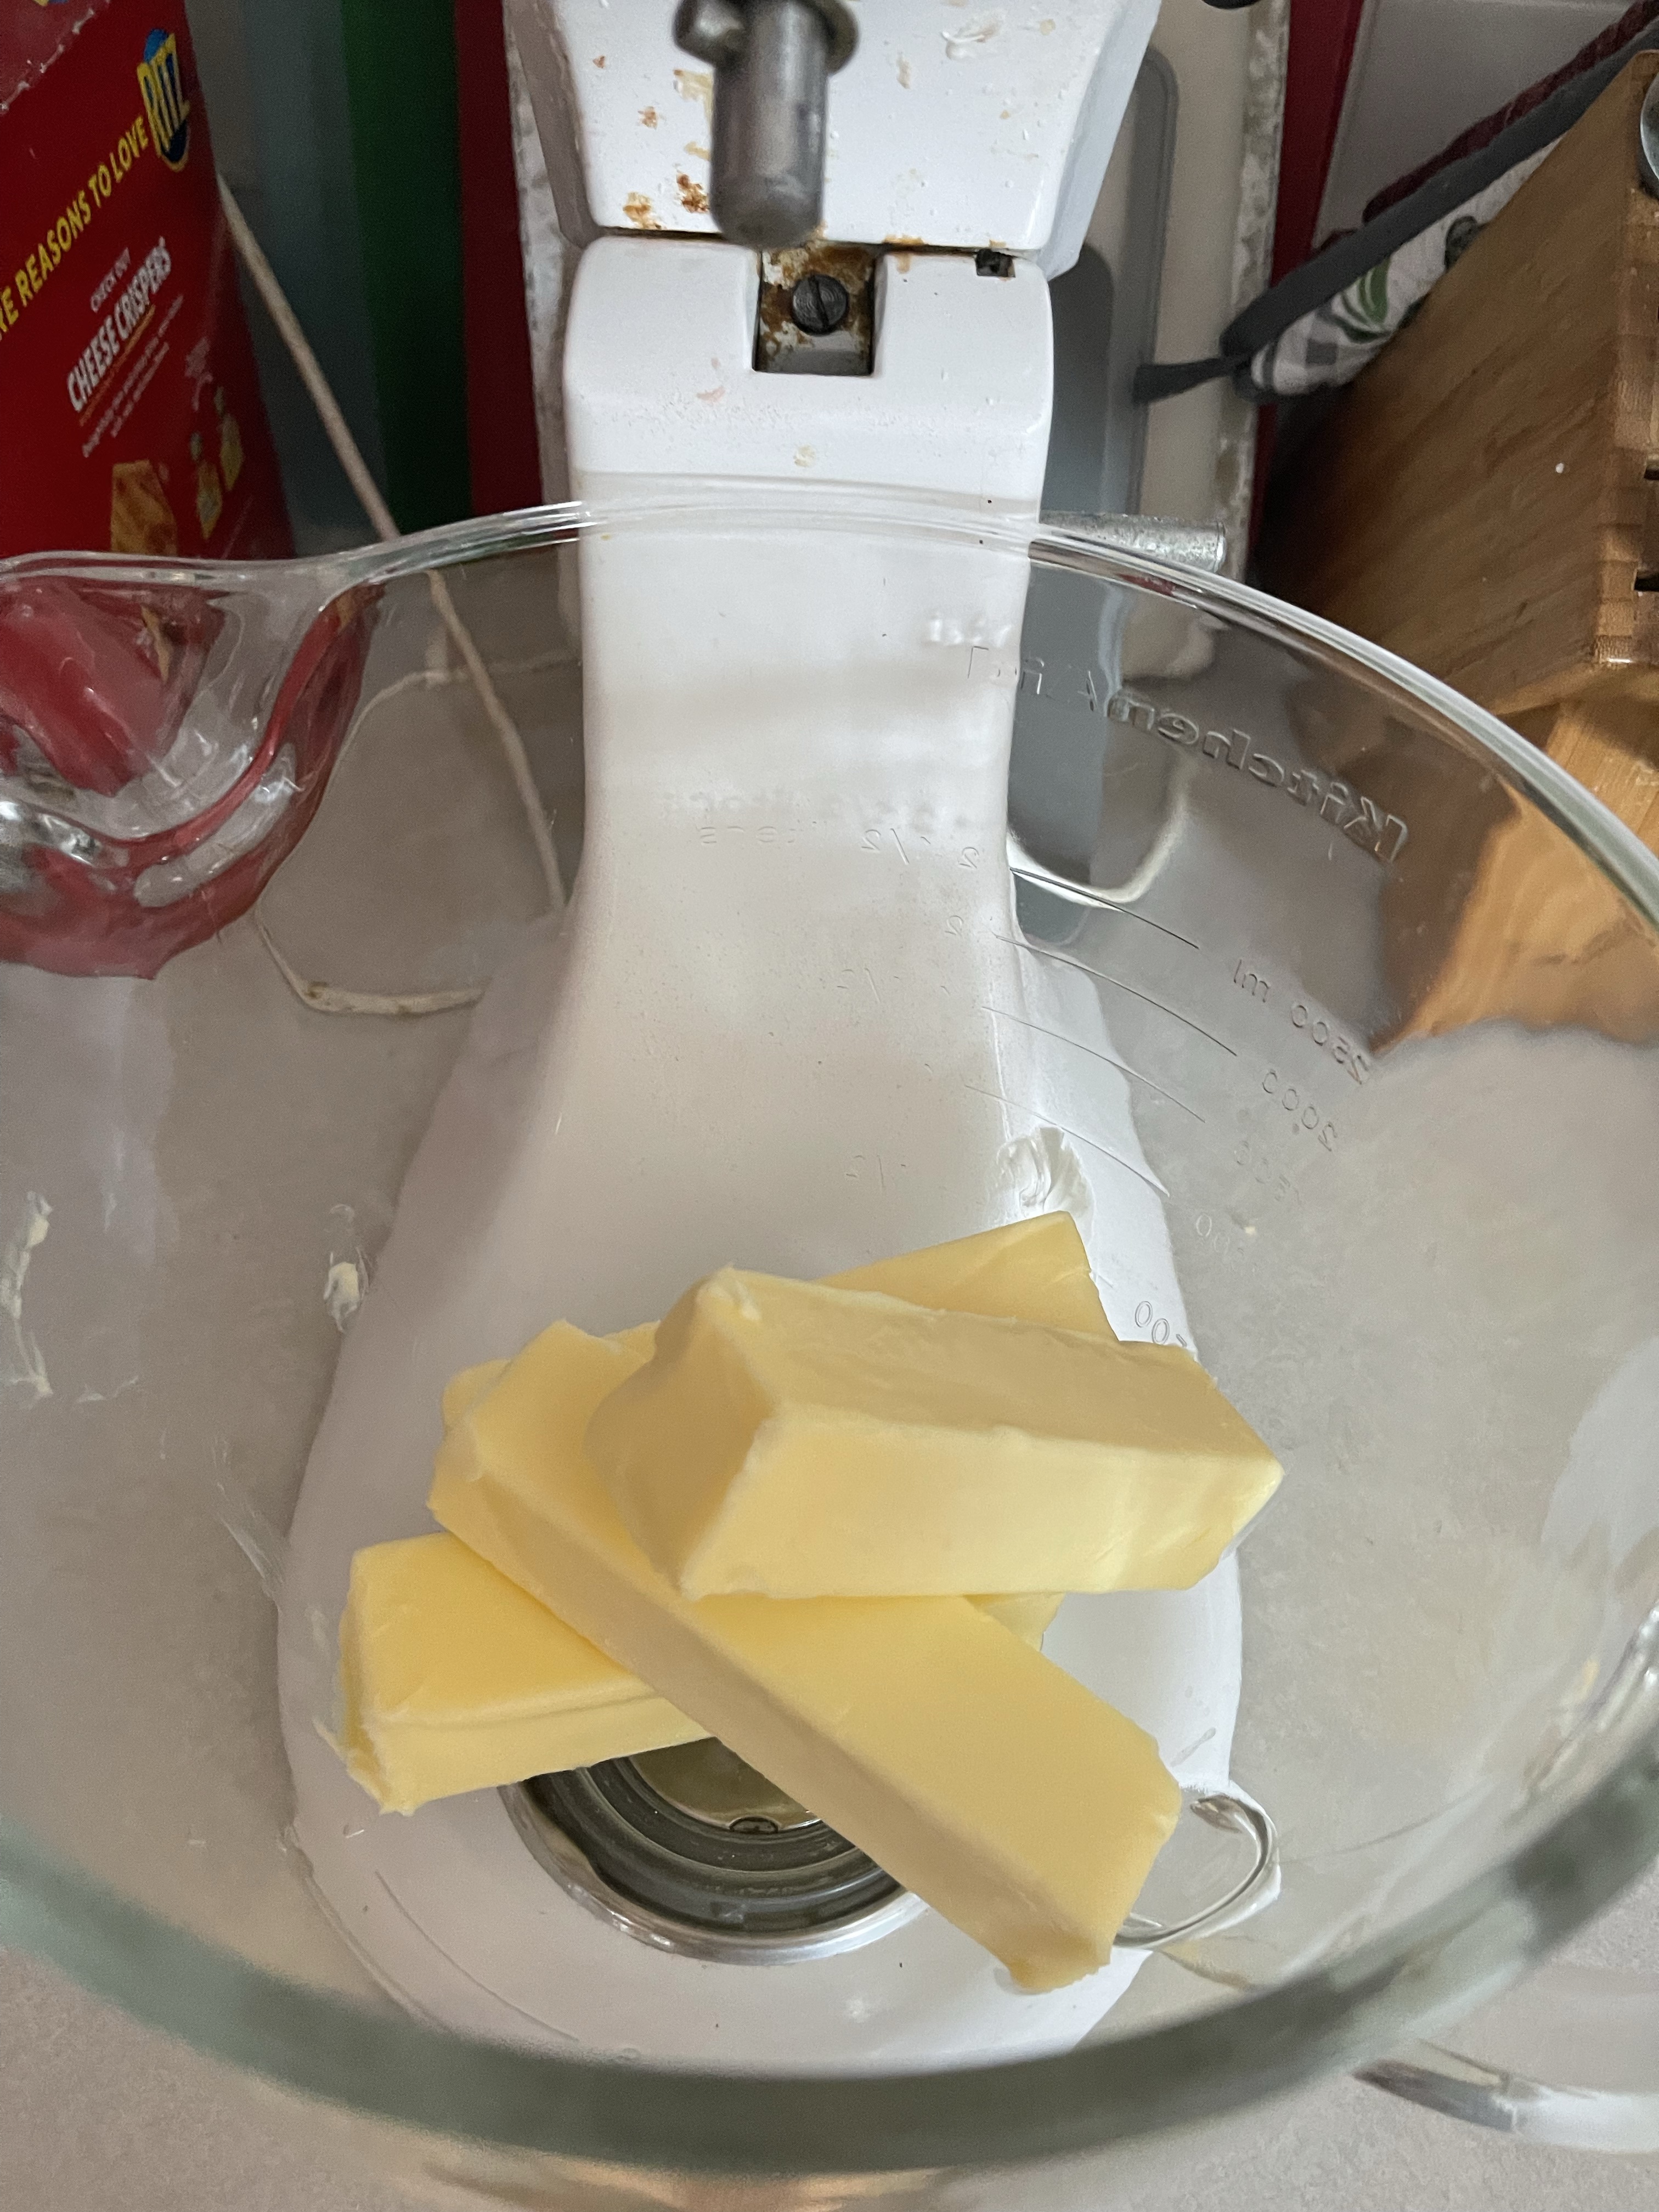
Cream butter and cream cheese together. Beat in sugar. Add egg yolk and vanilla, then stir in flour. Gather dough in a ball and chill overnight. To prepare, pre heat oven to 350. Rolll dough out to 3/16″ and cut into desired shapes. Bake for 12 minutes or until edges are light brown.
We are one week from Christmas and 6 days away from the end of this year’s cookies. My cookie table is looking quite crowded with this month’s abundance.
After making the world’s largest meatloaf last night, I ran out of eggs. I didn’t feel like going to the store today, so I remembered back to a few years ago when I was in the same situation. Mint Meltaways (auto spell check keeps trying to change this to Beltways) contains no eggs, so that is my cookie today.
This is our star today.
The thing with peppermint extract is that’s not like vanilla extract, in that if a little is good, more must be better. Peppermint extract is strong and spicy, and nothing you want to overdo it on. Use the exact amount called for. Don’t improvise. I saw an episode of Holiday Baking Championship on Food Network where someone did, and he was eliminated. I bet whenever he smells peppermint extract, he becomes sick with failure.
Anyway, enough of my PSA.
I mixed together my dough and brought out another shining star.
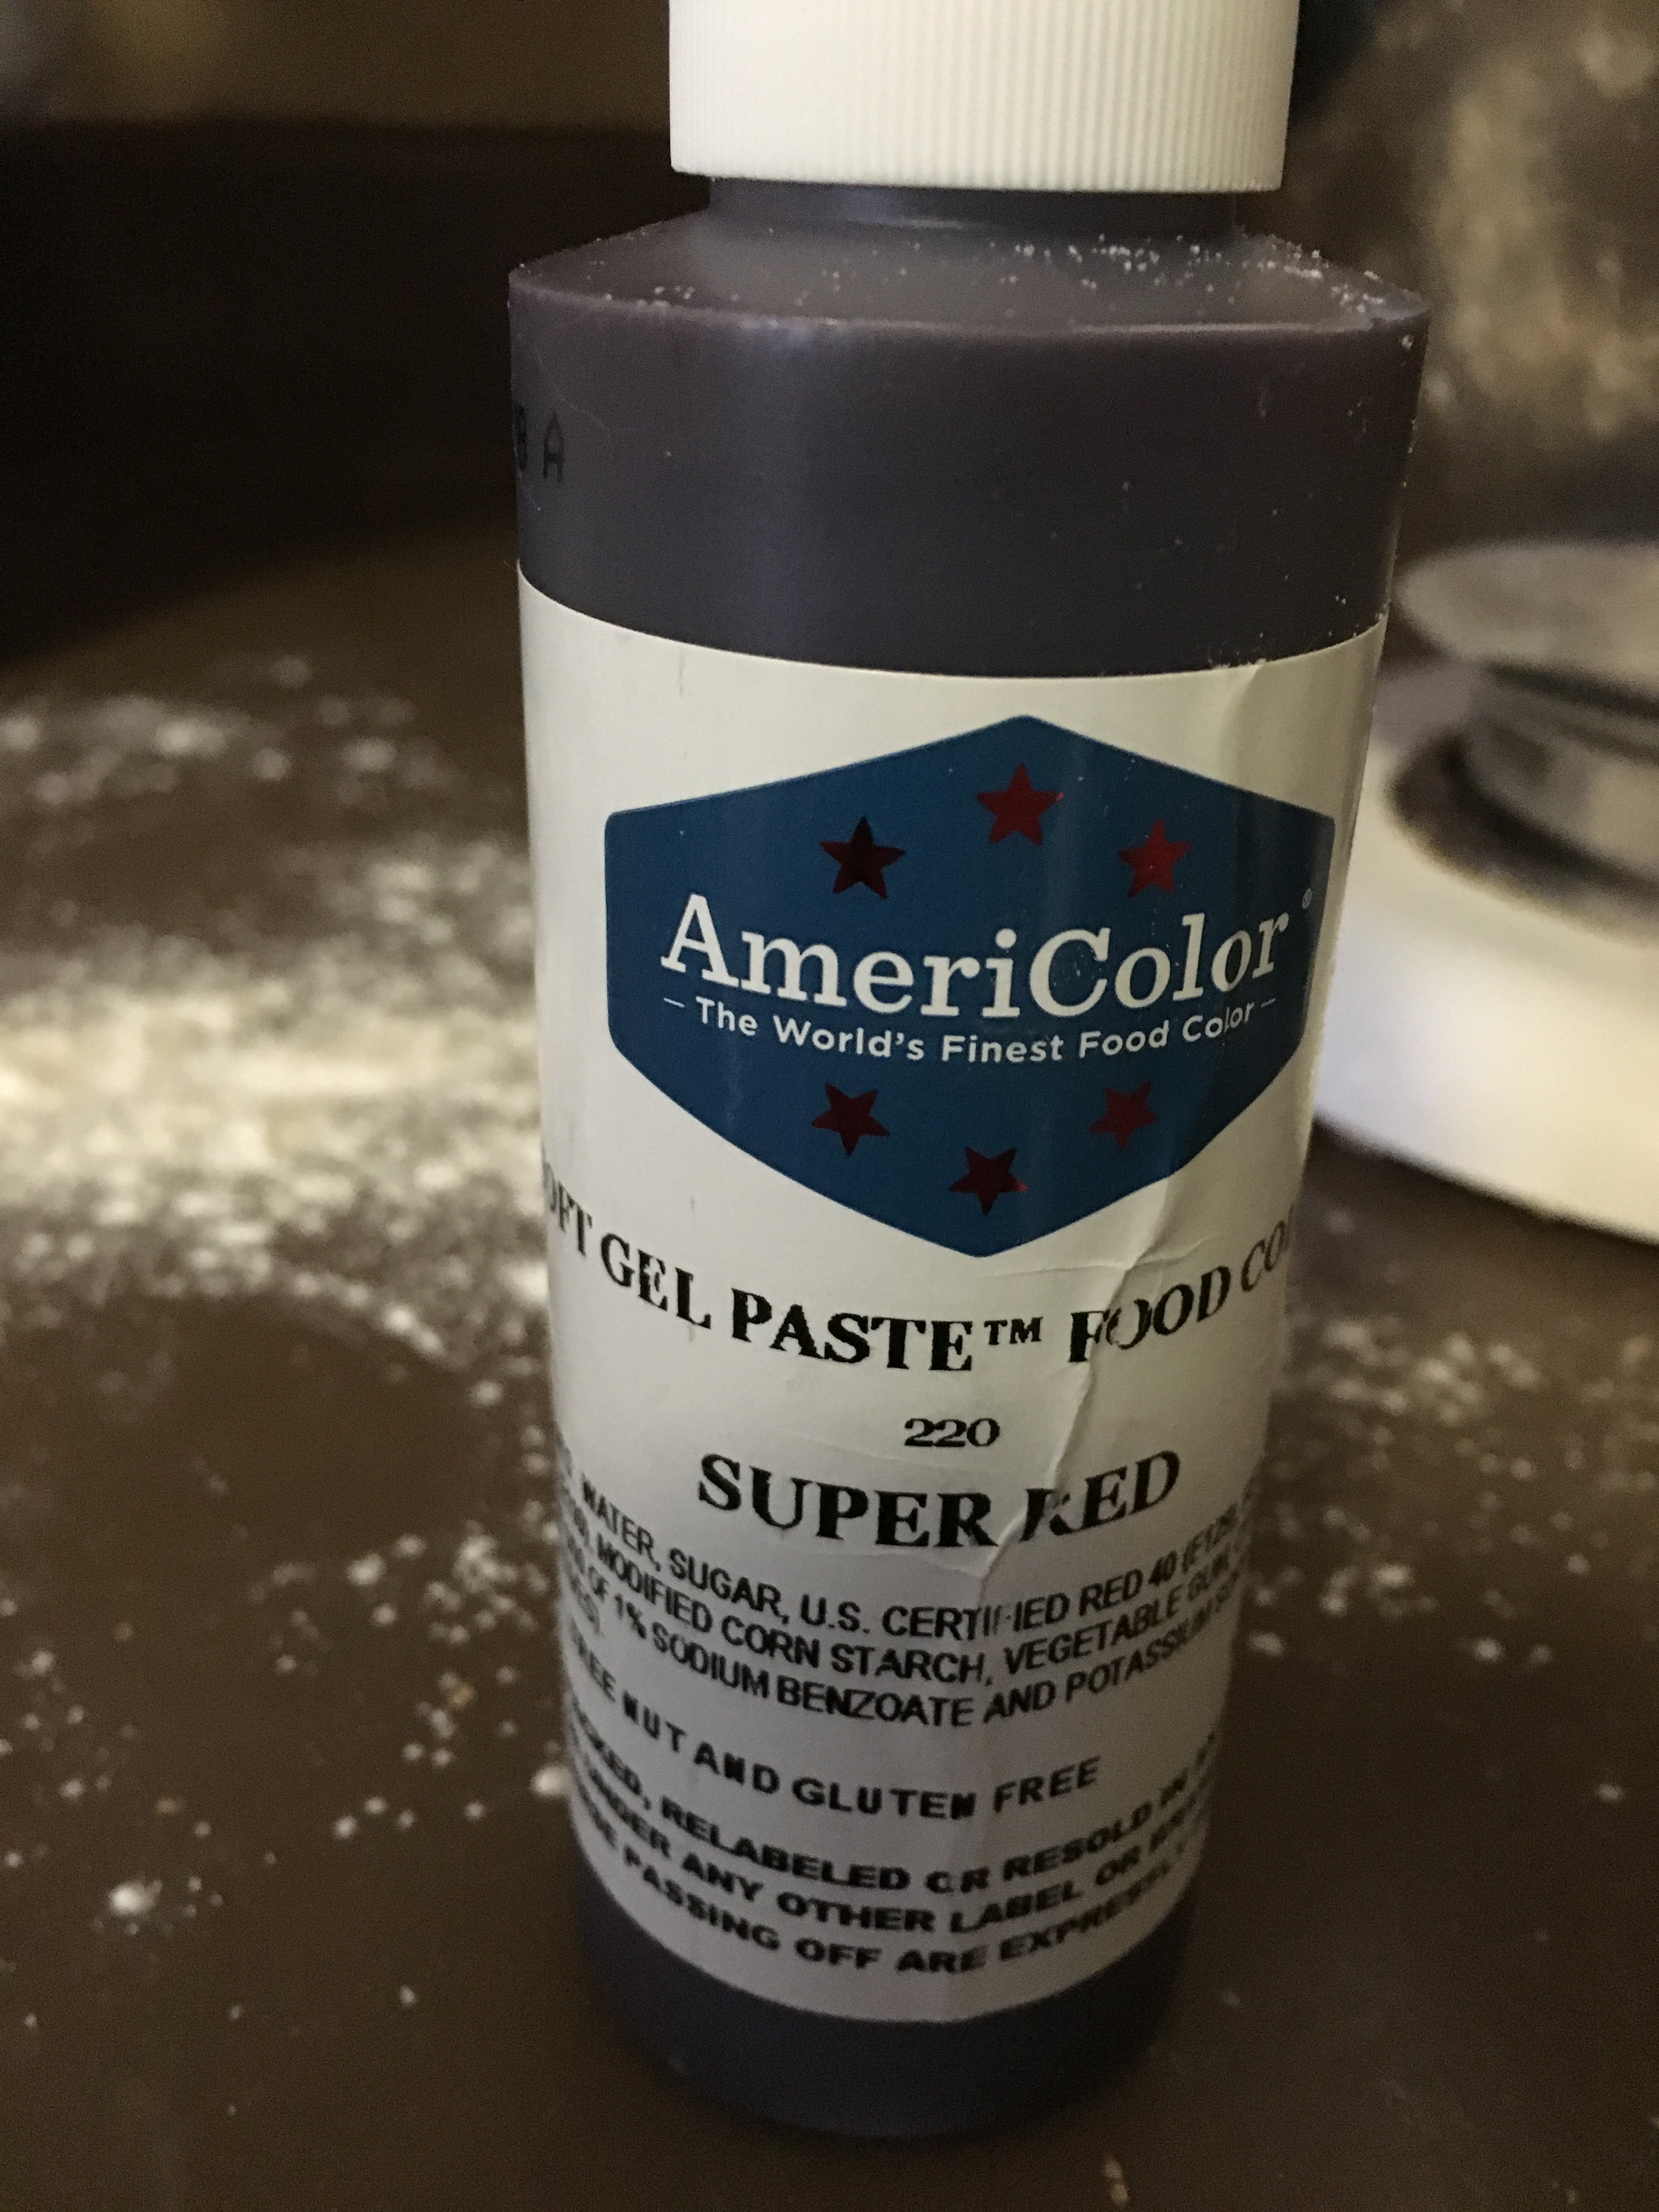
If you’ve followed my blog for a few years, you’ll recall how I’ve tried various different colors for this, all in the name of fun. One year, it was black. One year it was Oscar the Grouch pulp green. This year, I wanted to do red. But not just any red. The best red. No offense to Wilton, but their reds suck, and this one by AmeriColor is the best red around. I mean, besides me.
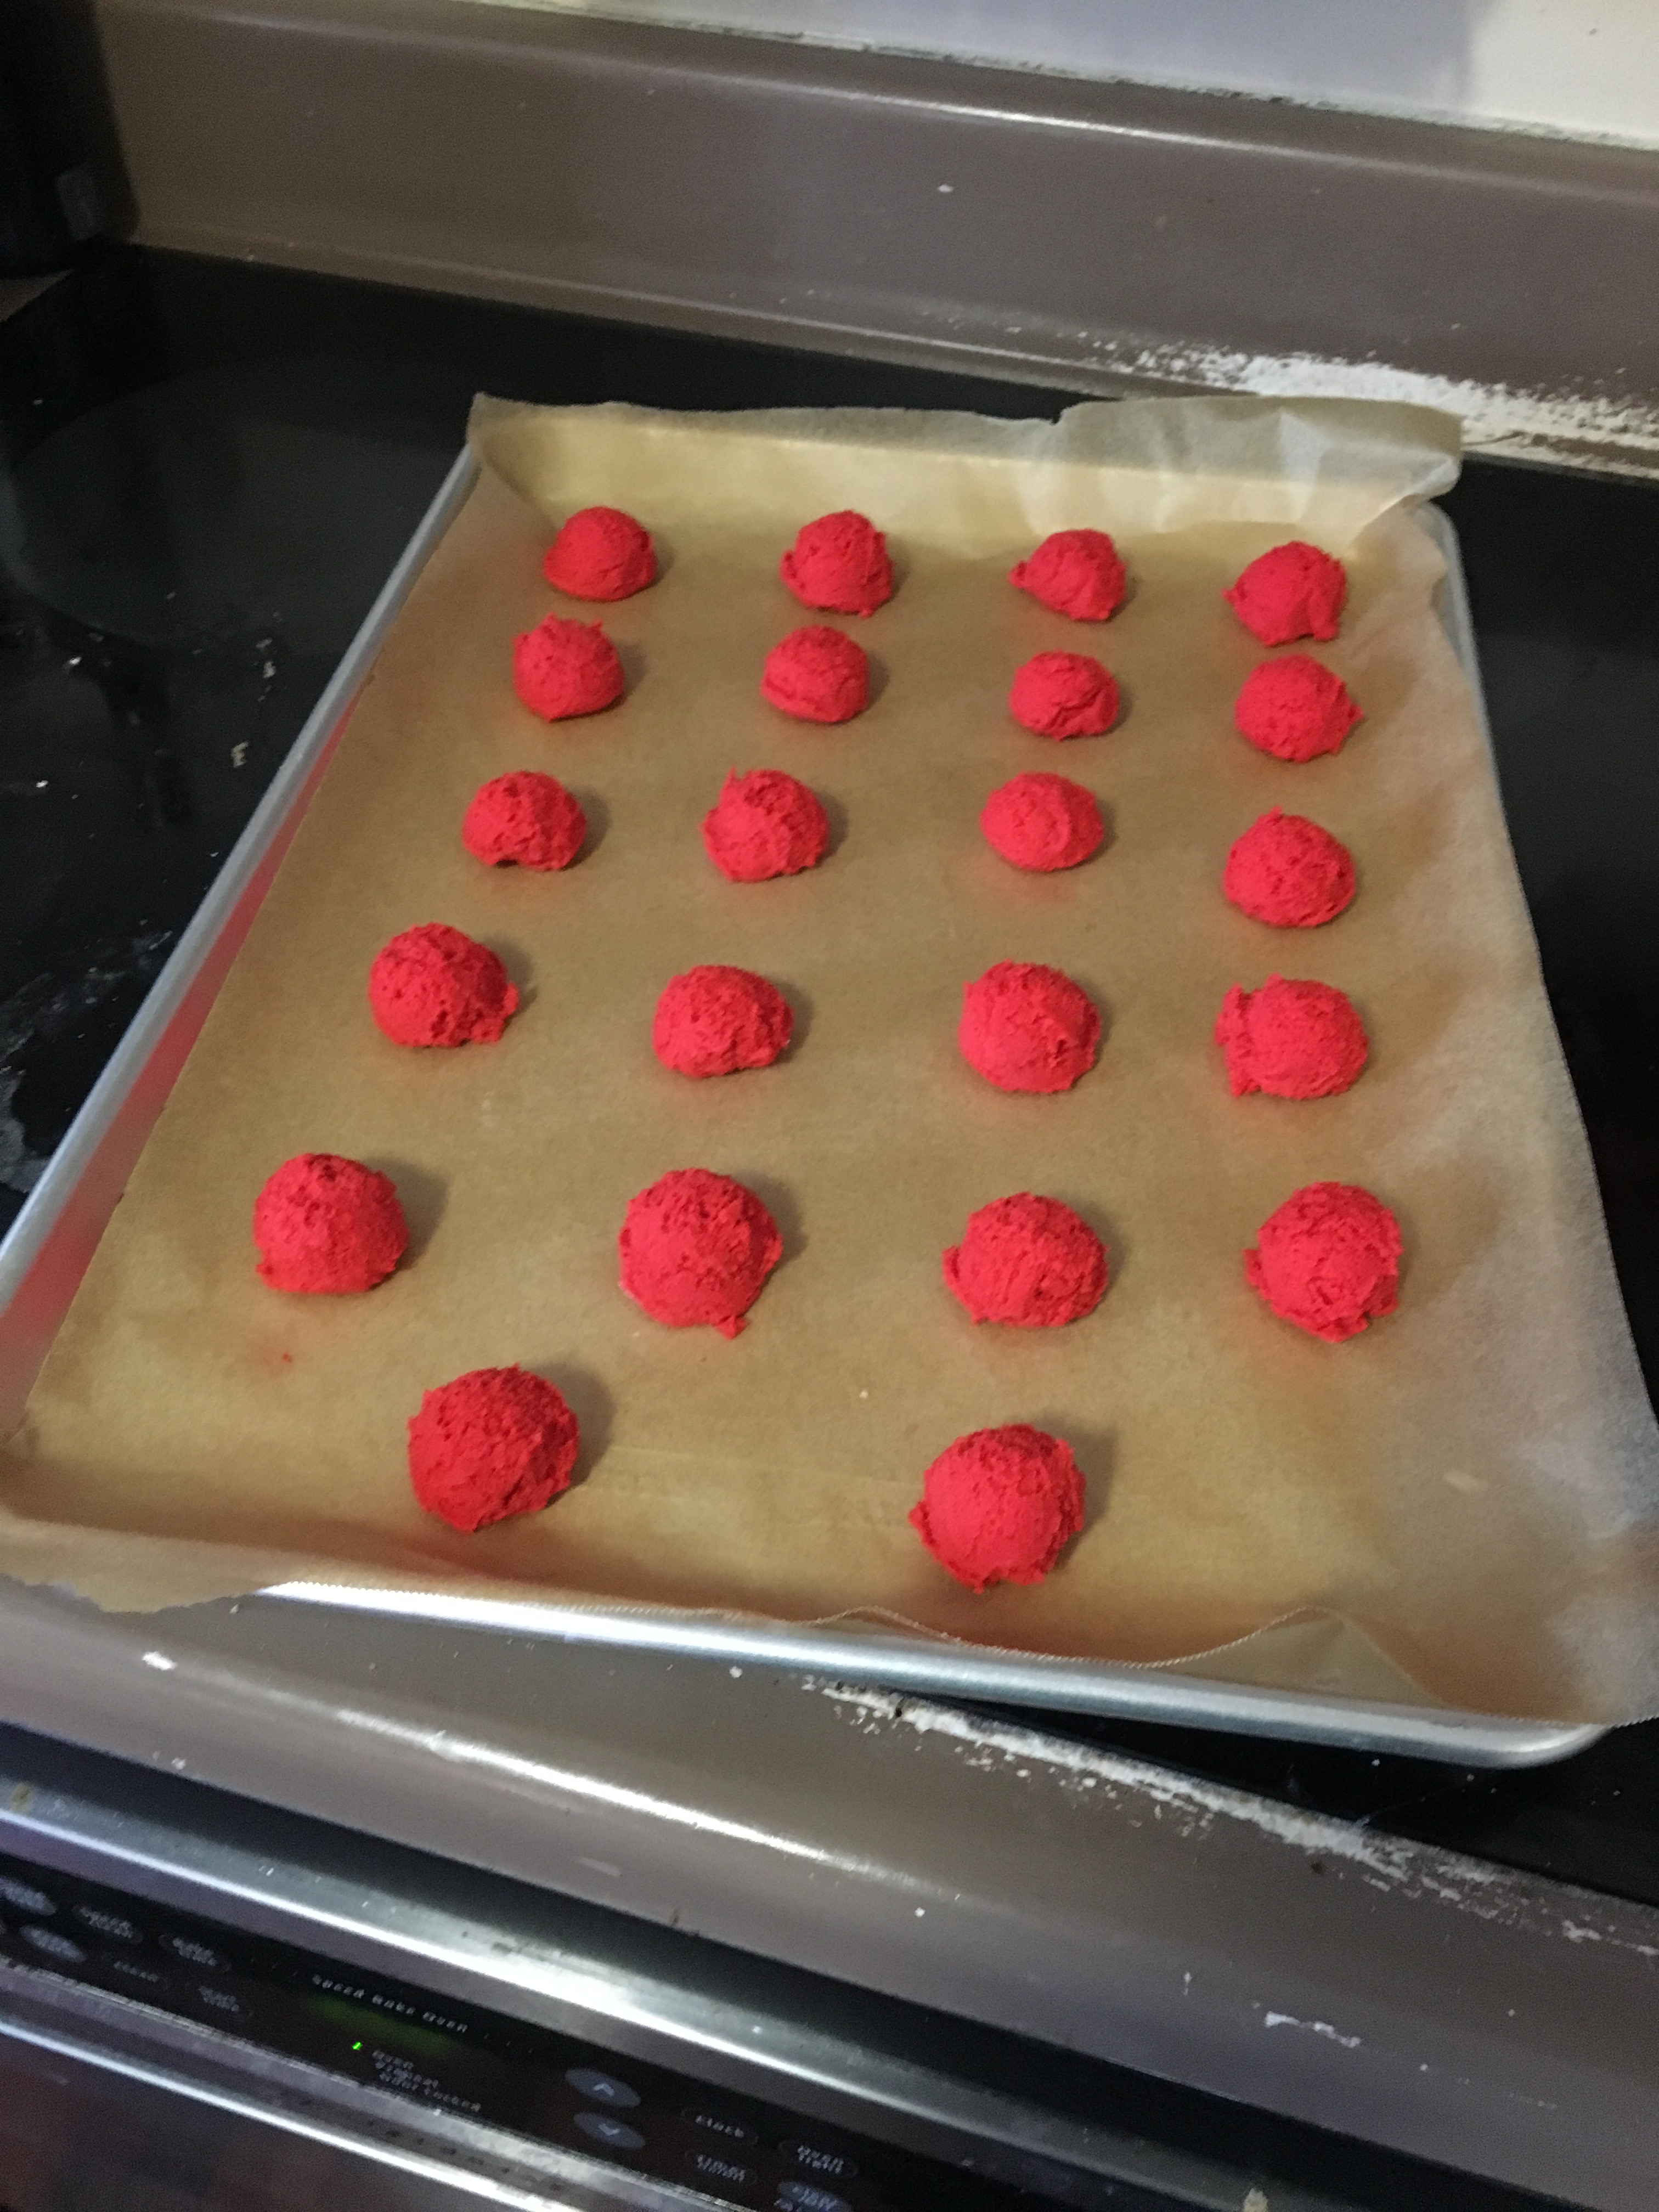
I plopped my red balls on a tray and baked them. The recipe says bake until golden, but there’s no golden in my blood-sacrifice red mint cookies. I timed it pretty well and they came out nicely.
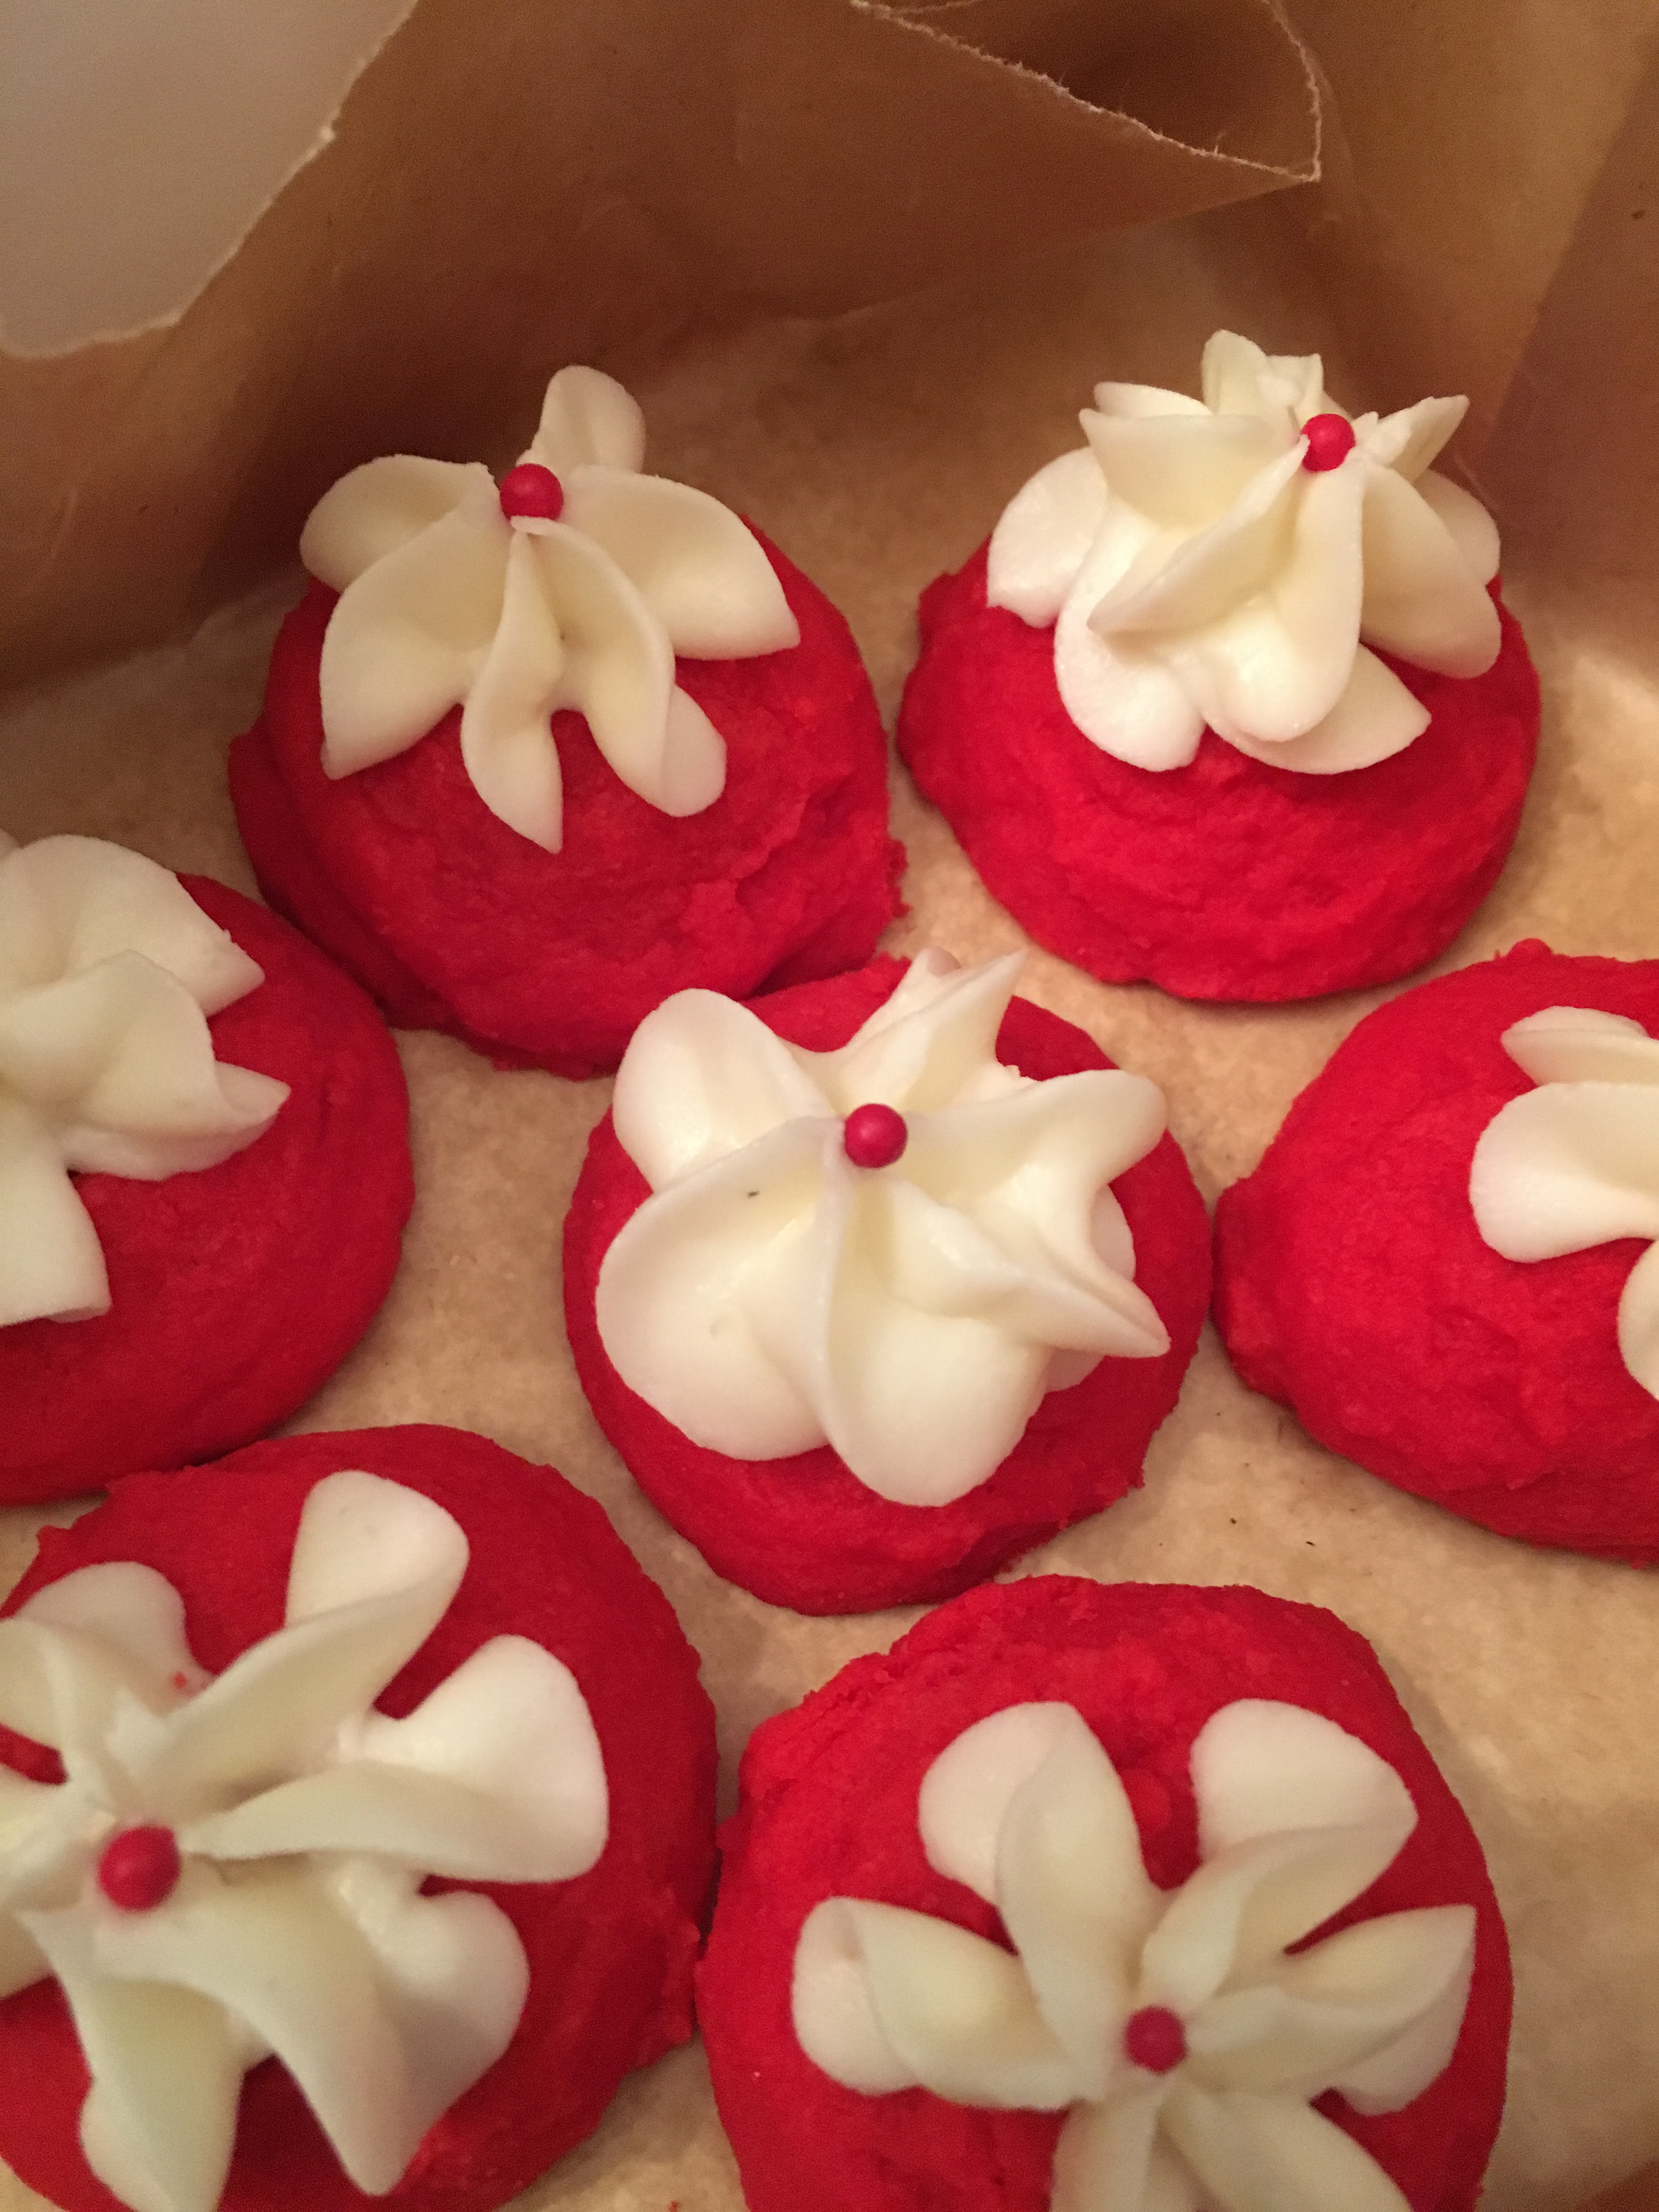
The mint frosting (again, do not add more–1/4 teaspoon is just enough) whips up pretty quickly. I used a star tip to put a dollop of minty goodness on each. Generally, I have peppermint dust to sprinkle on the tops of these cookies, but not today. I put a little red ball on each, which kinda makes them look like strange red nipples, but hey, more mature people may not think they look like anything but fun festive cookies.
Mint Meltaways
(from tasteofhome.com)
Ingredients
1 cup butter, softened
1/2 cup confectioners’ sugar
1/2 teaspoon peppermint extract
1-1/4 cups all-purpose flour
1/2 cup cornstarch
FROSTING:
2 tablespoons butter, softened
1-1/2 cups confectioners’ sugar
2 tablespoons 2% milk
1/4 teaspoon peppermint extract
2 to 3 drops red food coloring, optional
1/2 cup crushed peppermint candies
Directions:
In a small bowl, cream butter and confectioners’ sugar until light and fluffy. Beat in extract. Combine flour and cornstarch; gradually add to creamed mixture and mix well.
Shape into 1-in. balls. Place 2 in. apart on ungreased baking sheets.Bake at 350° for 10-12 minutes or until bottoms are lightly browned. Remove to wire racks to cool.
In a small bowl, beat butter until fluffy. Add the confectioners’sugar, milk, extract and, if desired, food coloring; beat until smooth. Spread over cooled cookies; sprinkle with crushed candies.
Not technically a cookie, but that’s okay because it’s not technically December 14 anymore. I didn’t make them last year, but decided these needed to be apart of our Cajun Festivities.
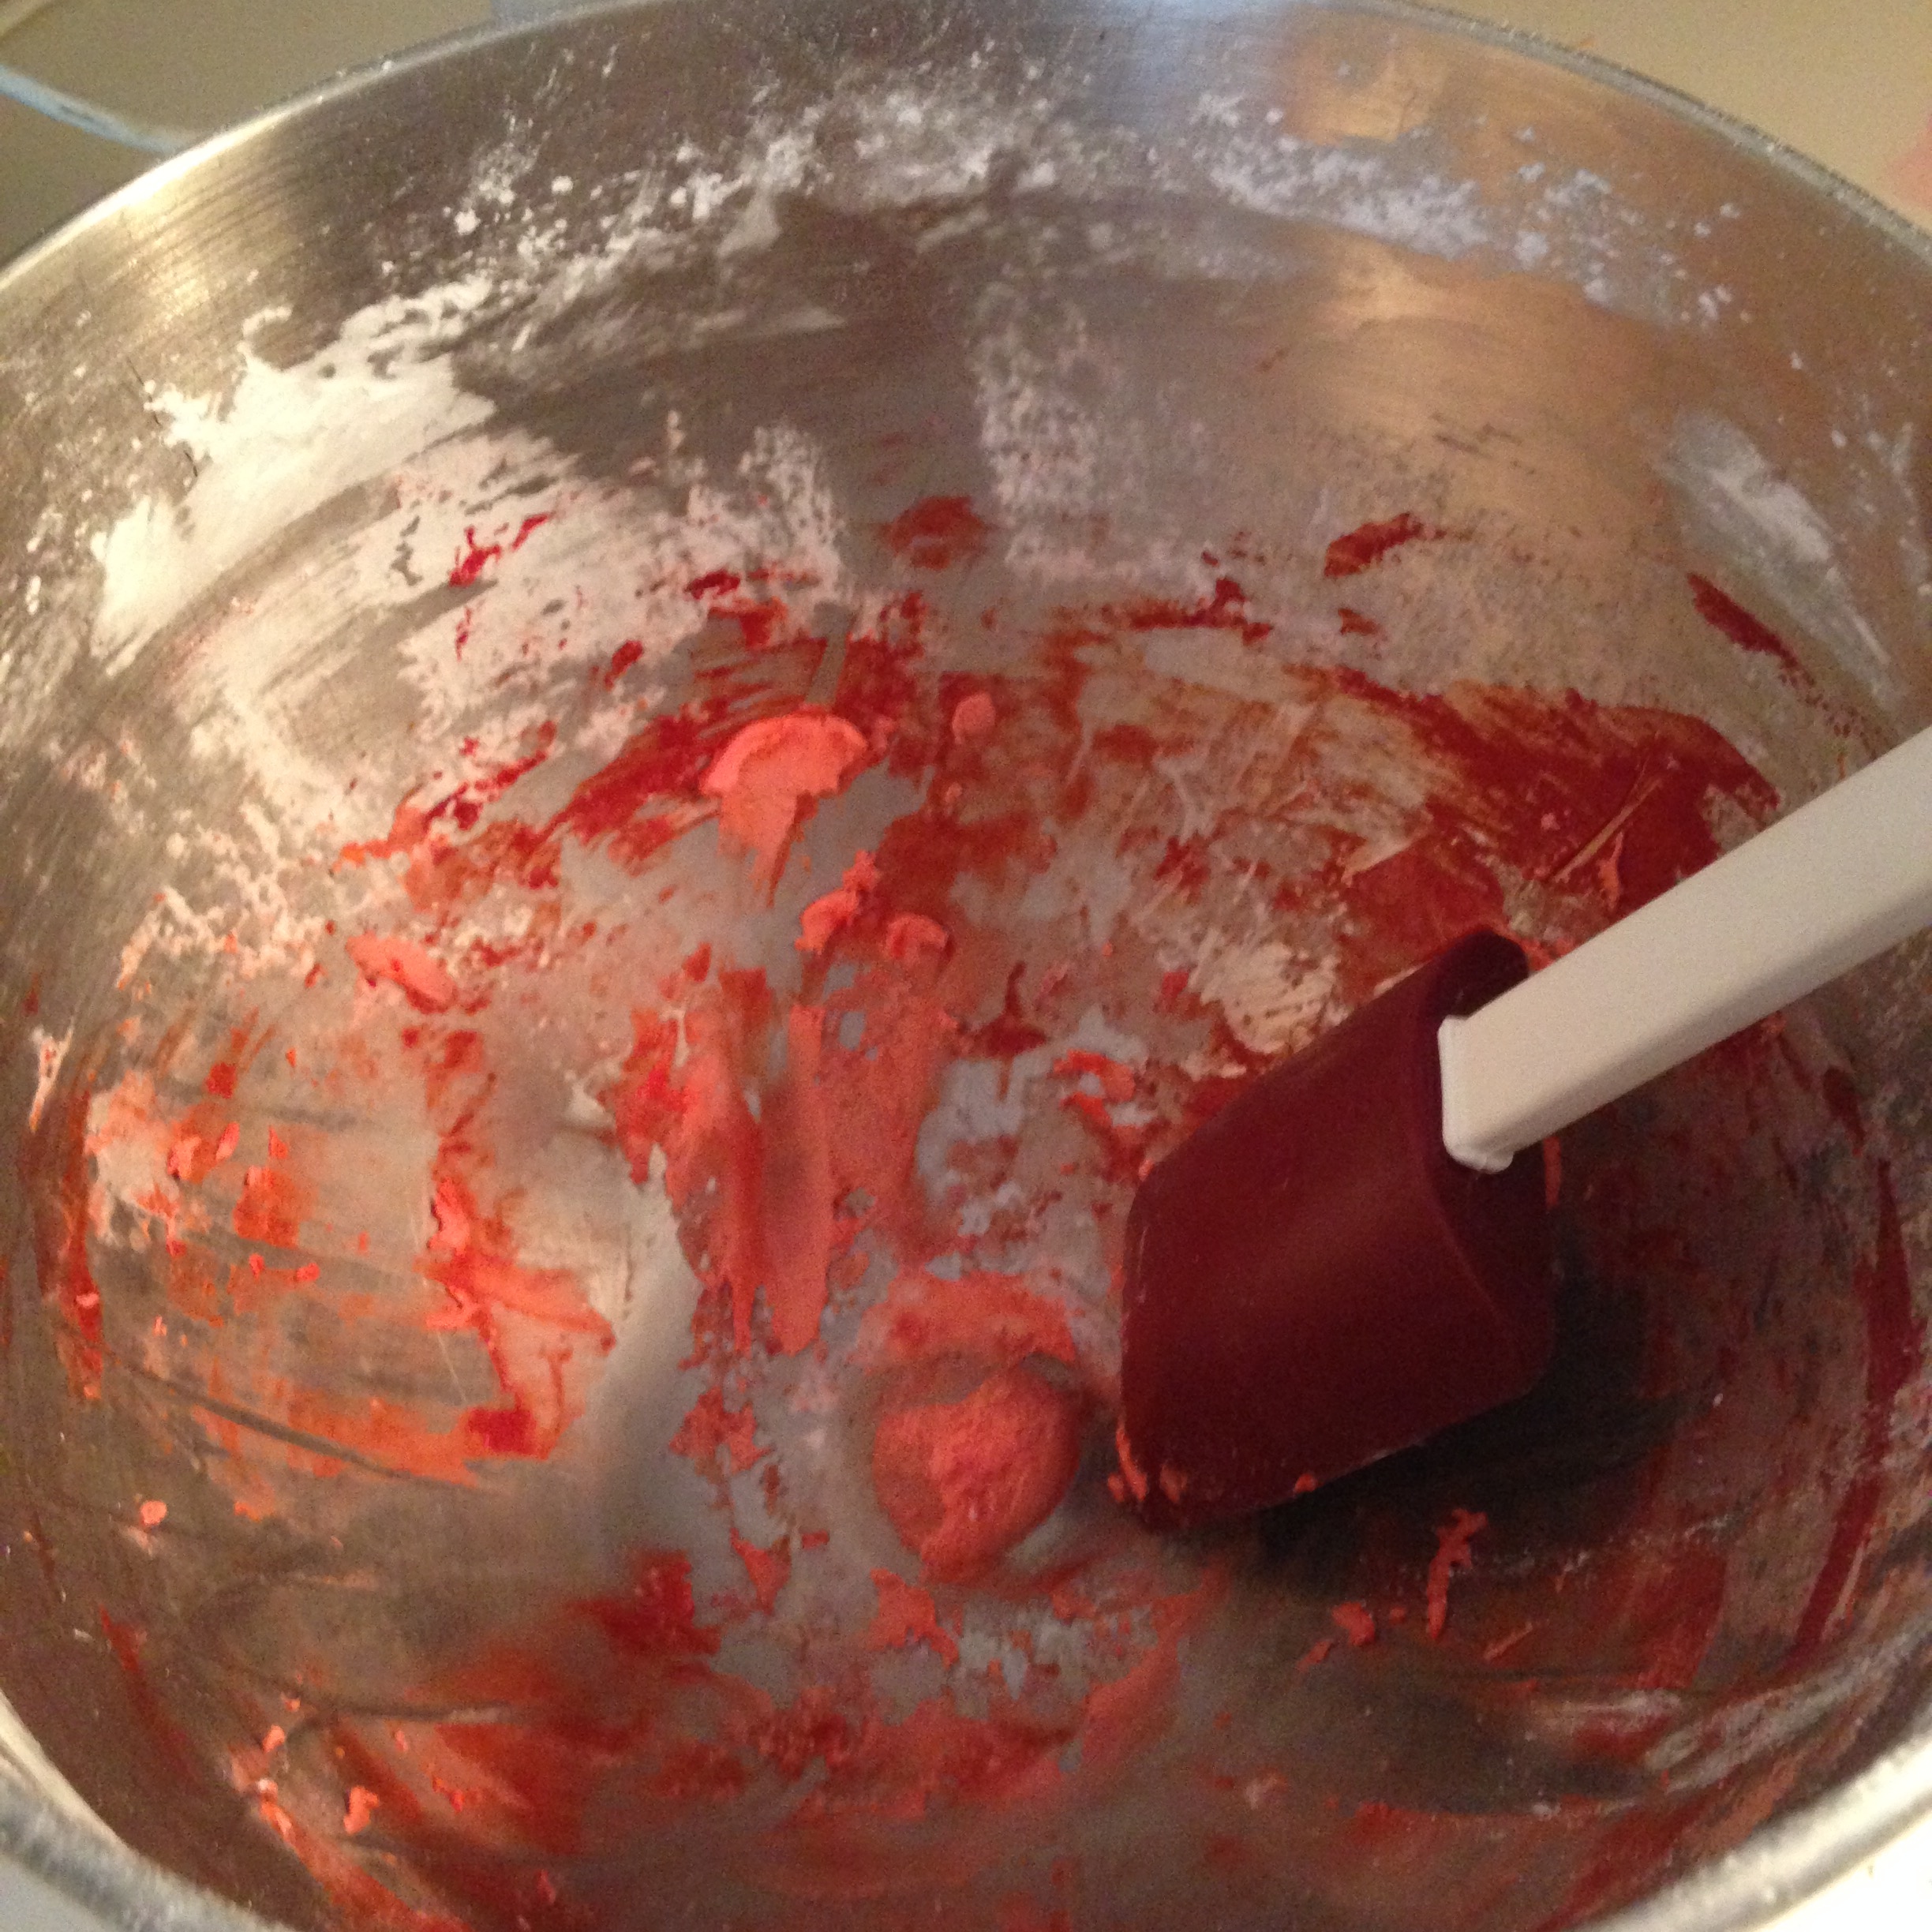
The recipe isn’t hard: butter, powdered sugar, extracts, cream, and some food coloring.
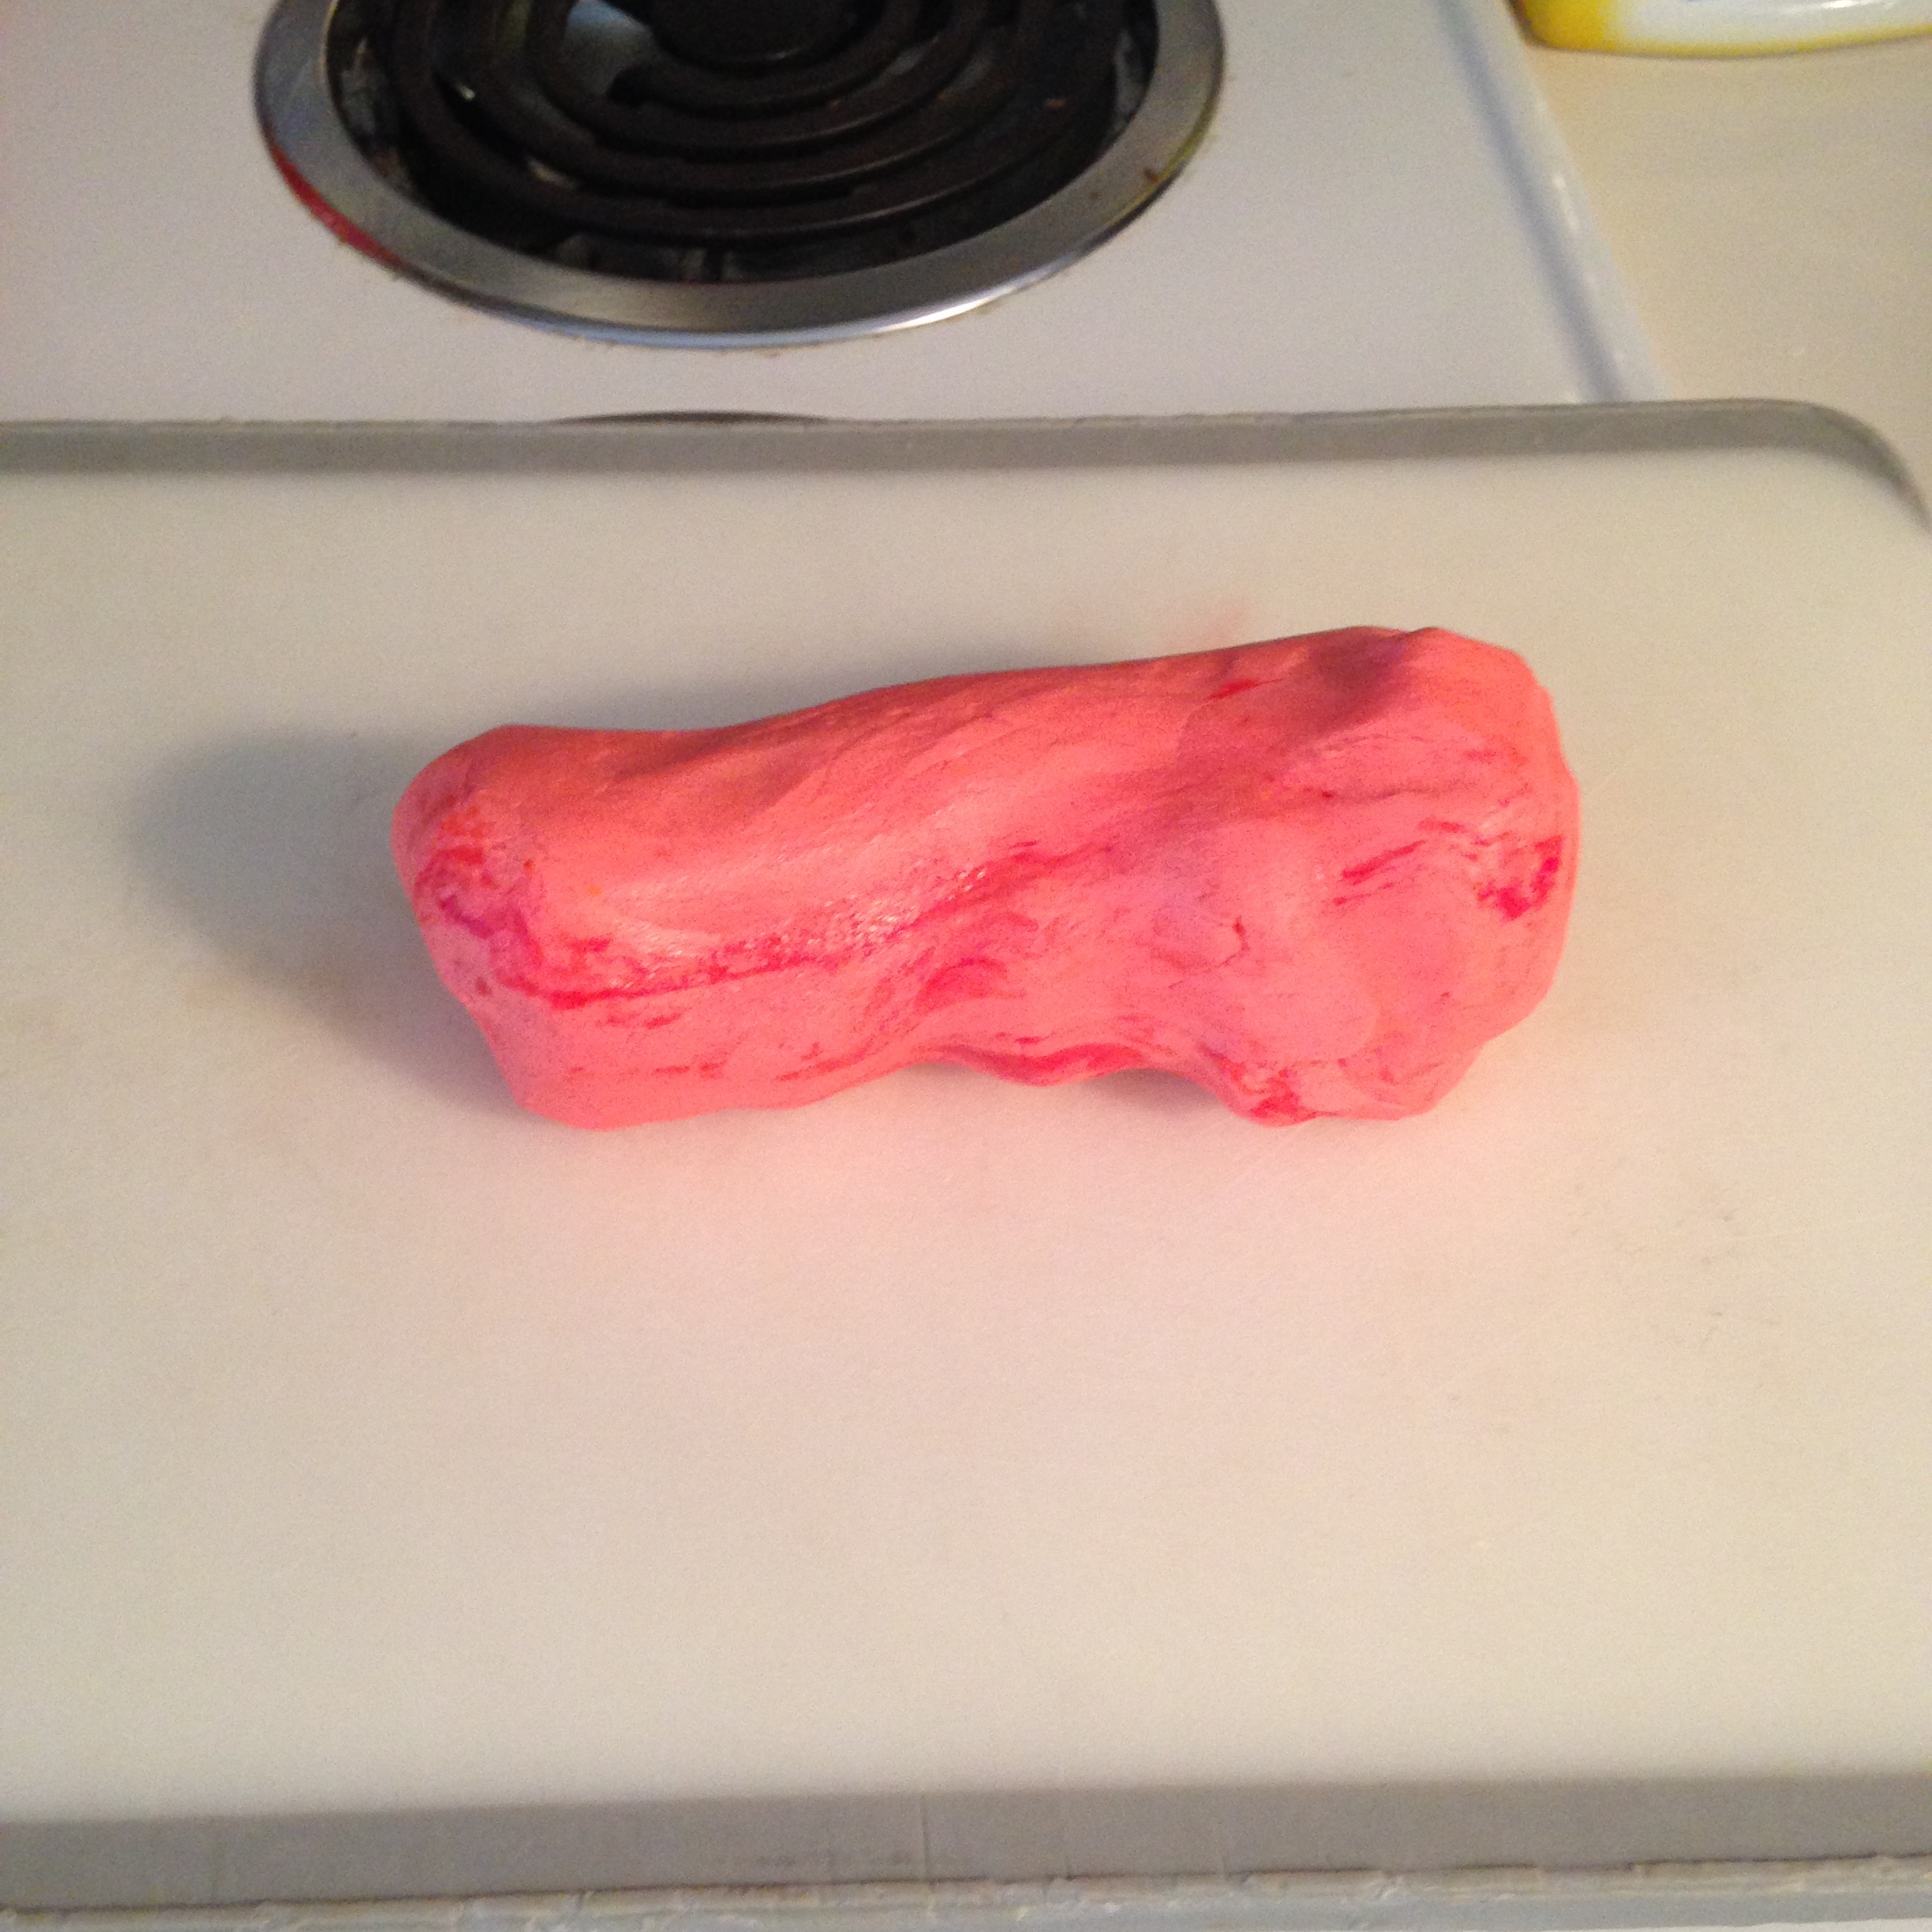
I decided to just do red and white this year. After I split my mints in two batches, I dyed half of it red. Scorcese red. (Name the movie!)
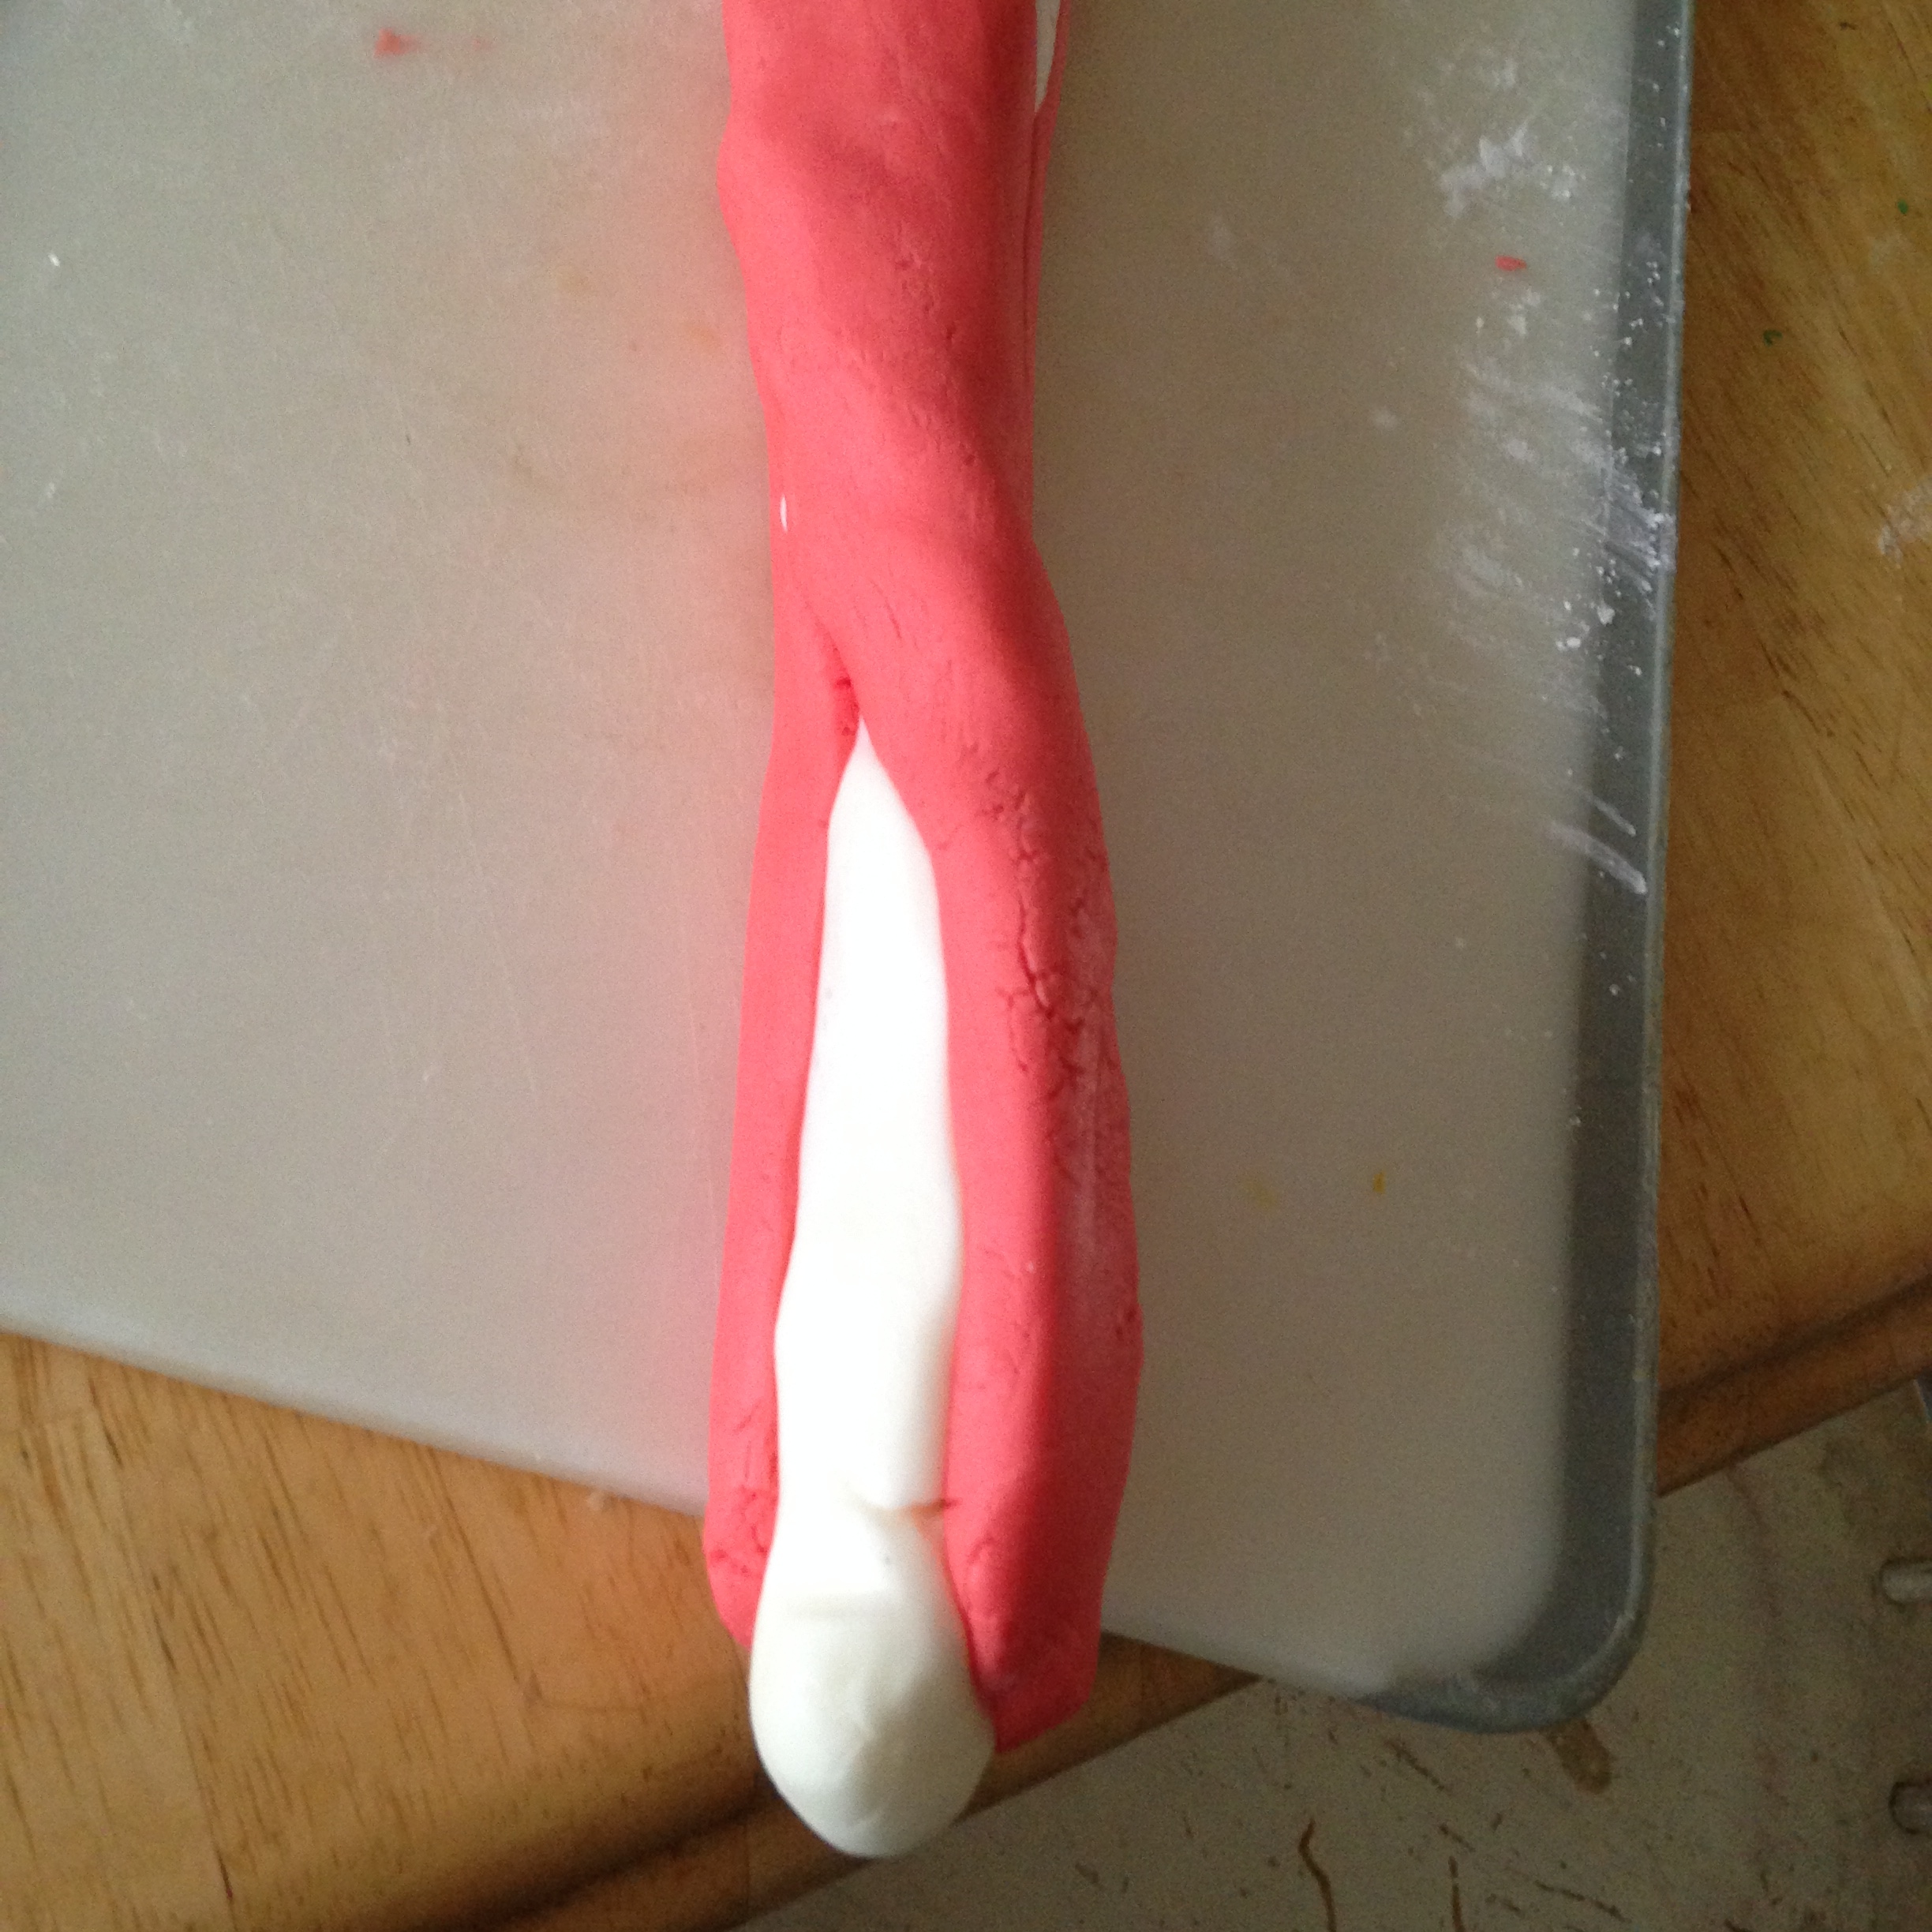
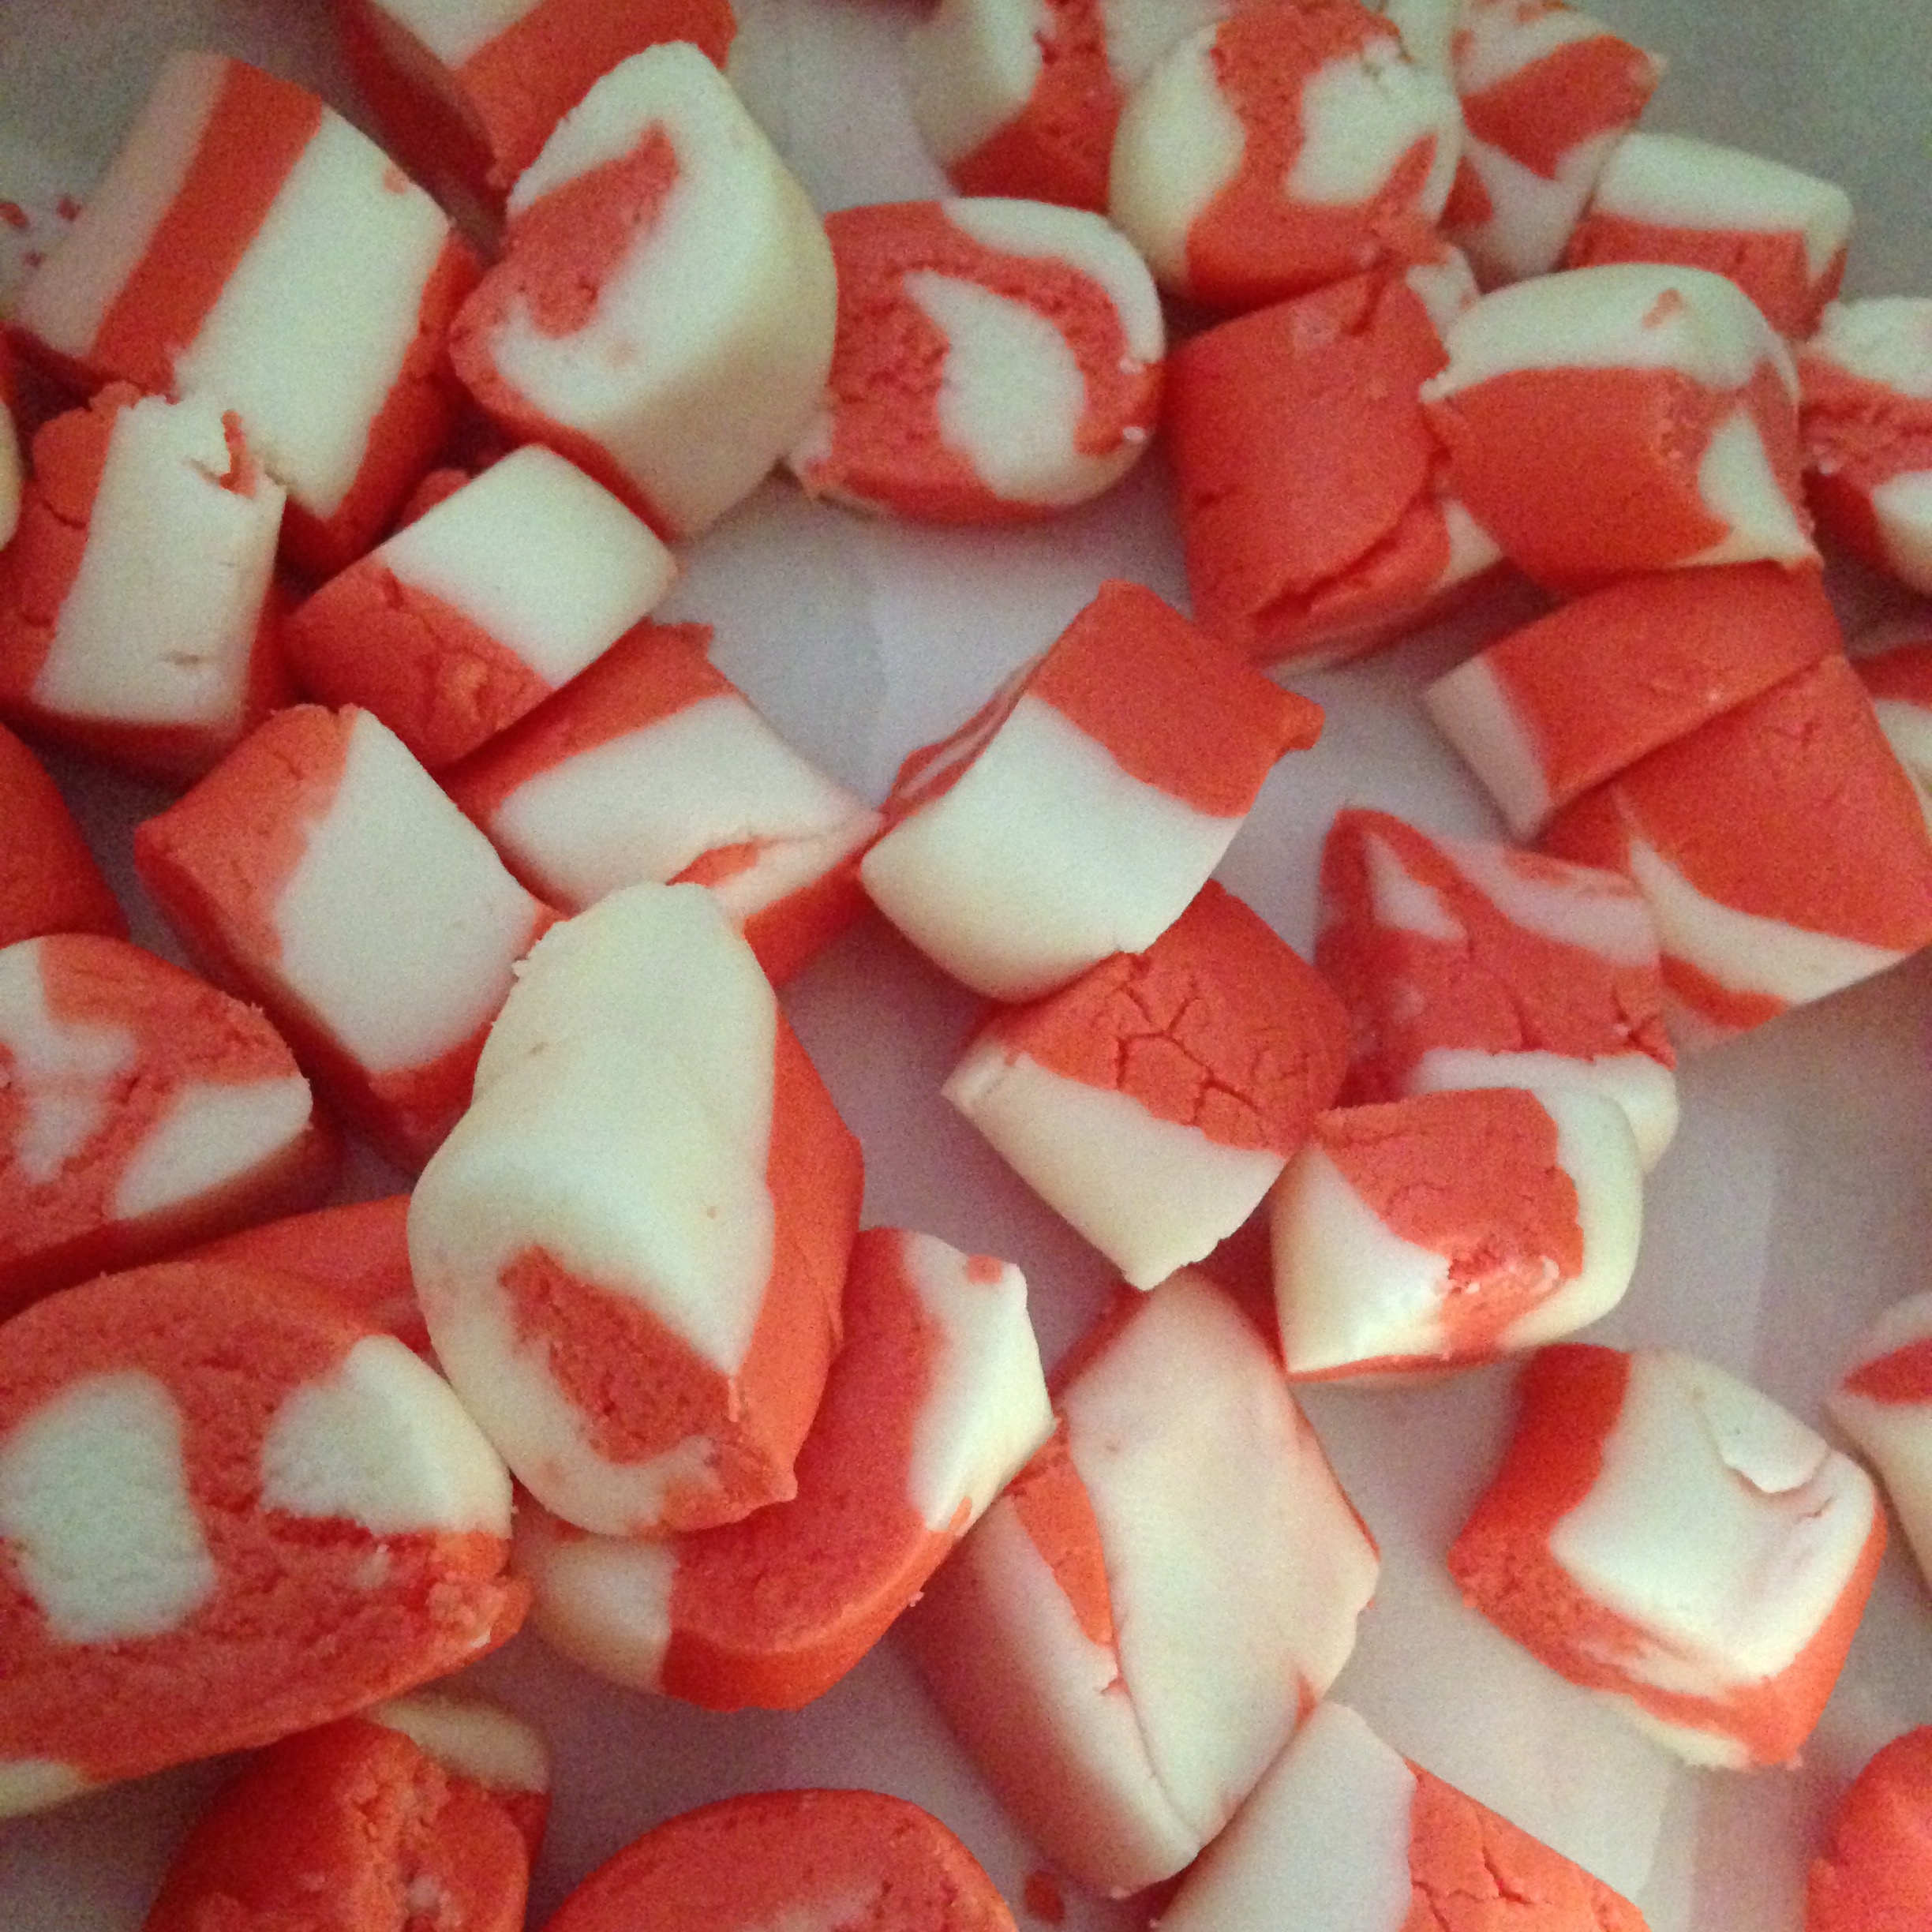
I did something else different this year and wrapped one half of the dough in the other half, hoping for a two-toned effect. Seems to have worked.
I once watched a show on how they made candy canes. It was something similar.
Slice and dice.
A great, minty, no bake treat!
—
Butter Mints
Ingredients:
1/2 cup butter, softened
3-3/4 cups confectioners’ sugar
1 tablespoon half-and-half cream or milk
1 teaspoon vanilla extract
1/4 teaspoon peppermint extract
Red and green paste or liquid food coloring, optional
Directions
In a large bowl, beat the butter, confectioners’ sugar, cream and
extracts. If desired, divide dough into portions and knead in food
coloring.
Form into balls by teaspoonfuls; flatten into patties, or roll
between two pieces of waxed paper to 1/8-in. thickness and cut into
desired shapes. Cover and refrigerate for several hours or
overnight. Store in the refrigerator. Yield: about 8 dozen.
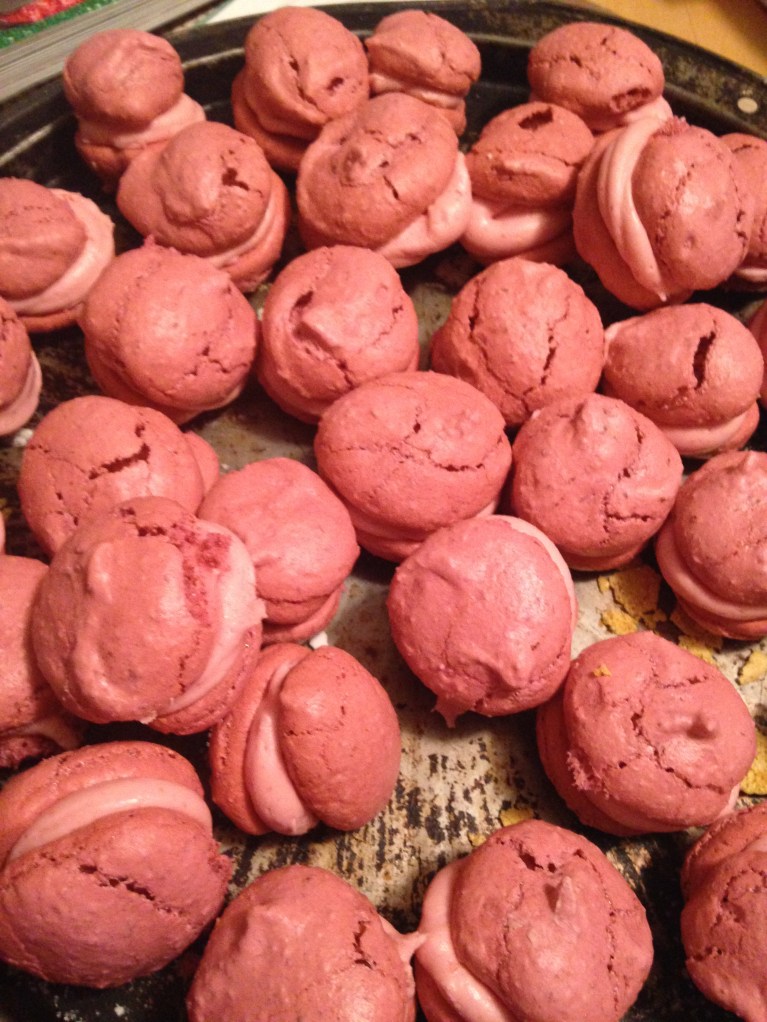
I always want to do a different kind of cookie for 24 straight days. Key word there is “different.” But here’s the thing: I f-ing love macarons. Like, it should be illegal how much I love them. Like, it may be a felony in 48 states.
I made macarons again, with the same general recipe for the cookie, except I added a whole ‘lot of pink, blue, red, and burgundy food coloring to come up with a raspberry color.
I have no pictures of this process. If you need a refresher, see December 13’s post.
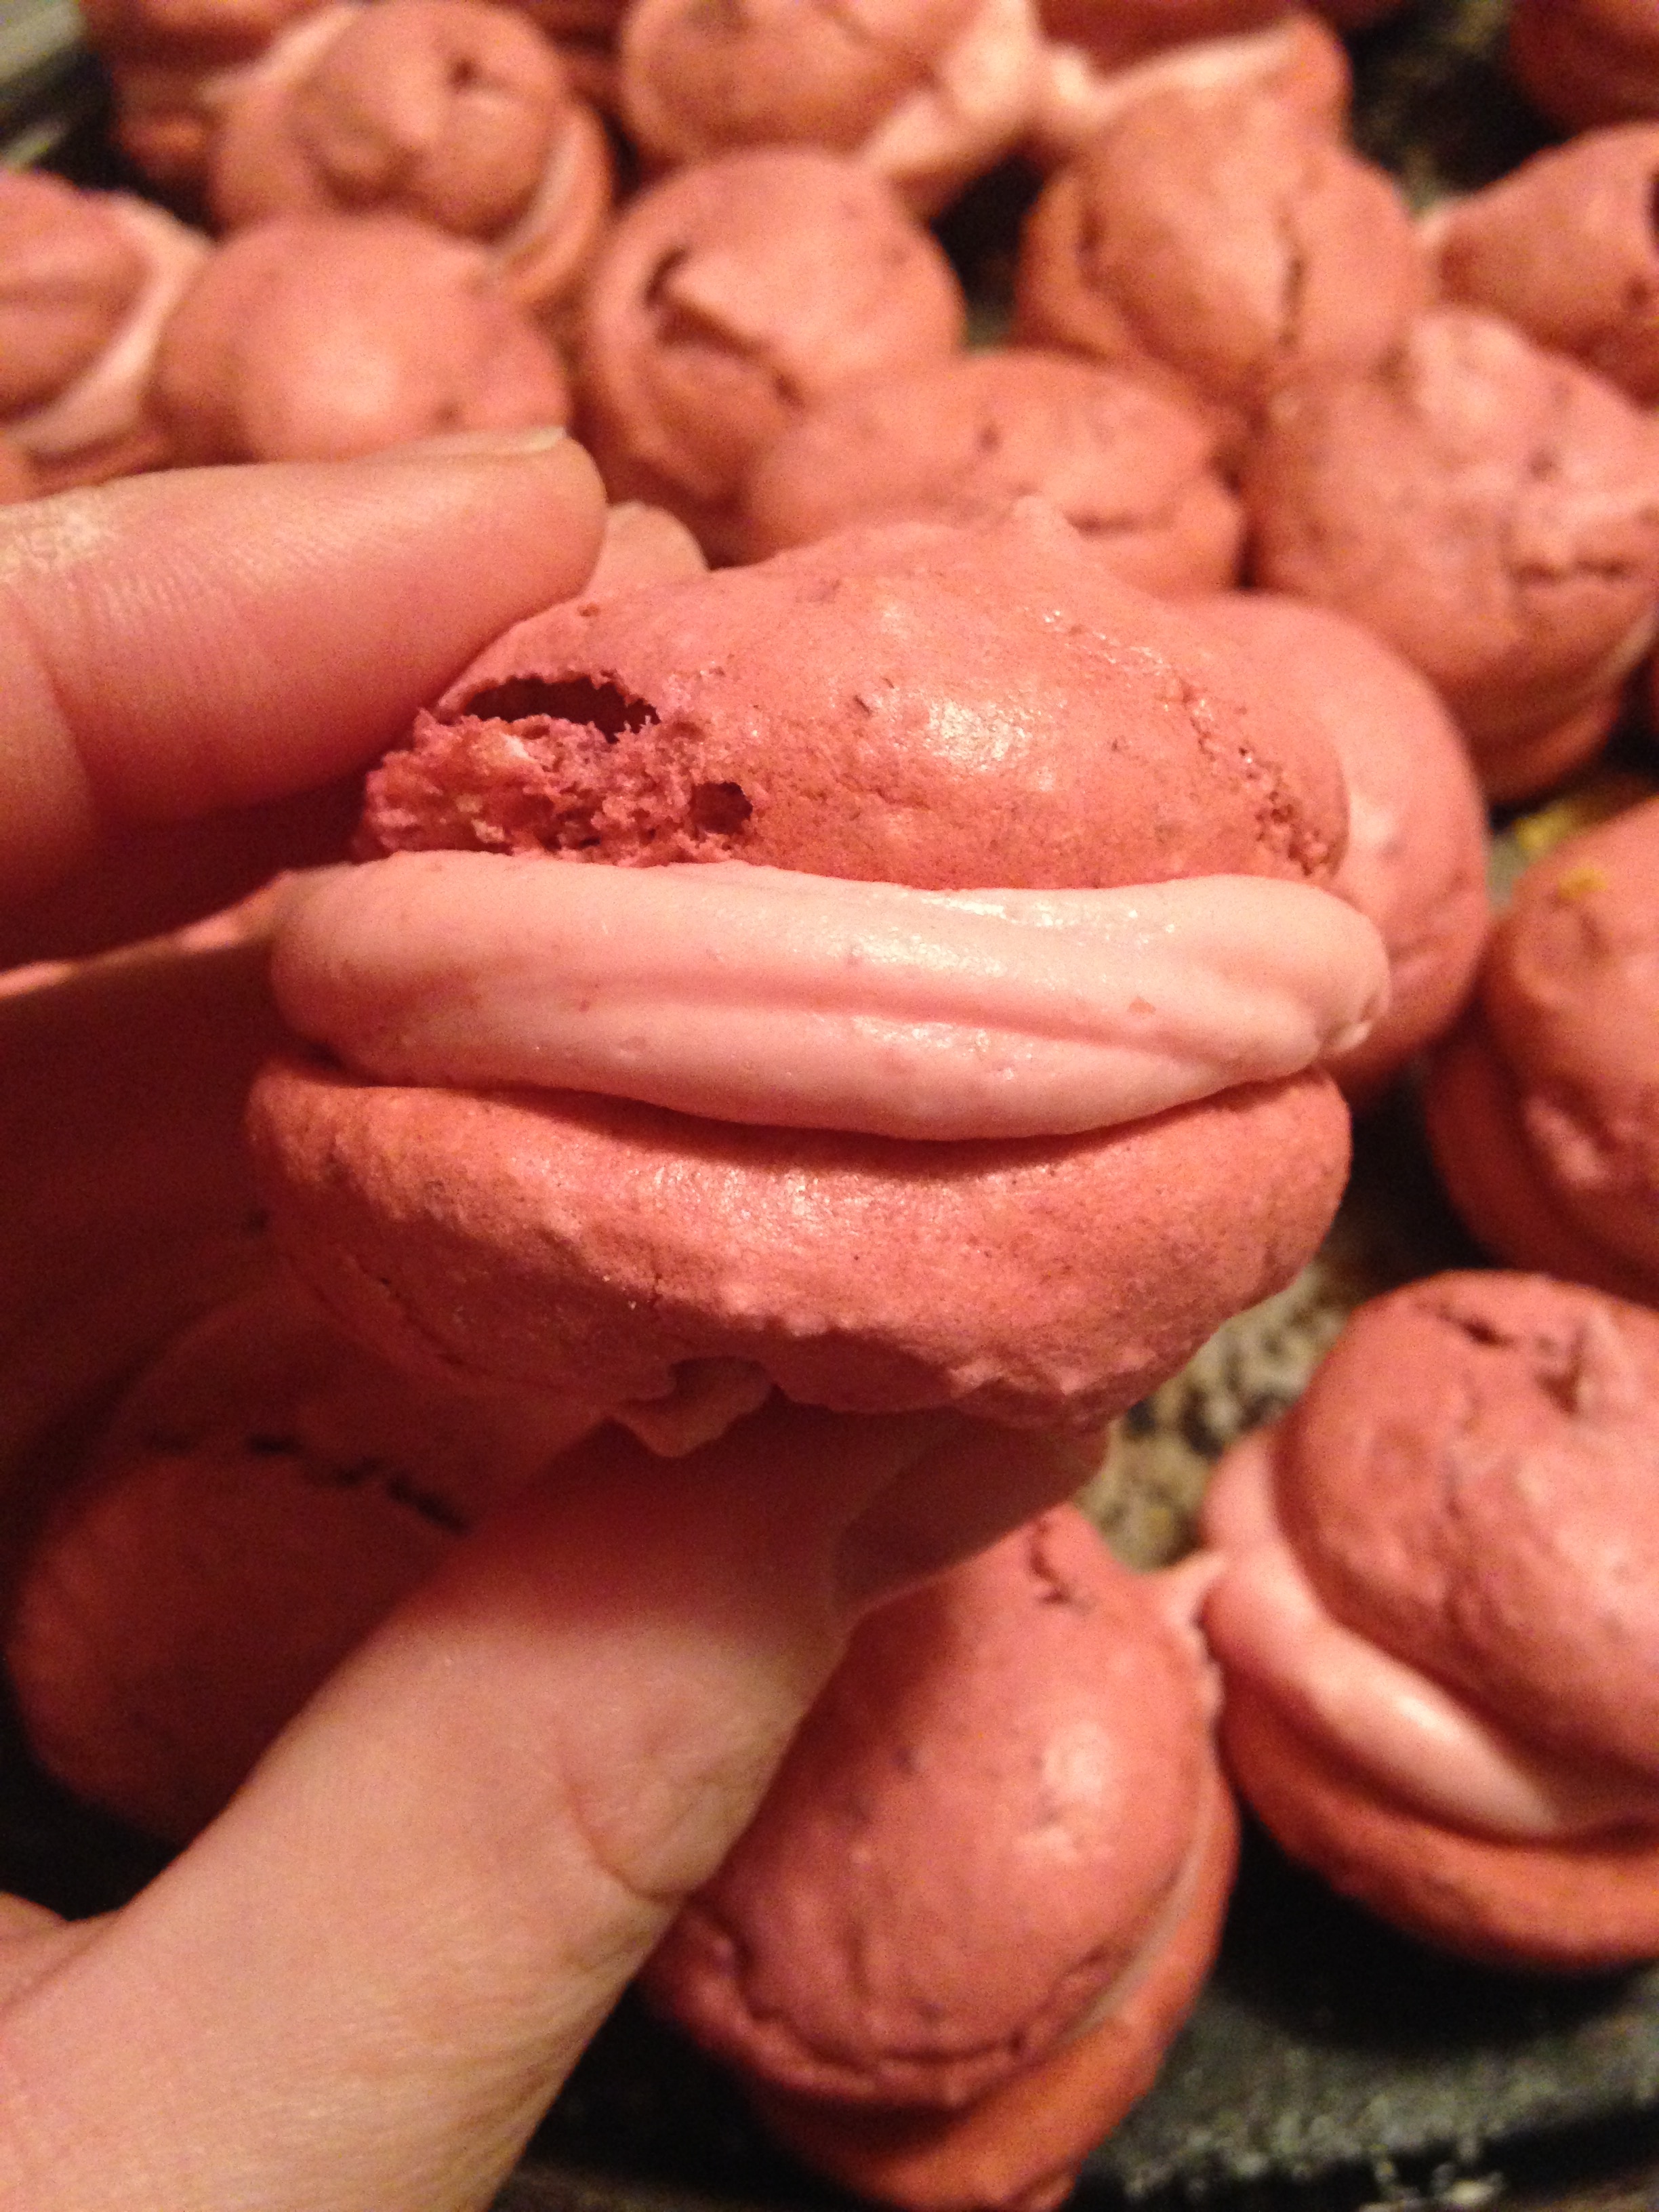
Now the filling was different on this one. I took a cup of raspberries and put them in a saucepan with a little water and about a tablespoon of sugar. I brought it to a boil until my mixture was almost like jelly. I let it cool a little and instead of straining the seeds out, I put it in the blender and pureed the s-t out of it.
In Old Trusty, I put in 1/4 c butter and whipped it up, then added some powdered sugar and the raspberry mixture. I mixed that up too. And then added more powdered sugar. And more. And more. It took a lot this time to get it to the right consistency–almost 3/4 of a bag.
Went through the same process with the cookies as before, and when I was done, the patron saint of raspberry macaron’s blessed me with a good batch of cookies.
A year ago, Disgruntled Husband and I spent three days in New York City, which was about as wonderful and magnificent as I ever imagined it would be. At the bakery across from where they film the Today Show, I bought some macarons, which were bright and pricey. Oh Sweet Lord, they were about the best thing I’ve ever eaten.
Fast forward to this November, where I had a hankering for said cookie. I tried to make them, and while they tasted like a macaron, they certainly didn’t look like it. I was determined to try again.
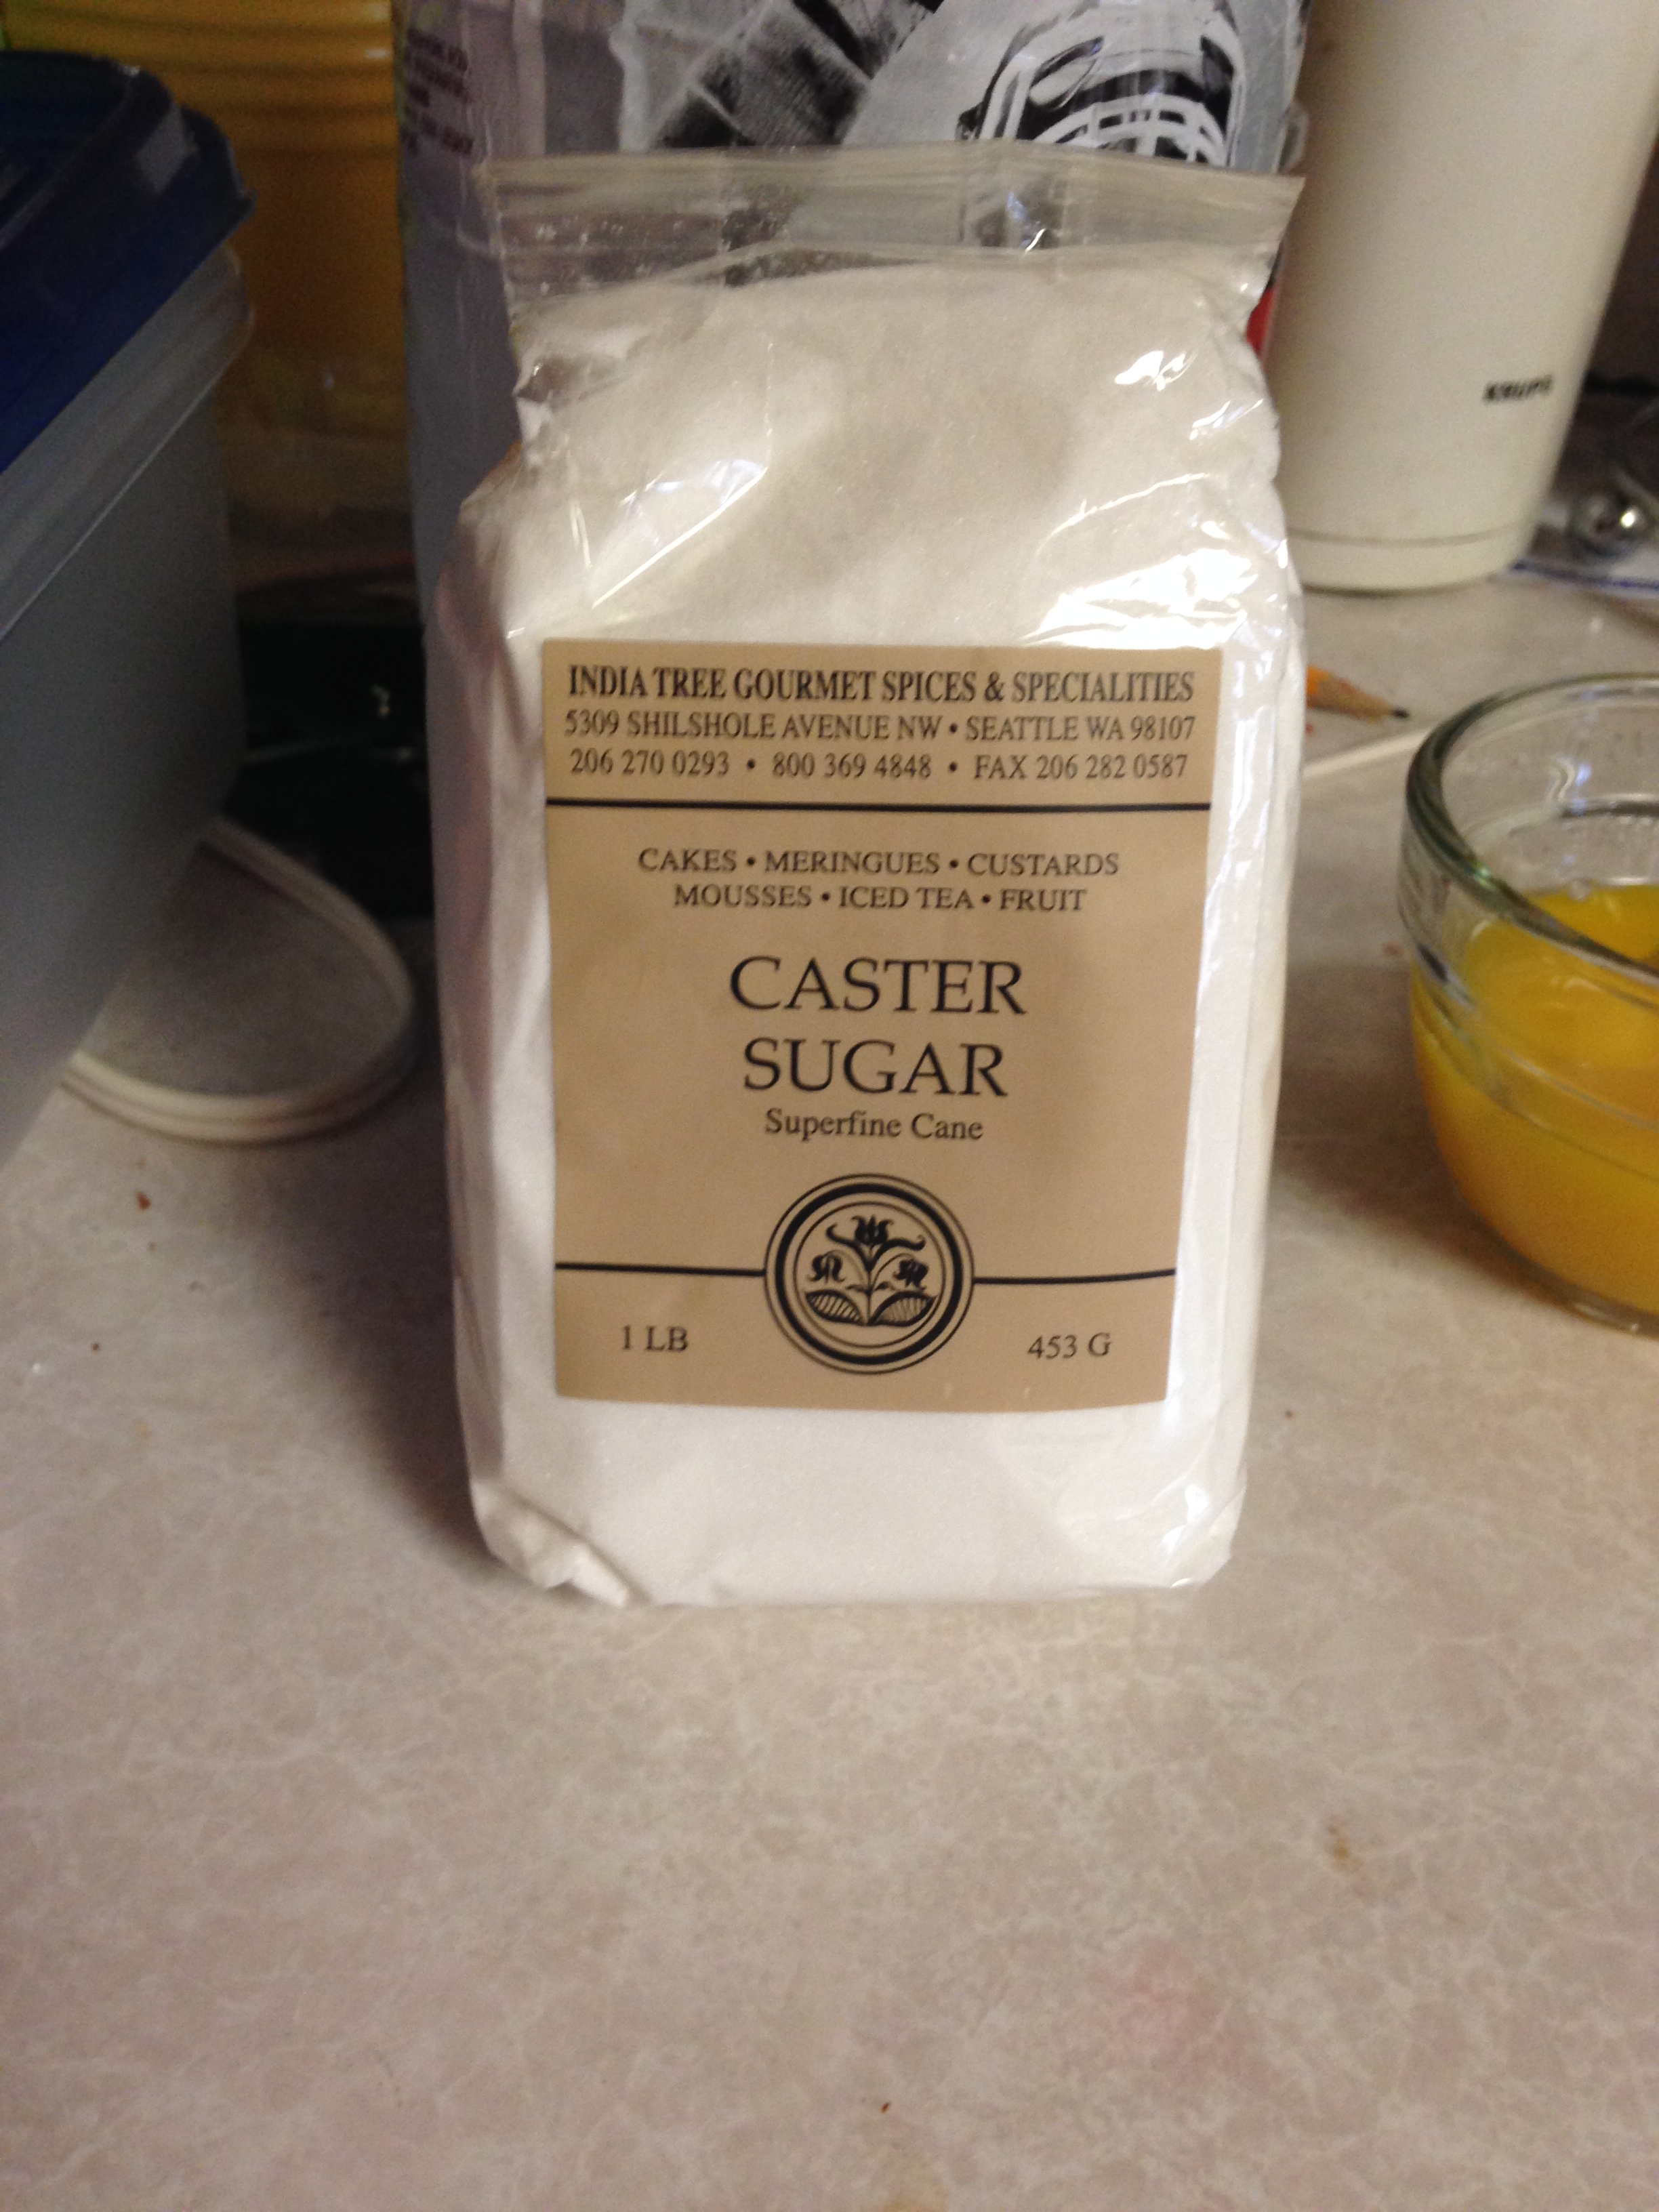
Thanks to an Amazon Prime account, I obtained caster sugar, almond meal, and a macaron silicone pan liner (more on that disappointment later). Today was the day I decided to give it another shot.
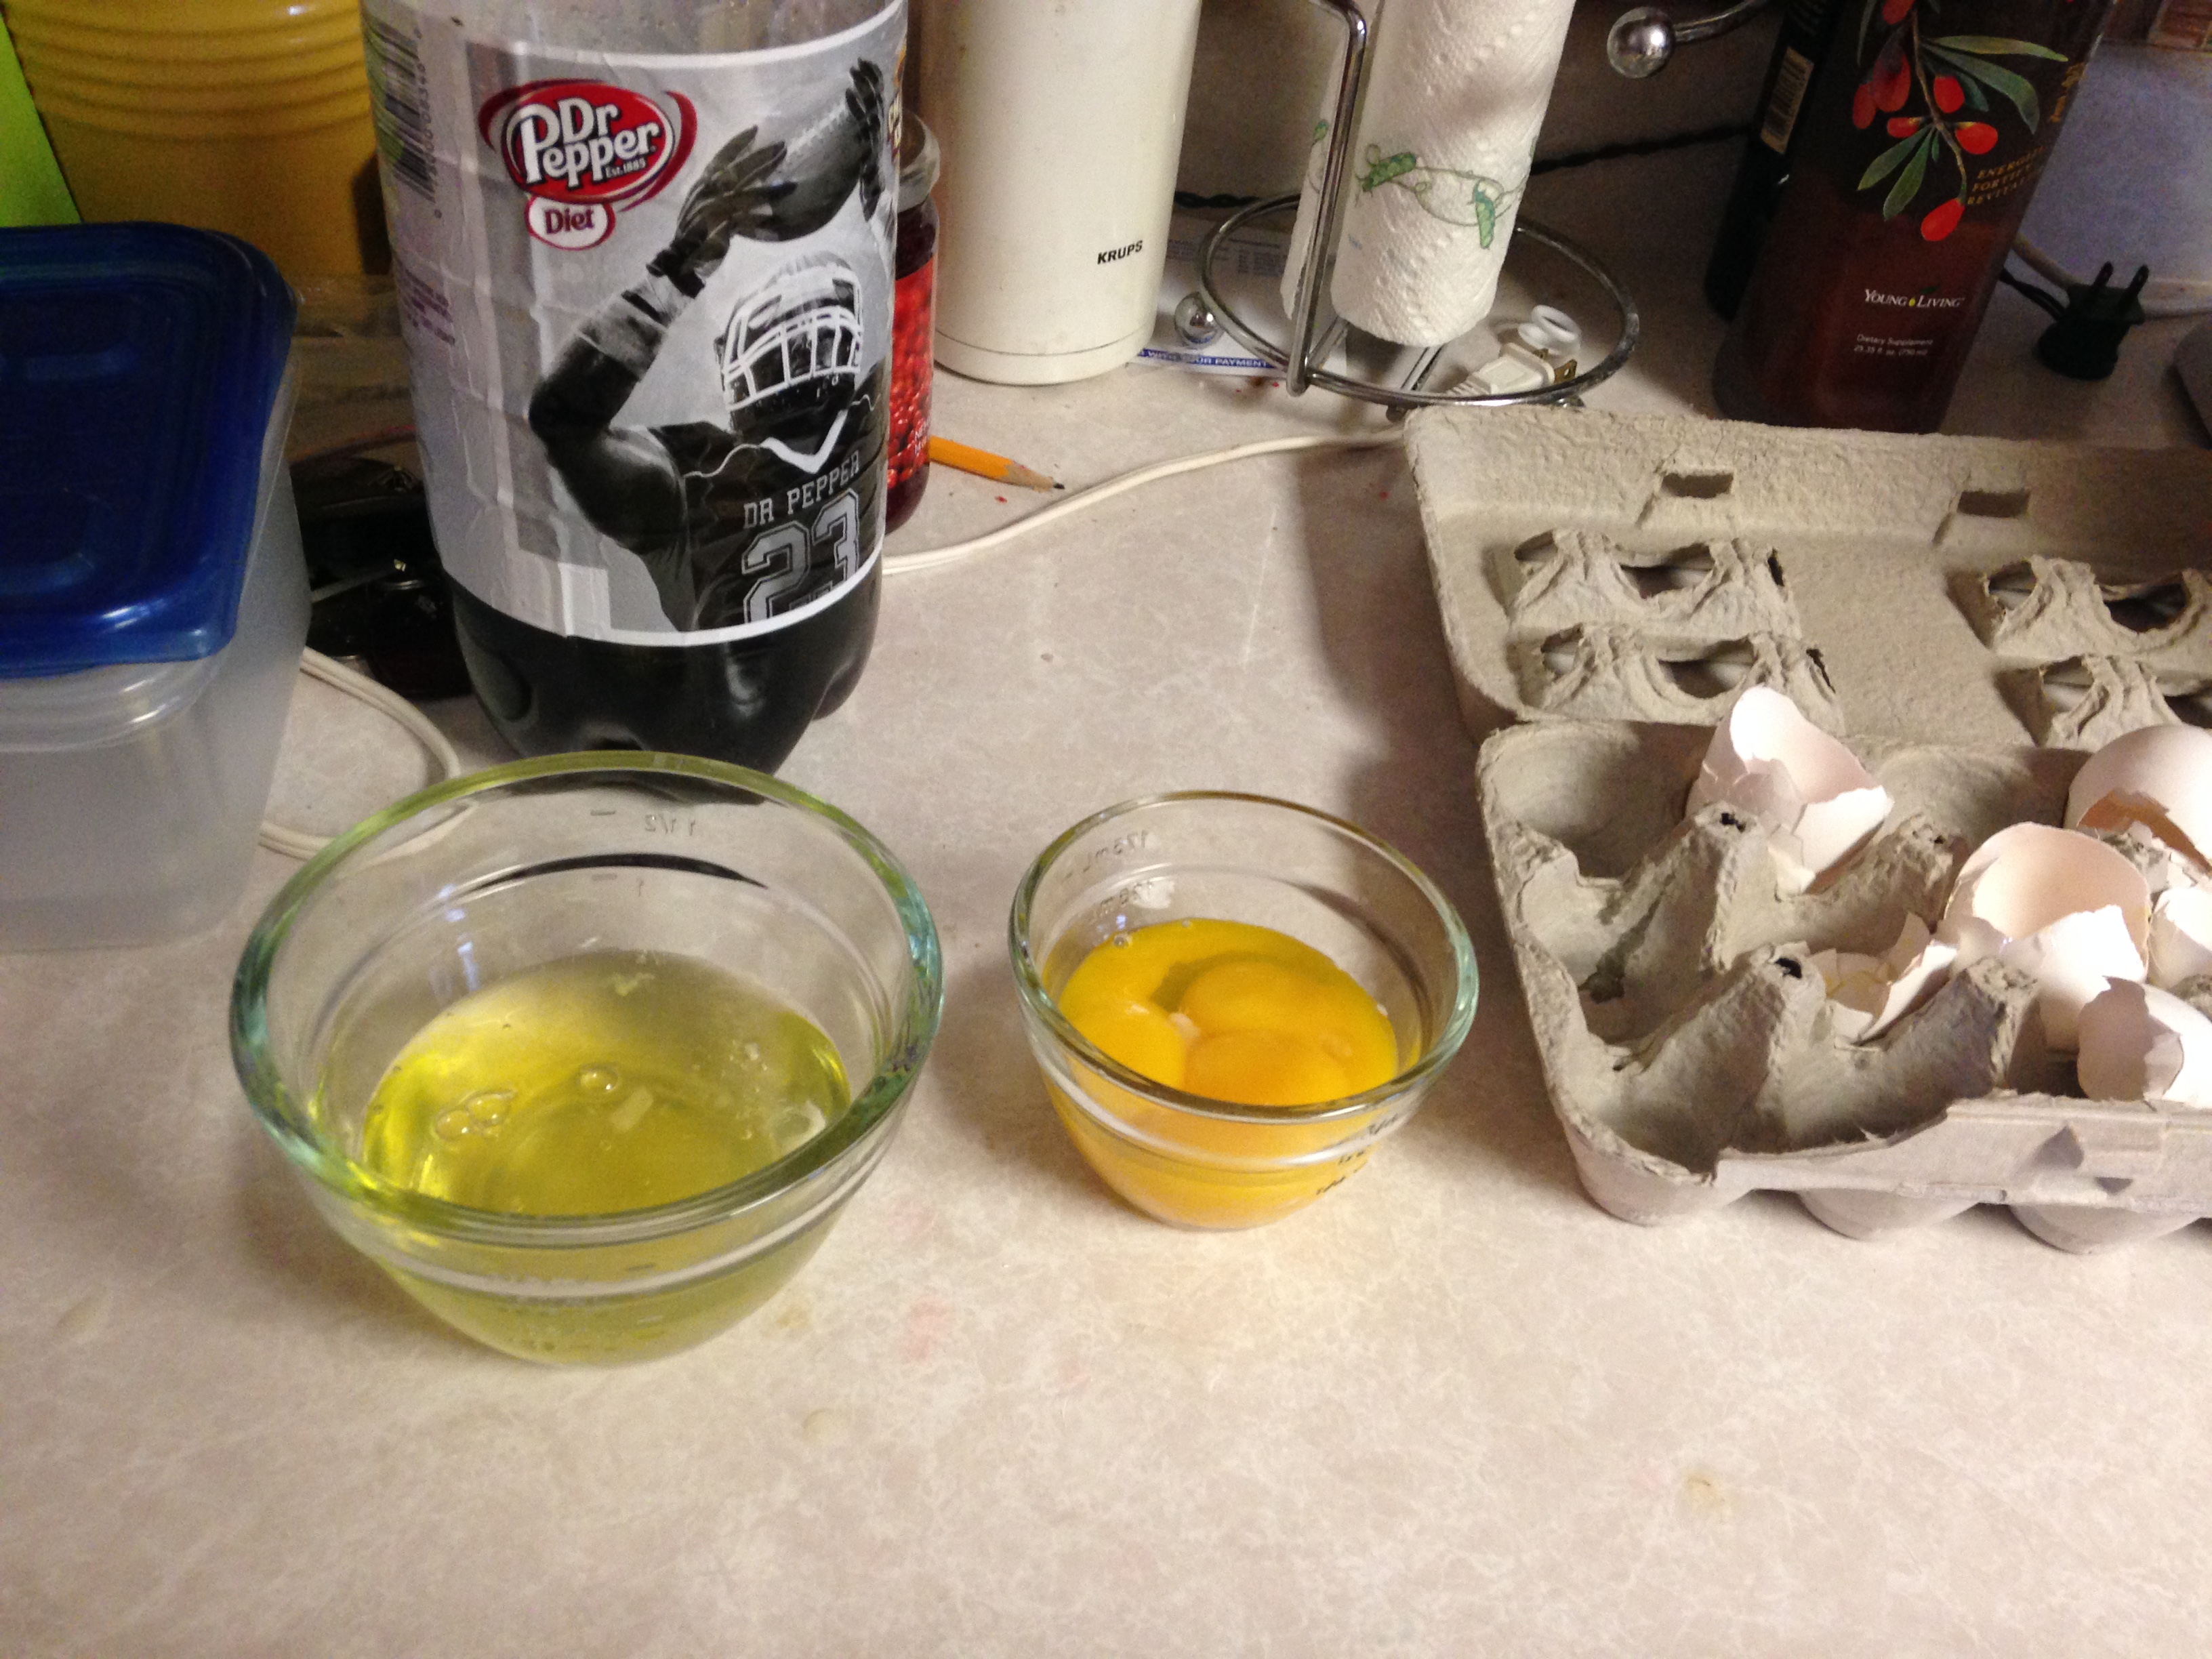
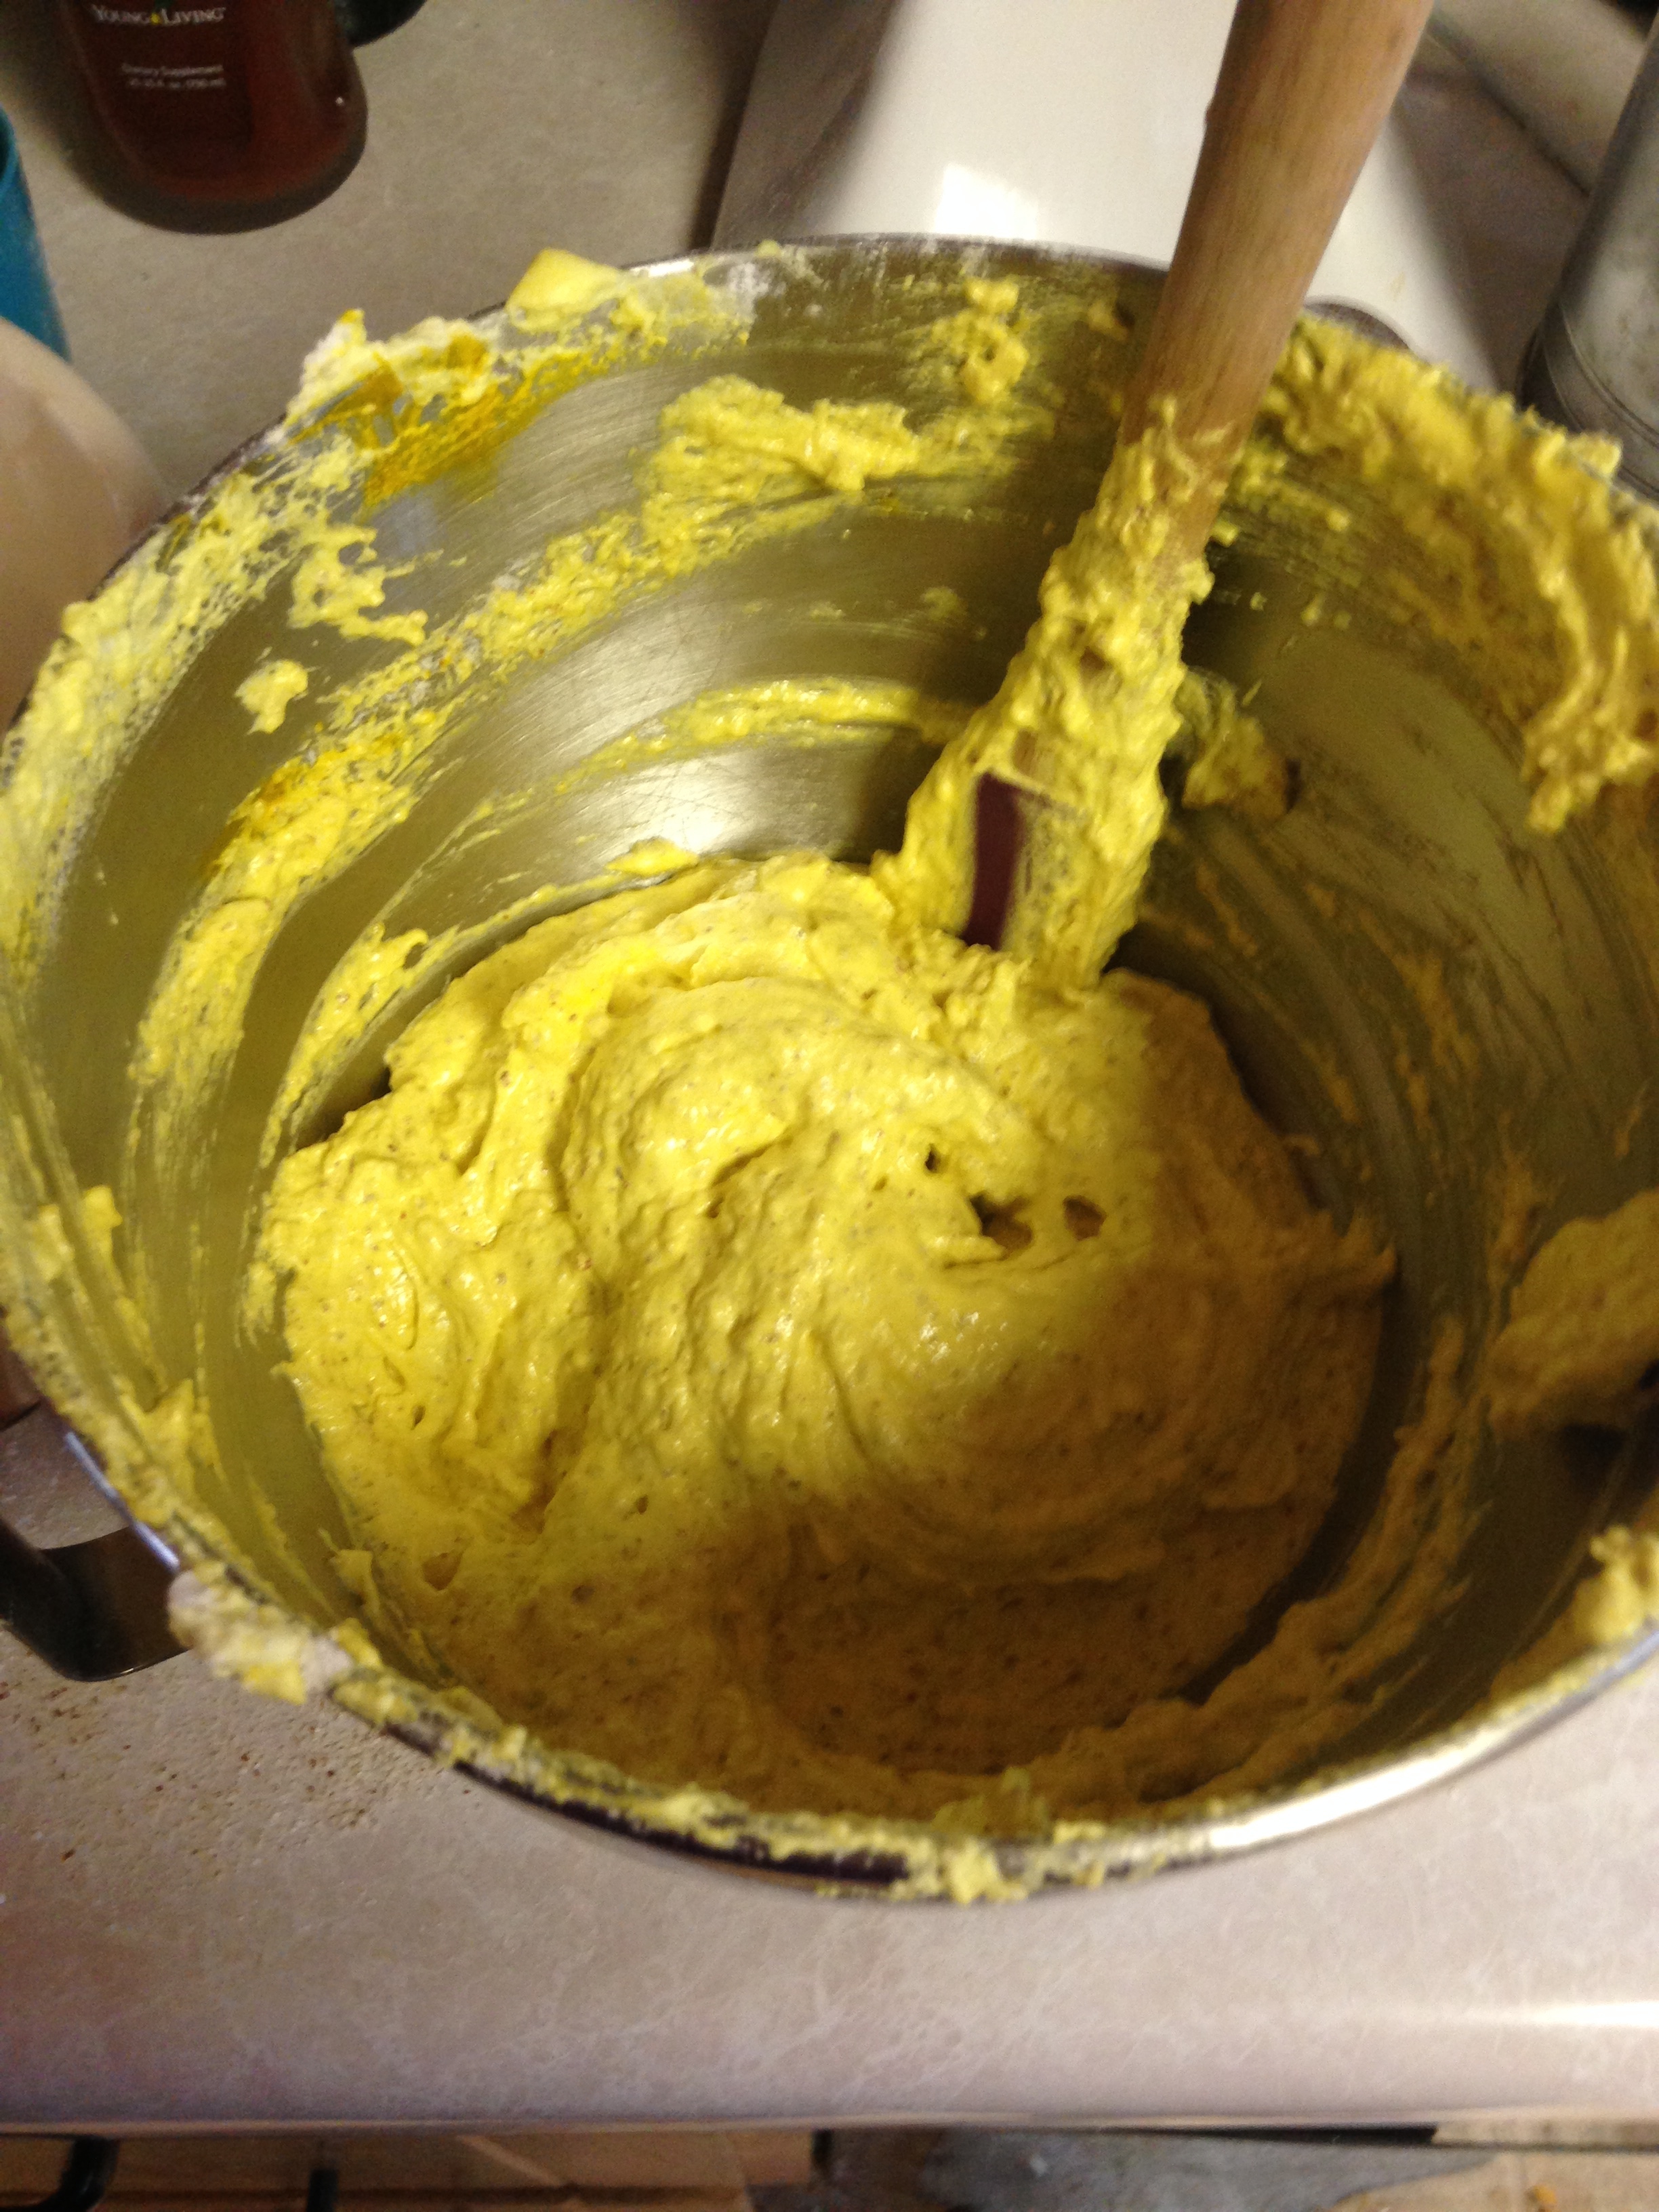
I separated my eggs, keeping the yolks for another recipe I have my eye on. I put four egg whites and the caster sugar inside Old Trusty.
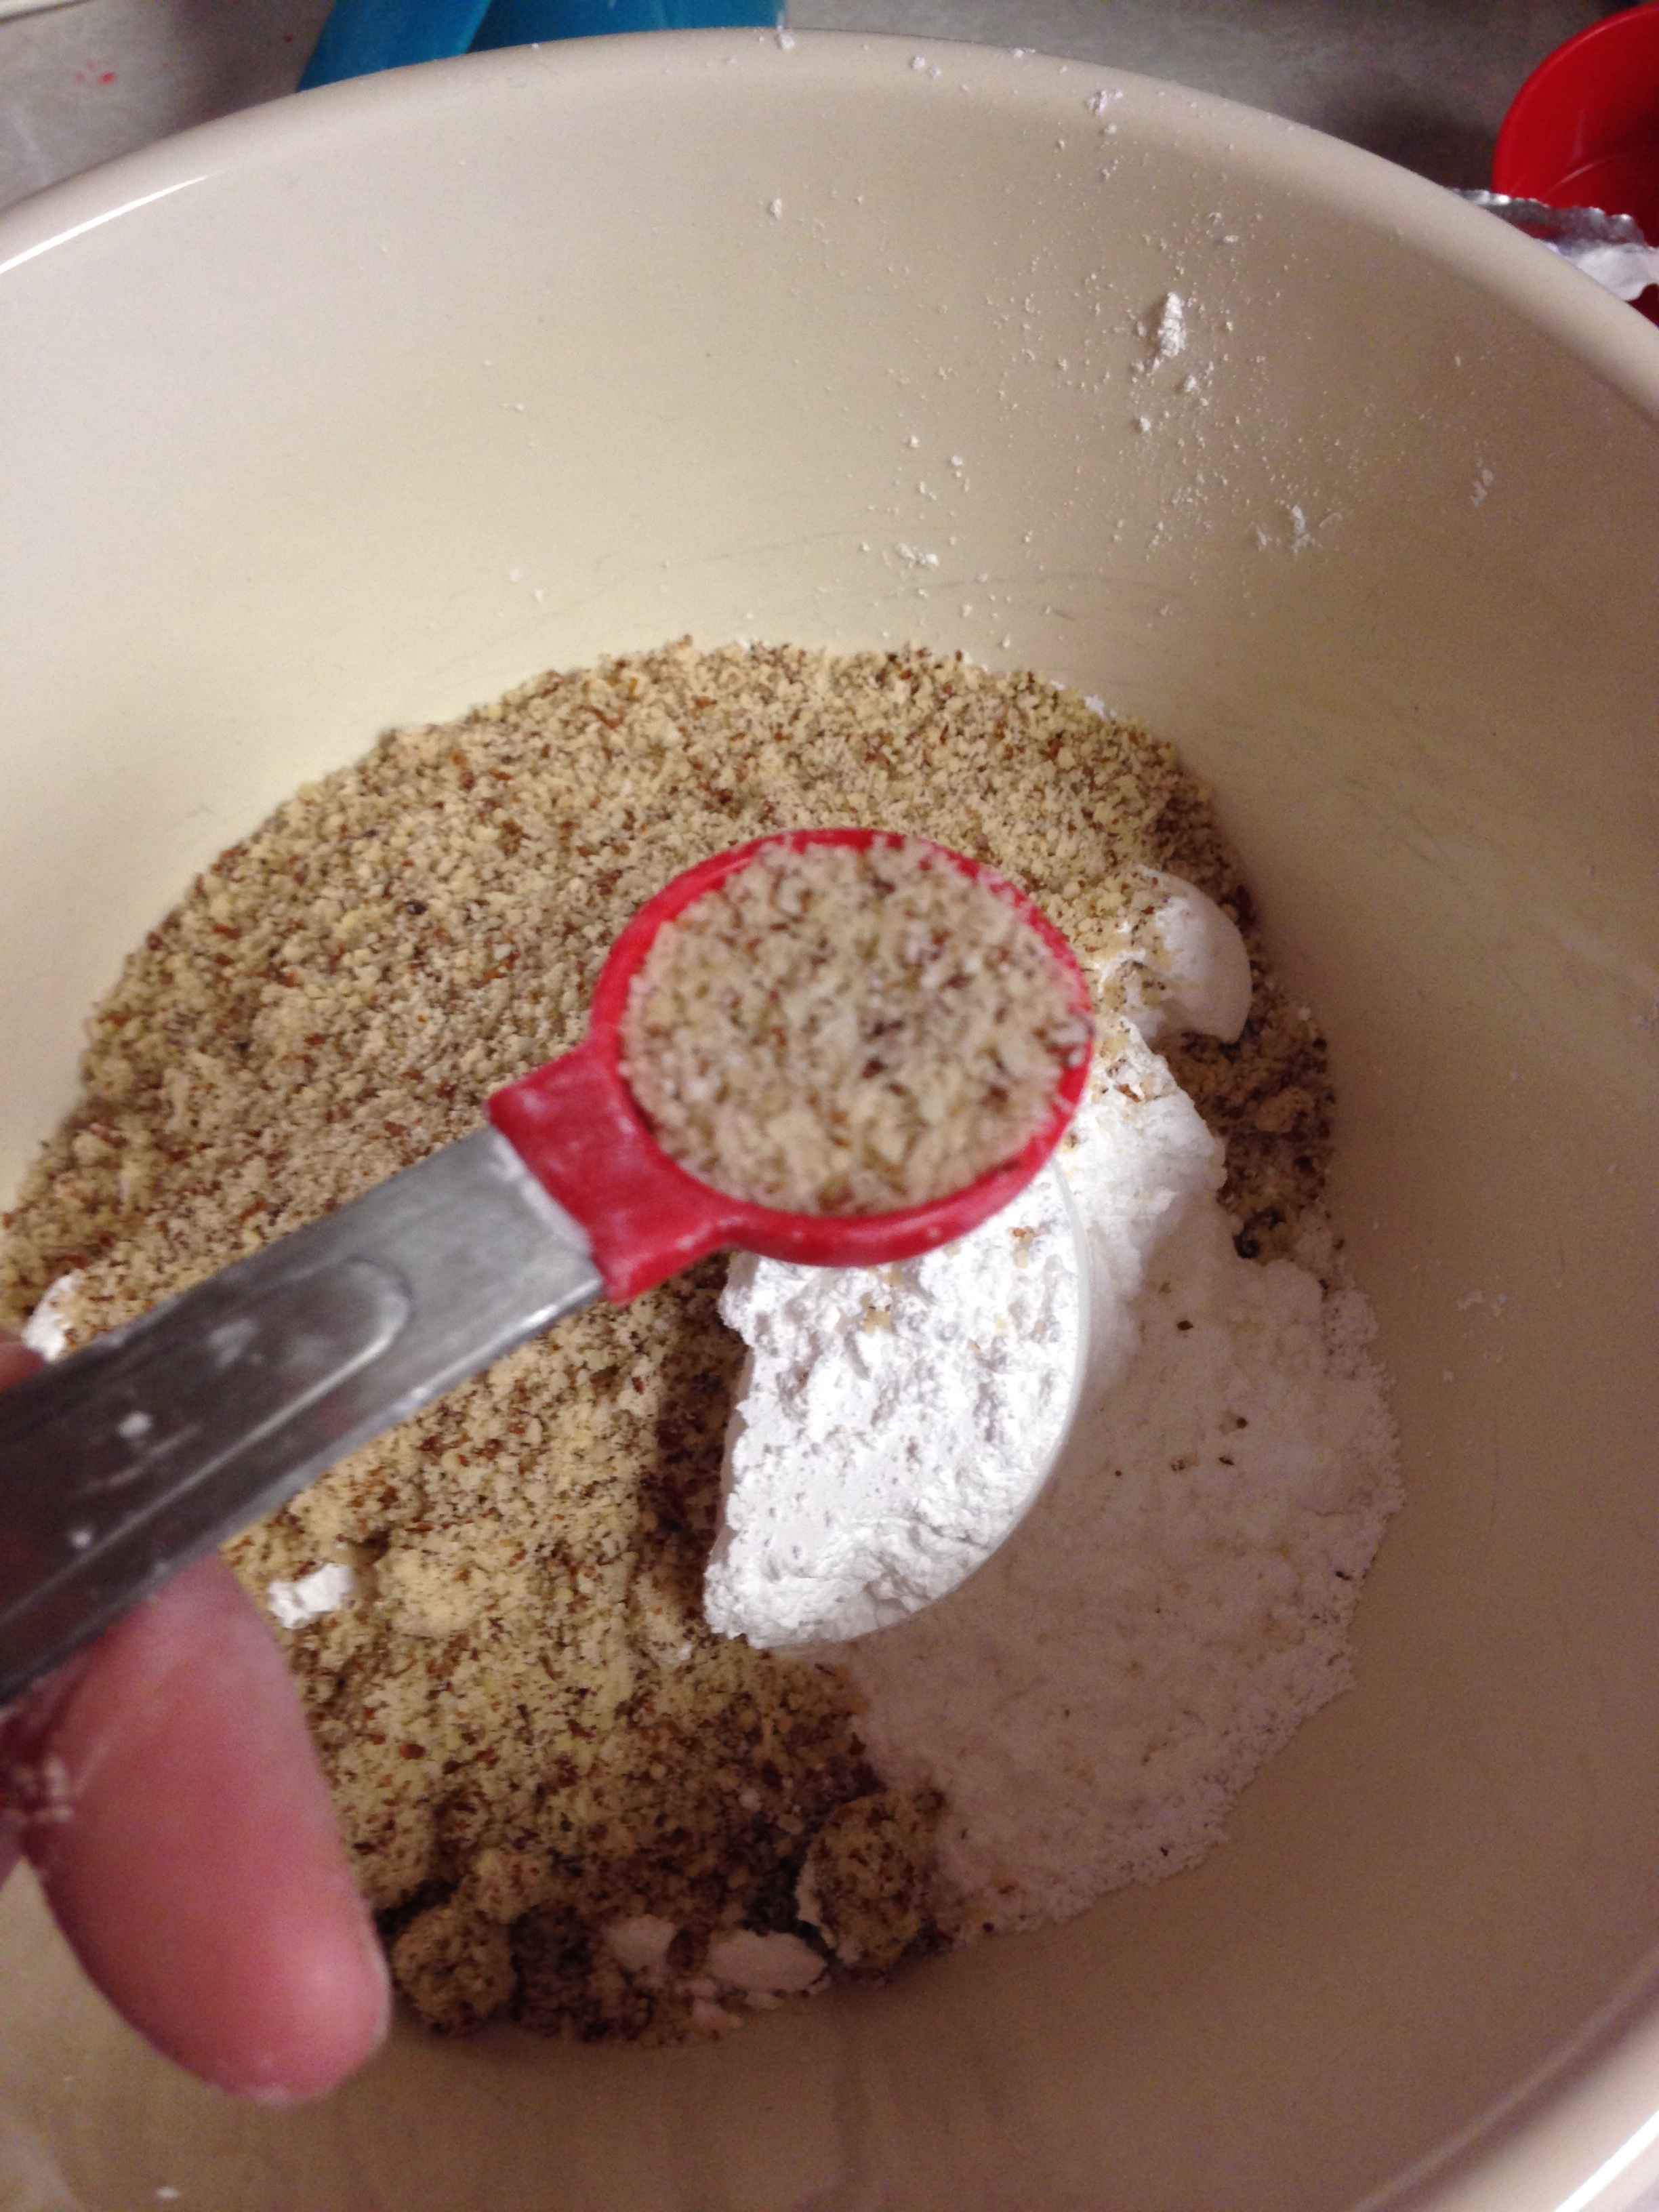
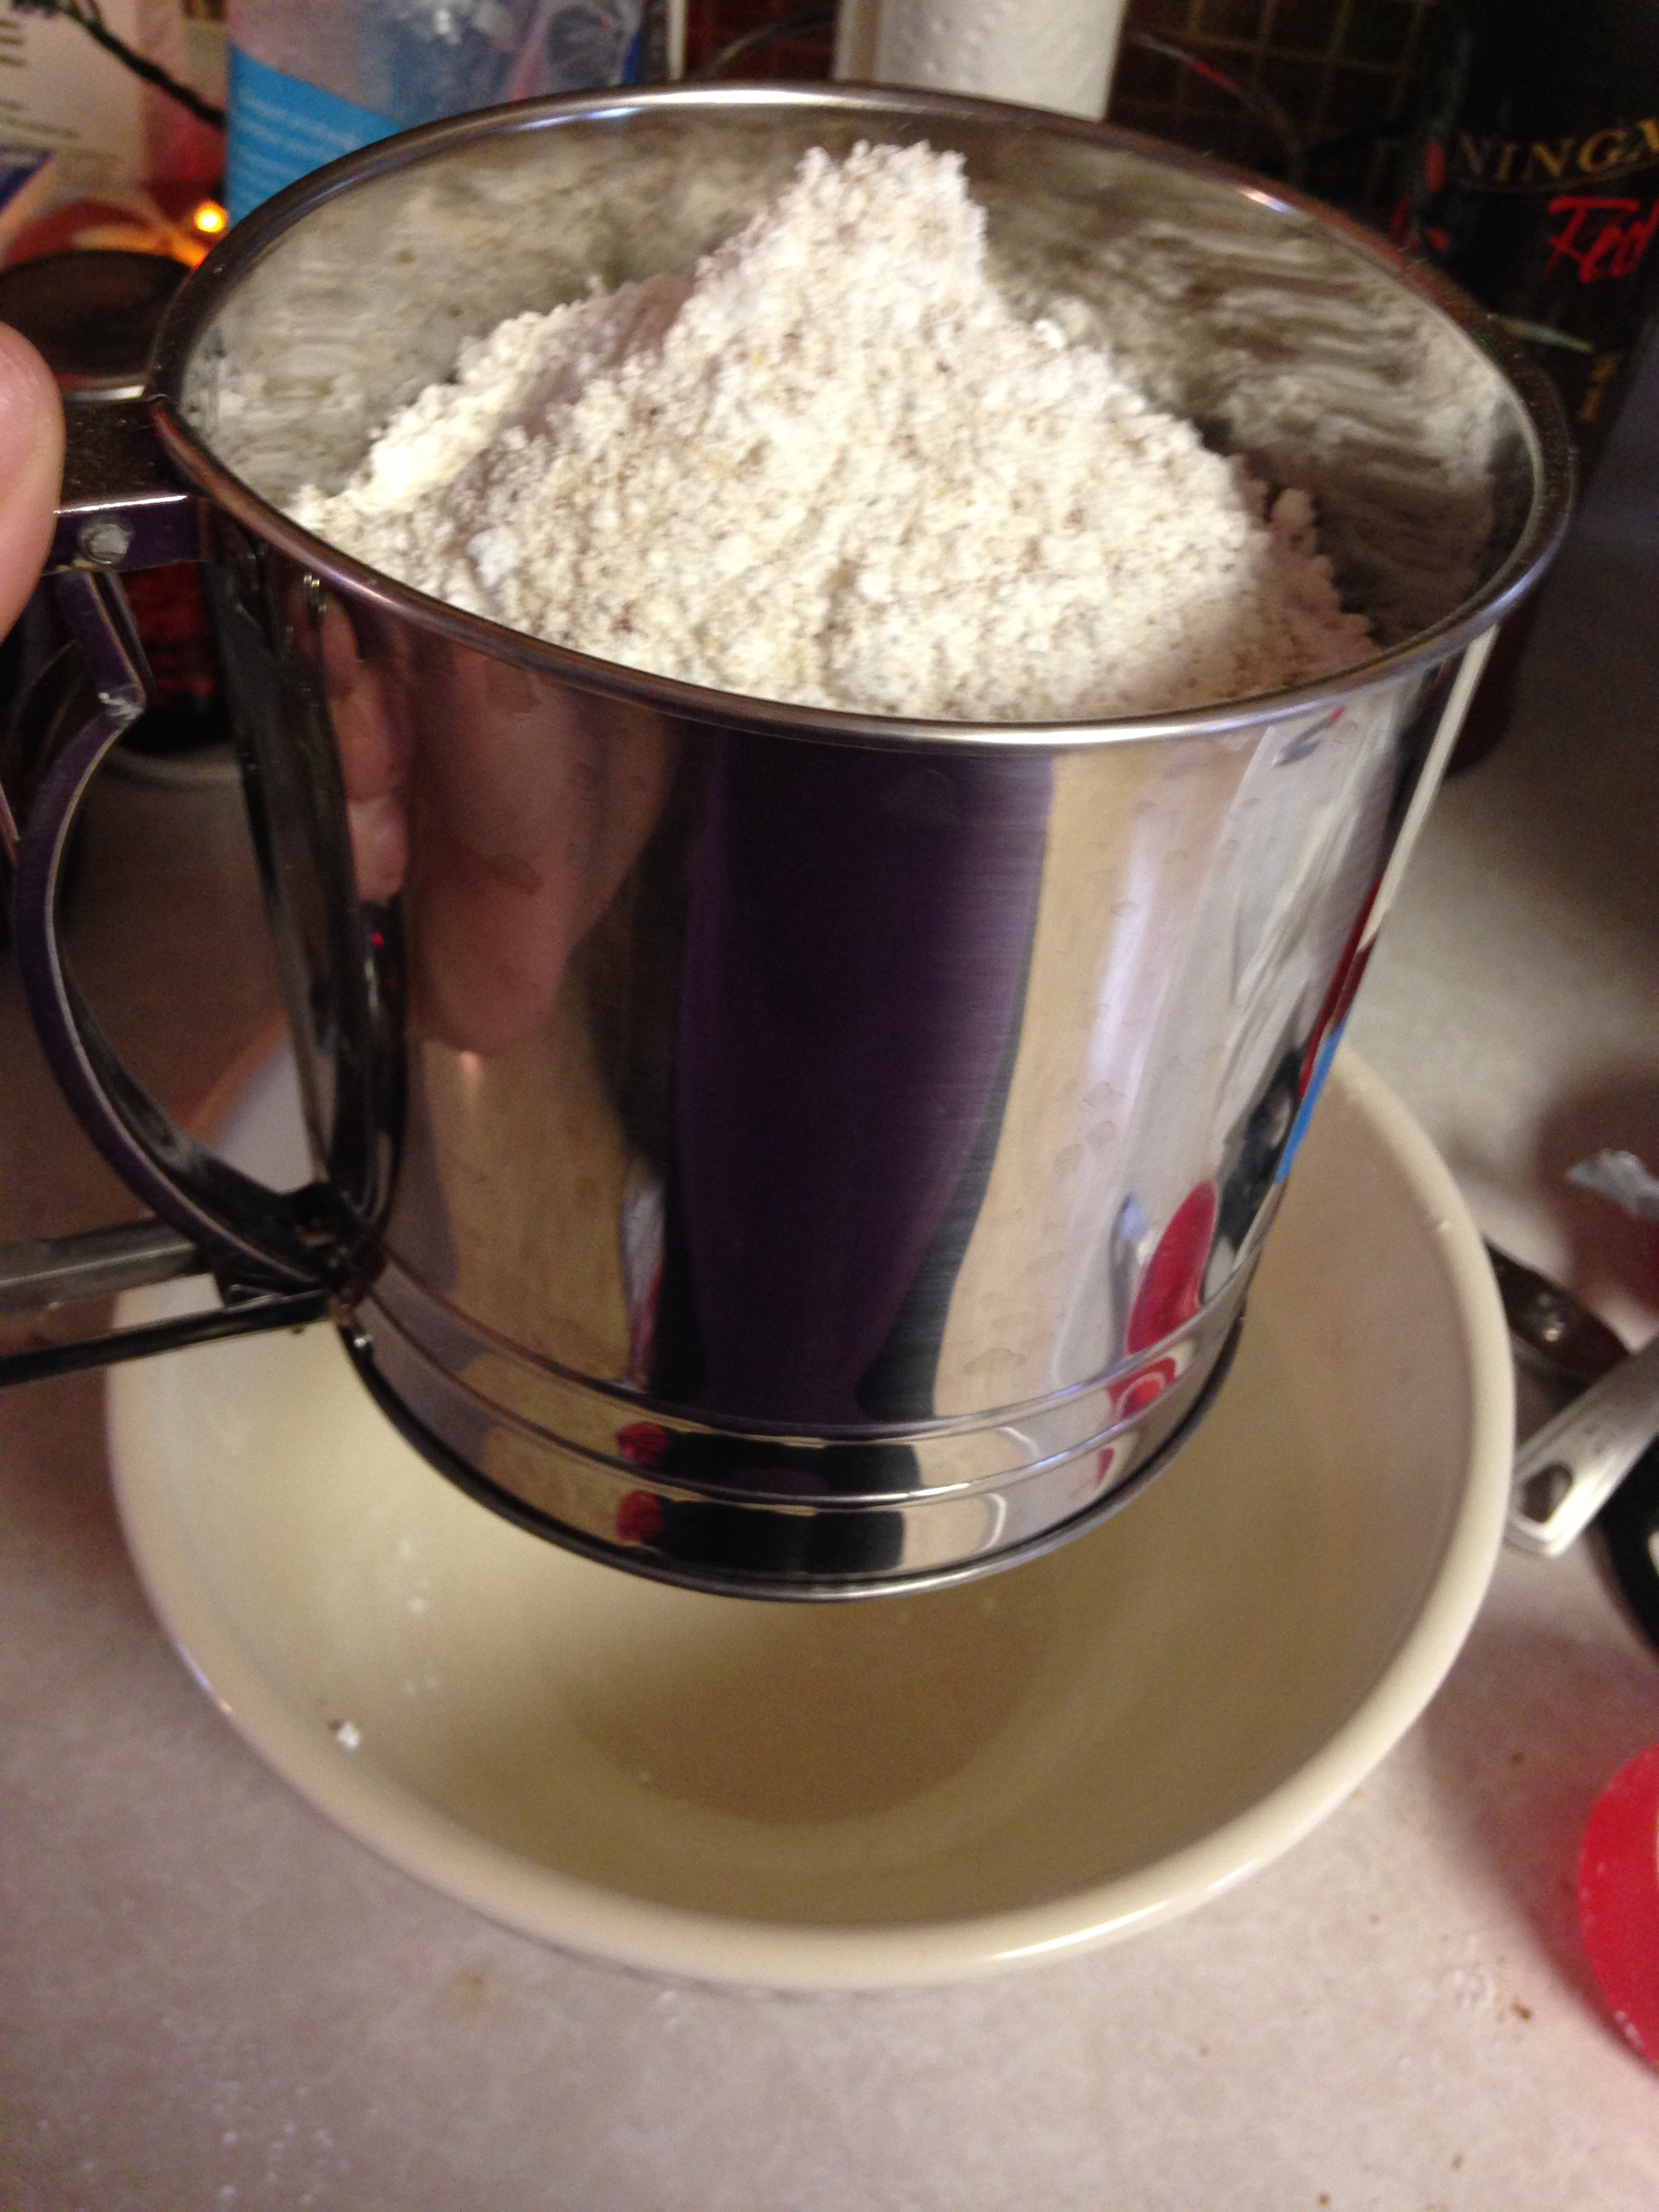
While those whipped up for 10 minutes or so, I got to work on my dry mixture…powdered sugar, almond meal, and salt…sifted twice.
(What this picture doesn’t show is that I had to switch to a metal strainer because the use of my dominant hand would be something I’d like to keep this holiday season. This is a heavy mixture, and I discovered quickly that I couldn’t pull the handle that many times.)
I threw out the big pieces of almond meal that were too big to go through my sifting mechanism.
This video was very helpful in my macaron-making:
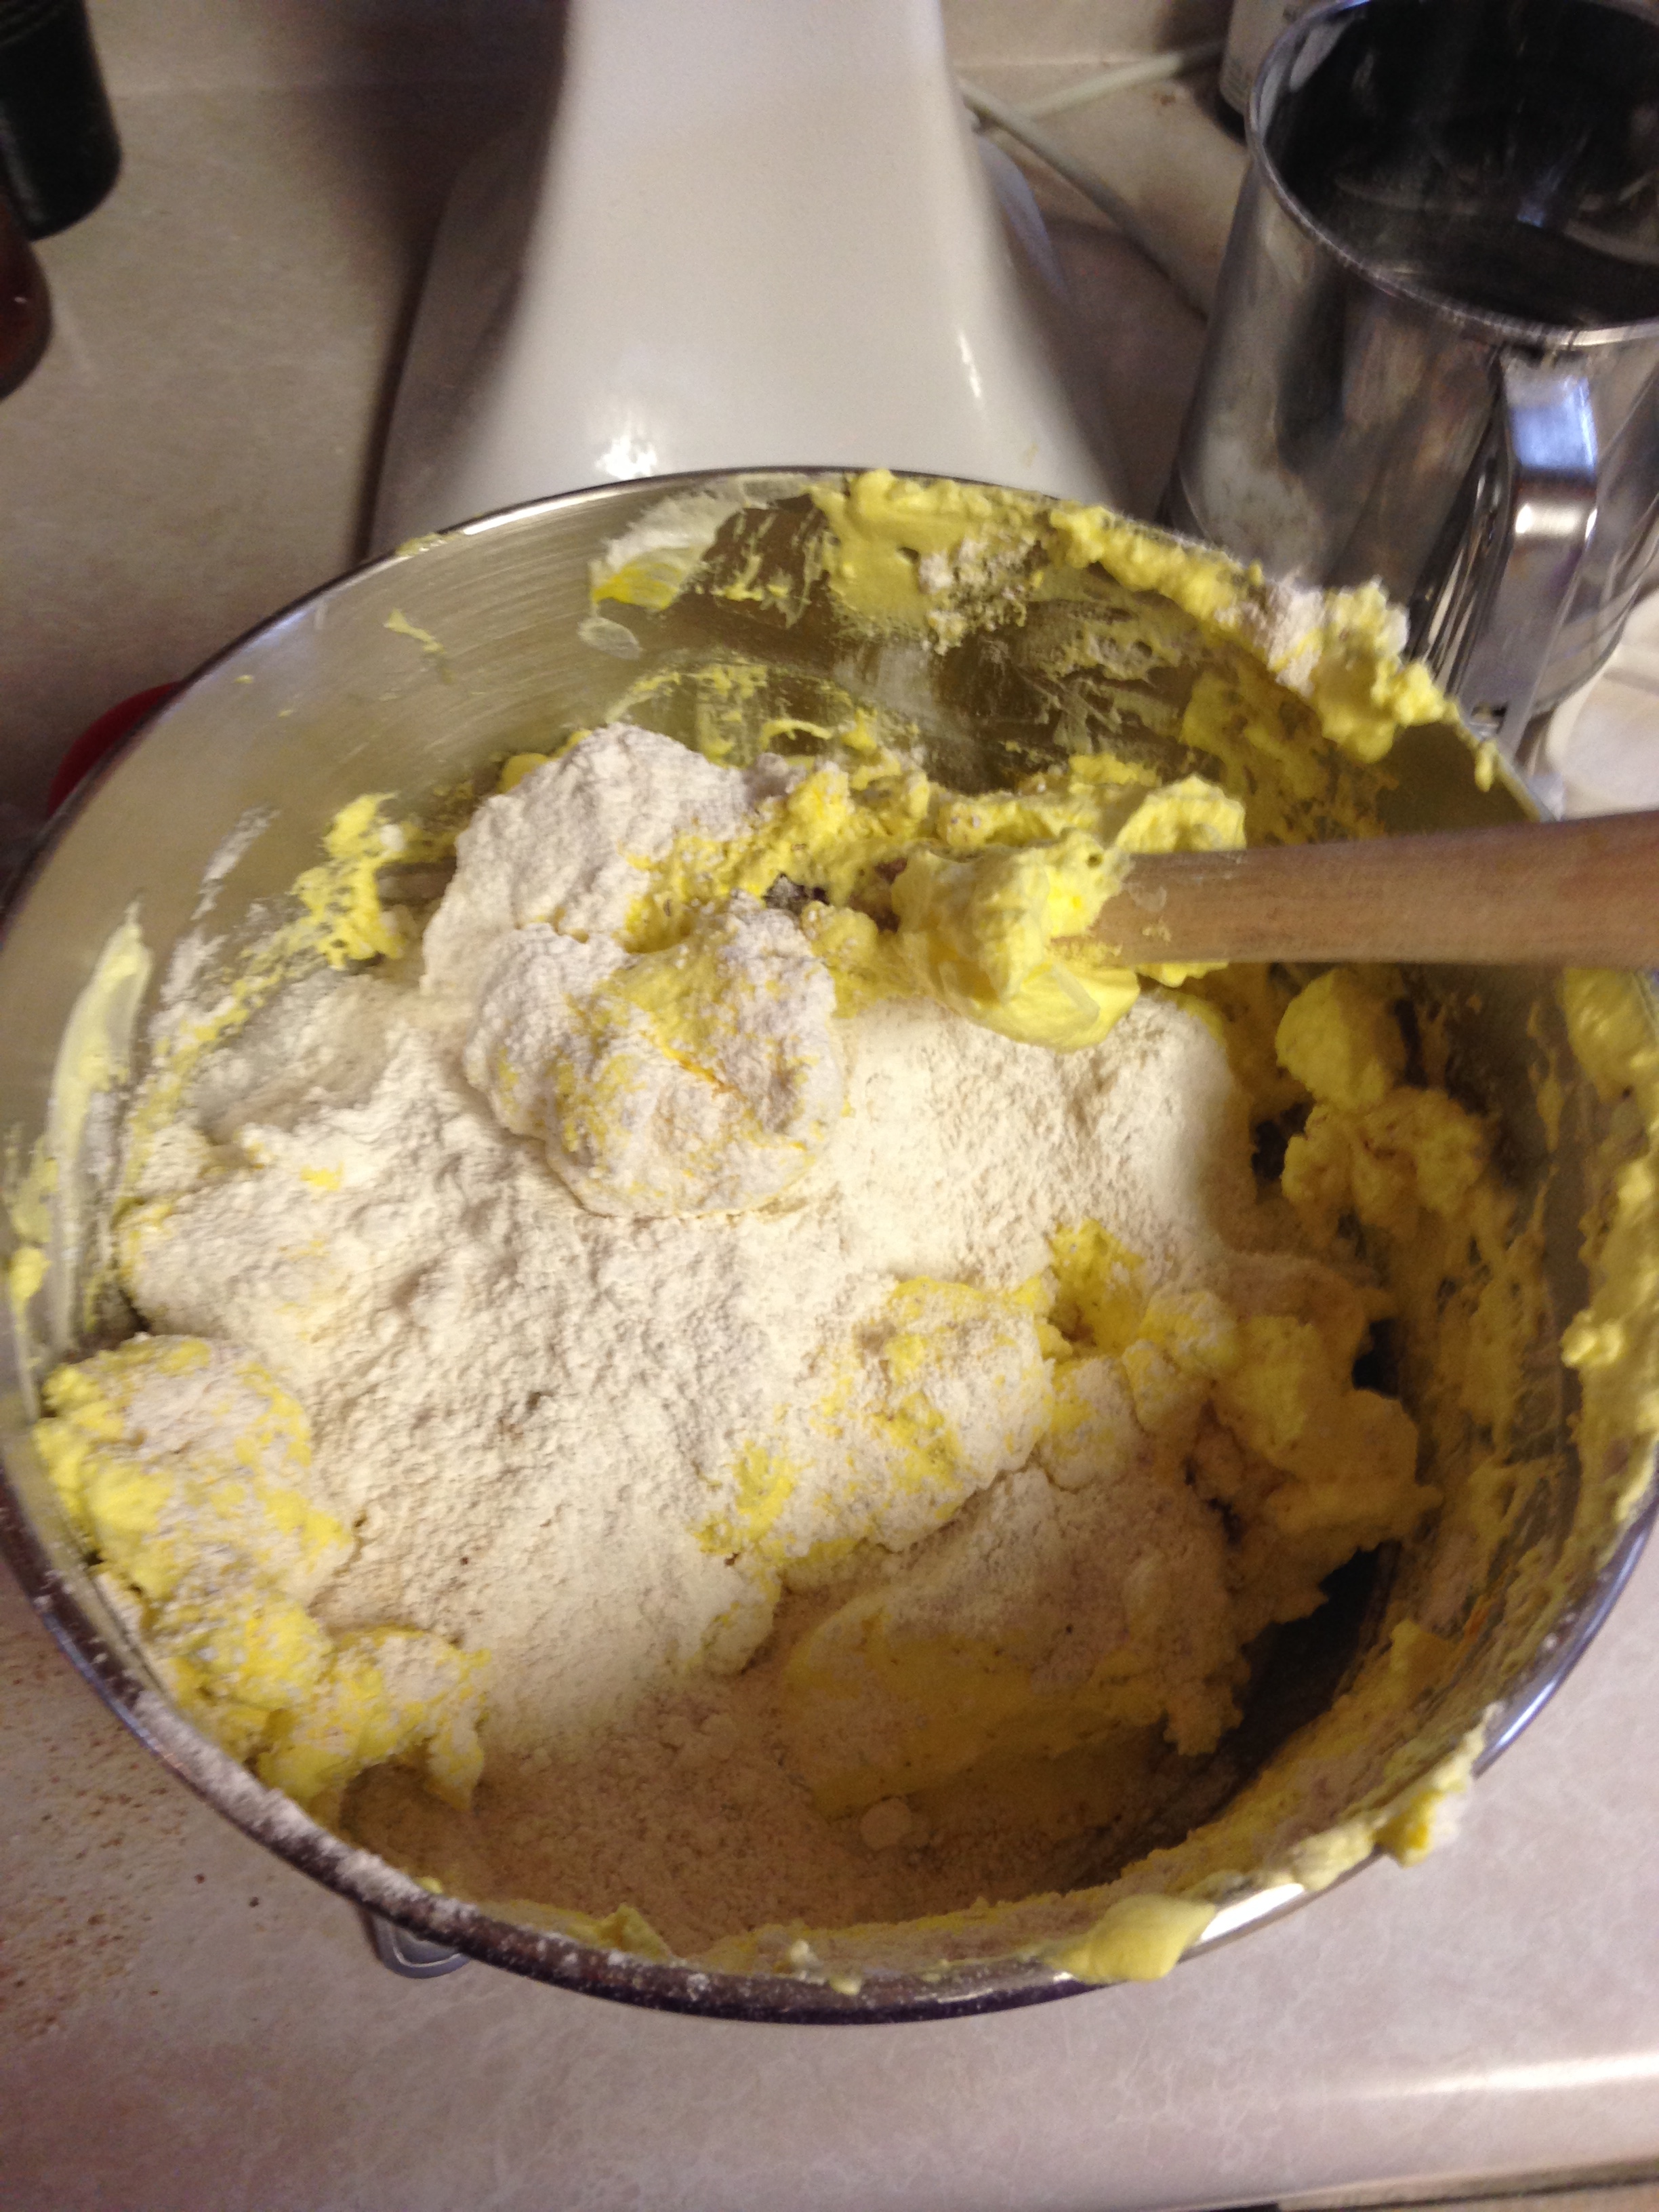
I folded in my dry mixture as instructed.
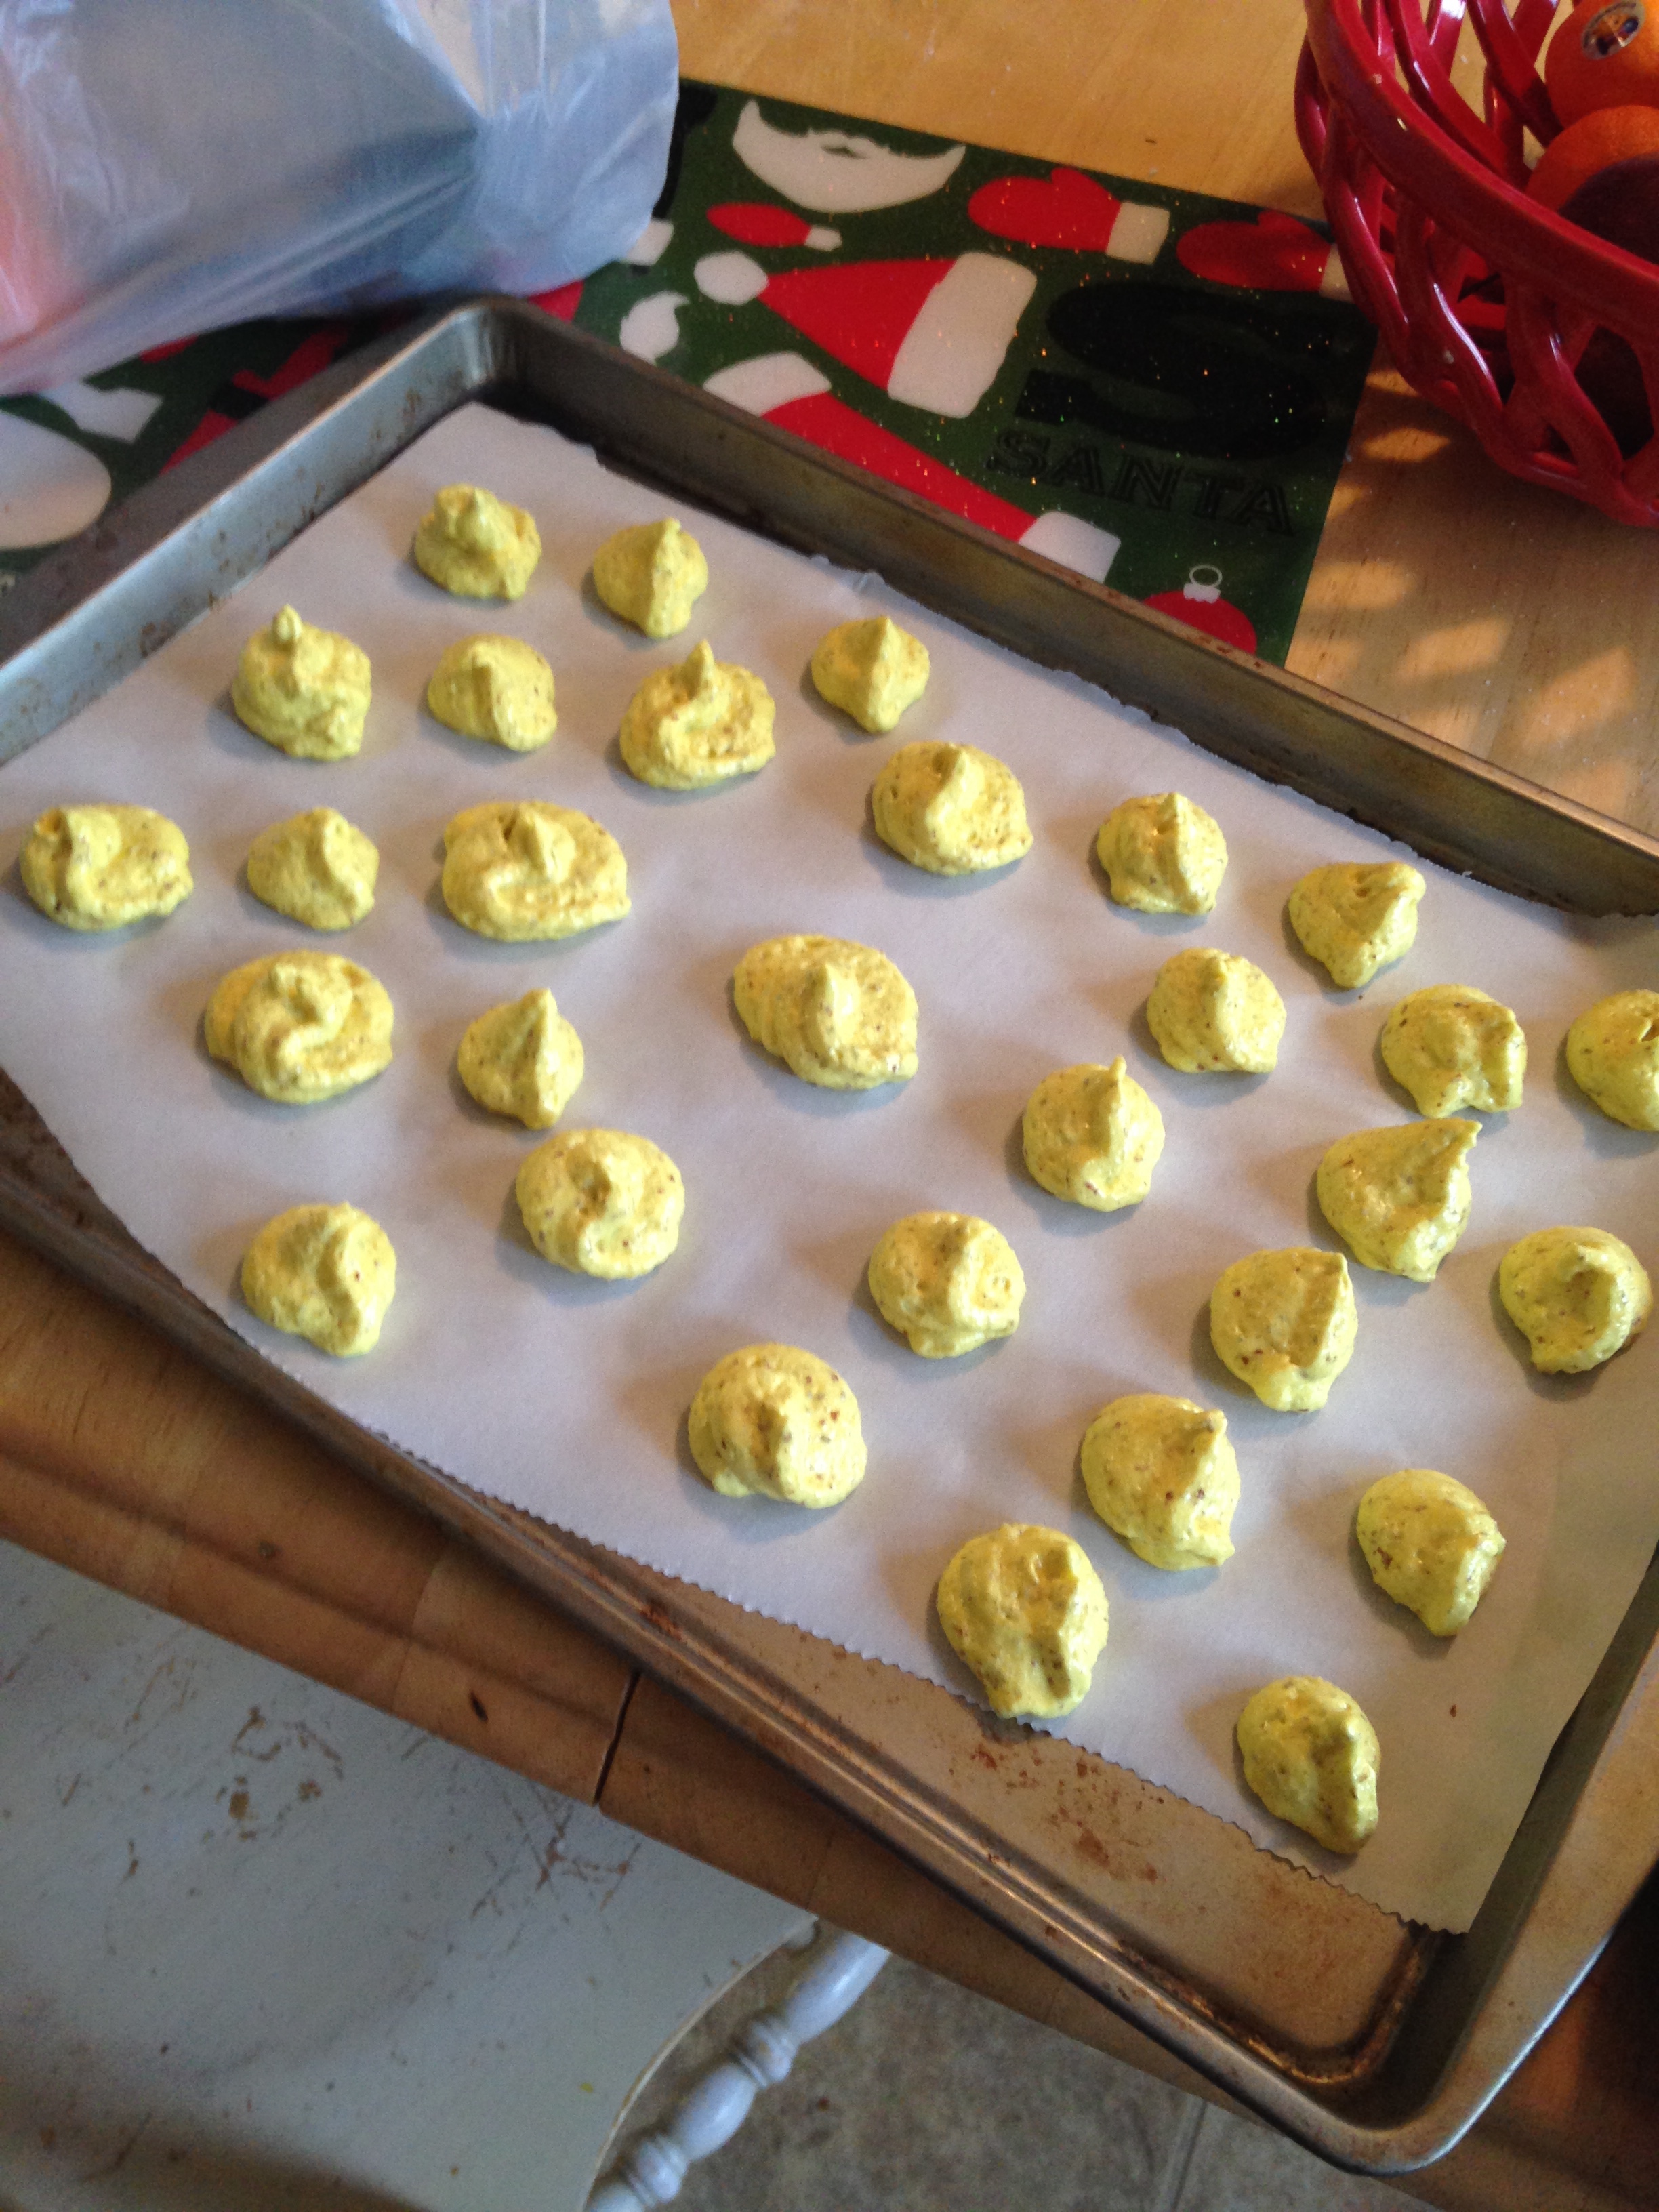
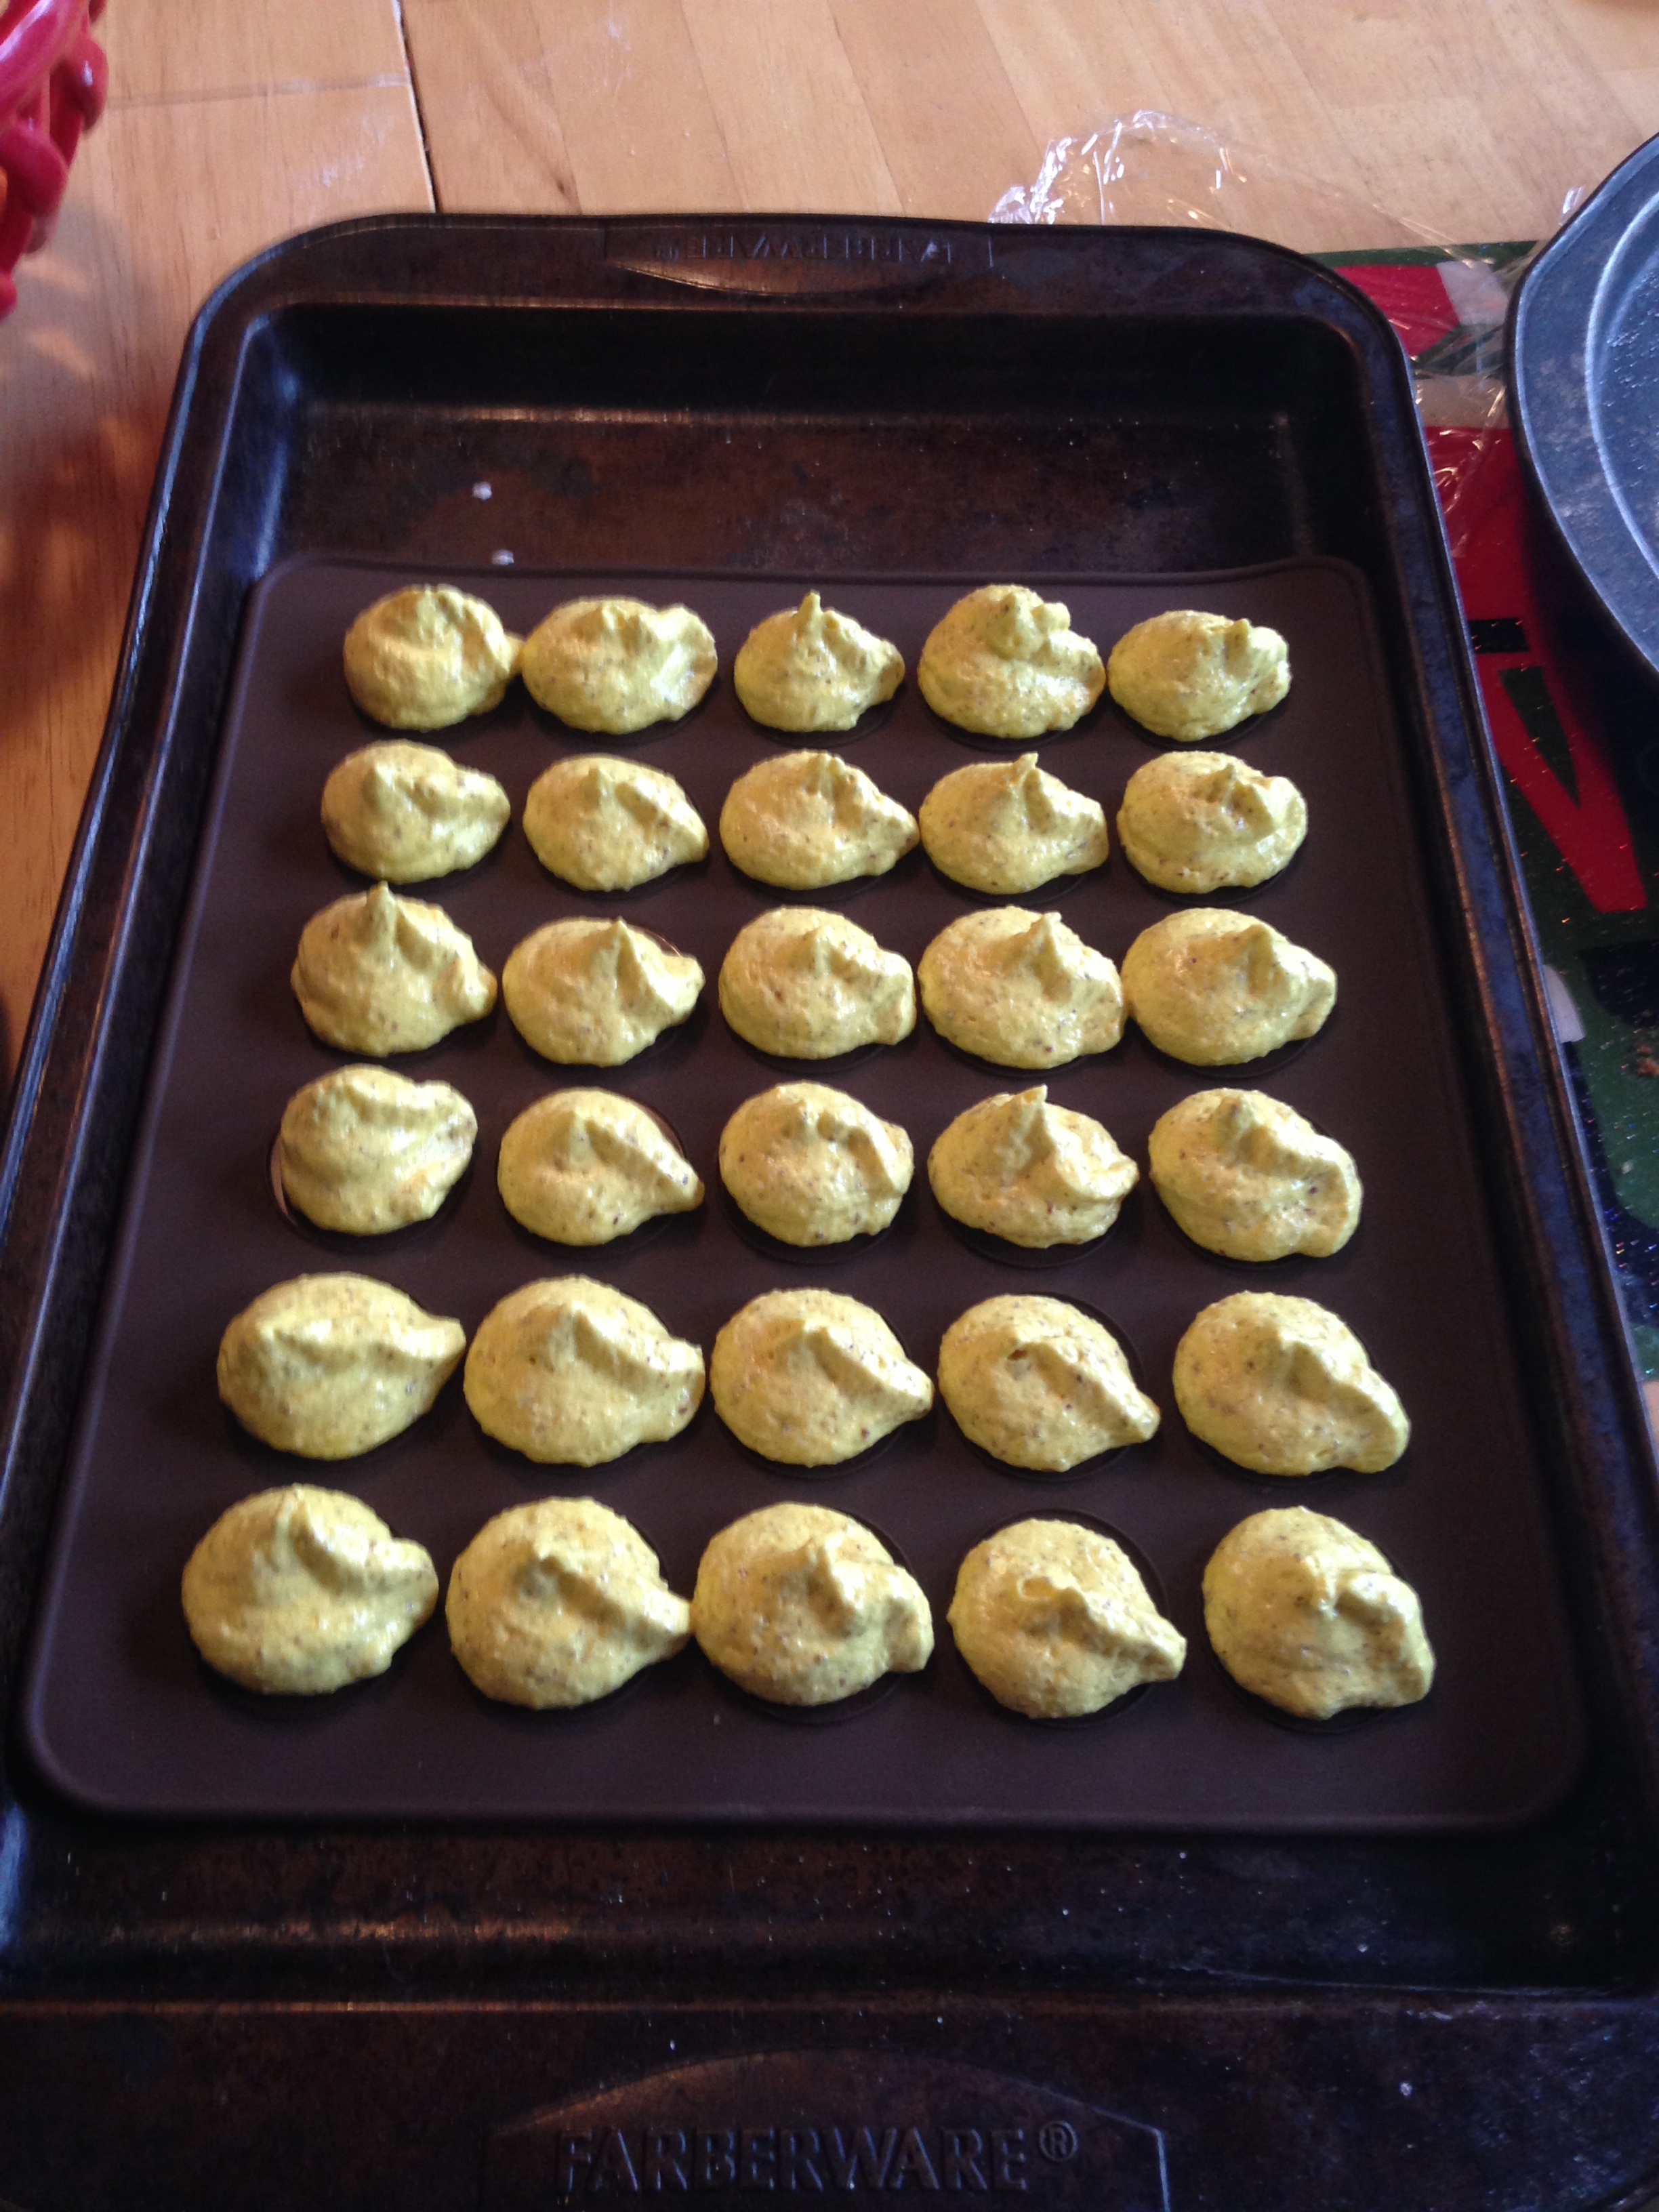
And forced it through a pastry bag and plopped drops on my silicone macaron sheet, and then on another pan but on parchment paper.
I gently threw the pans down to eliminate any air bubbles. Then I decided that wasn’t violent enough and dropped them a few times from about five feet off my kitchen table.
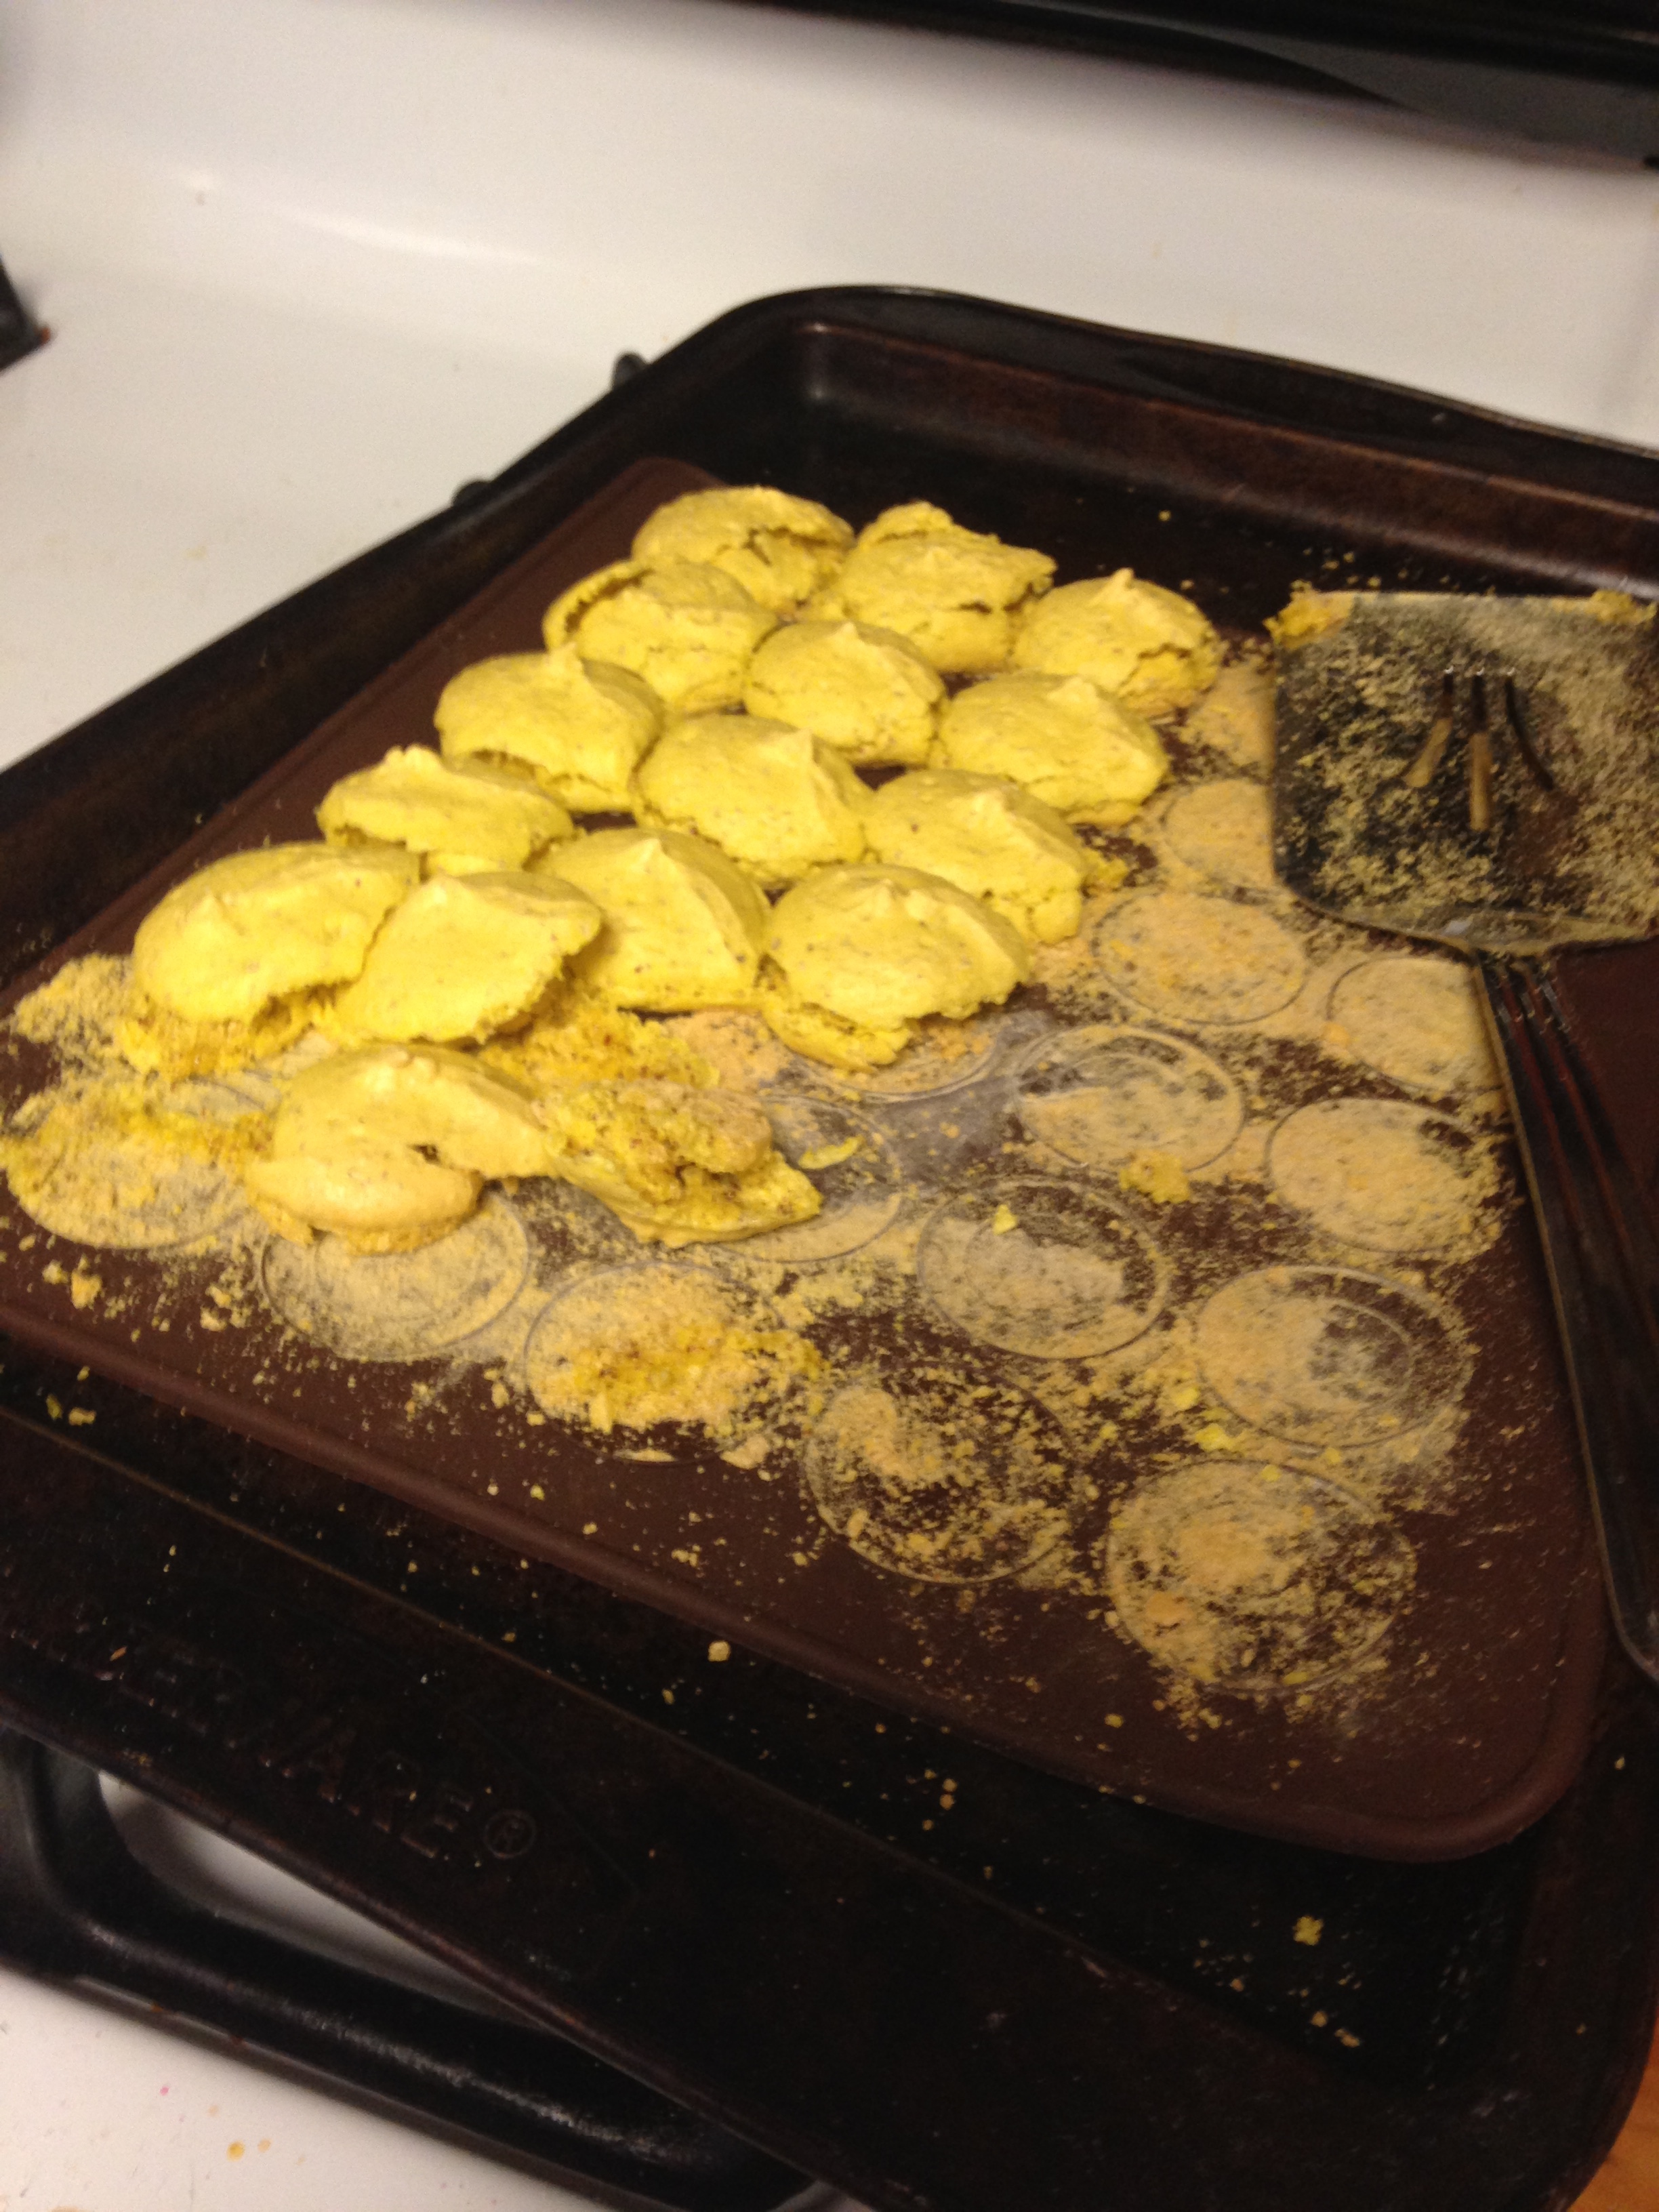
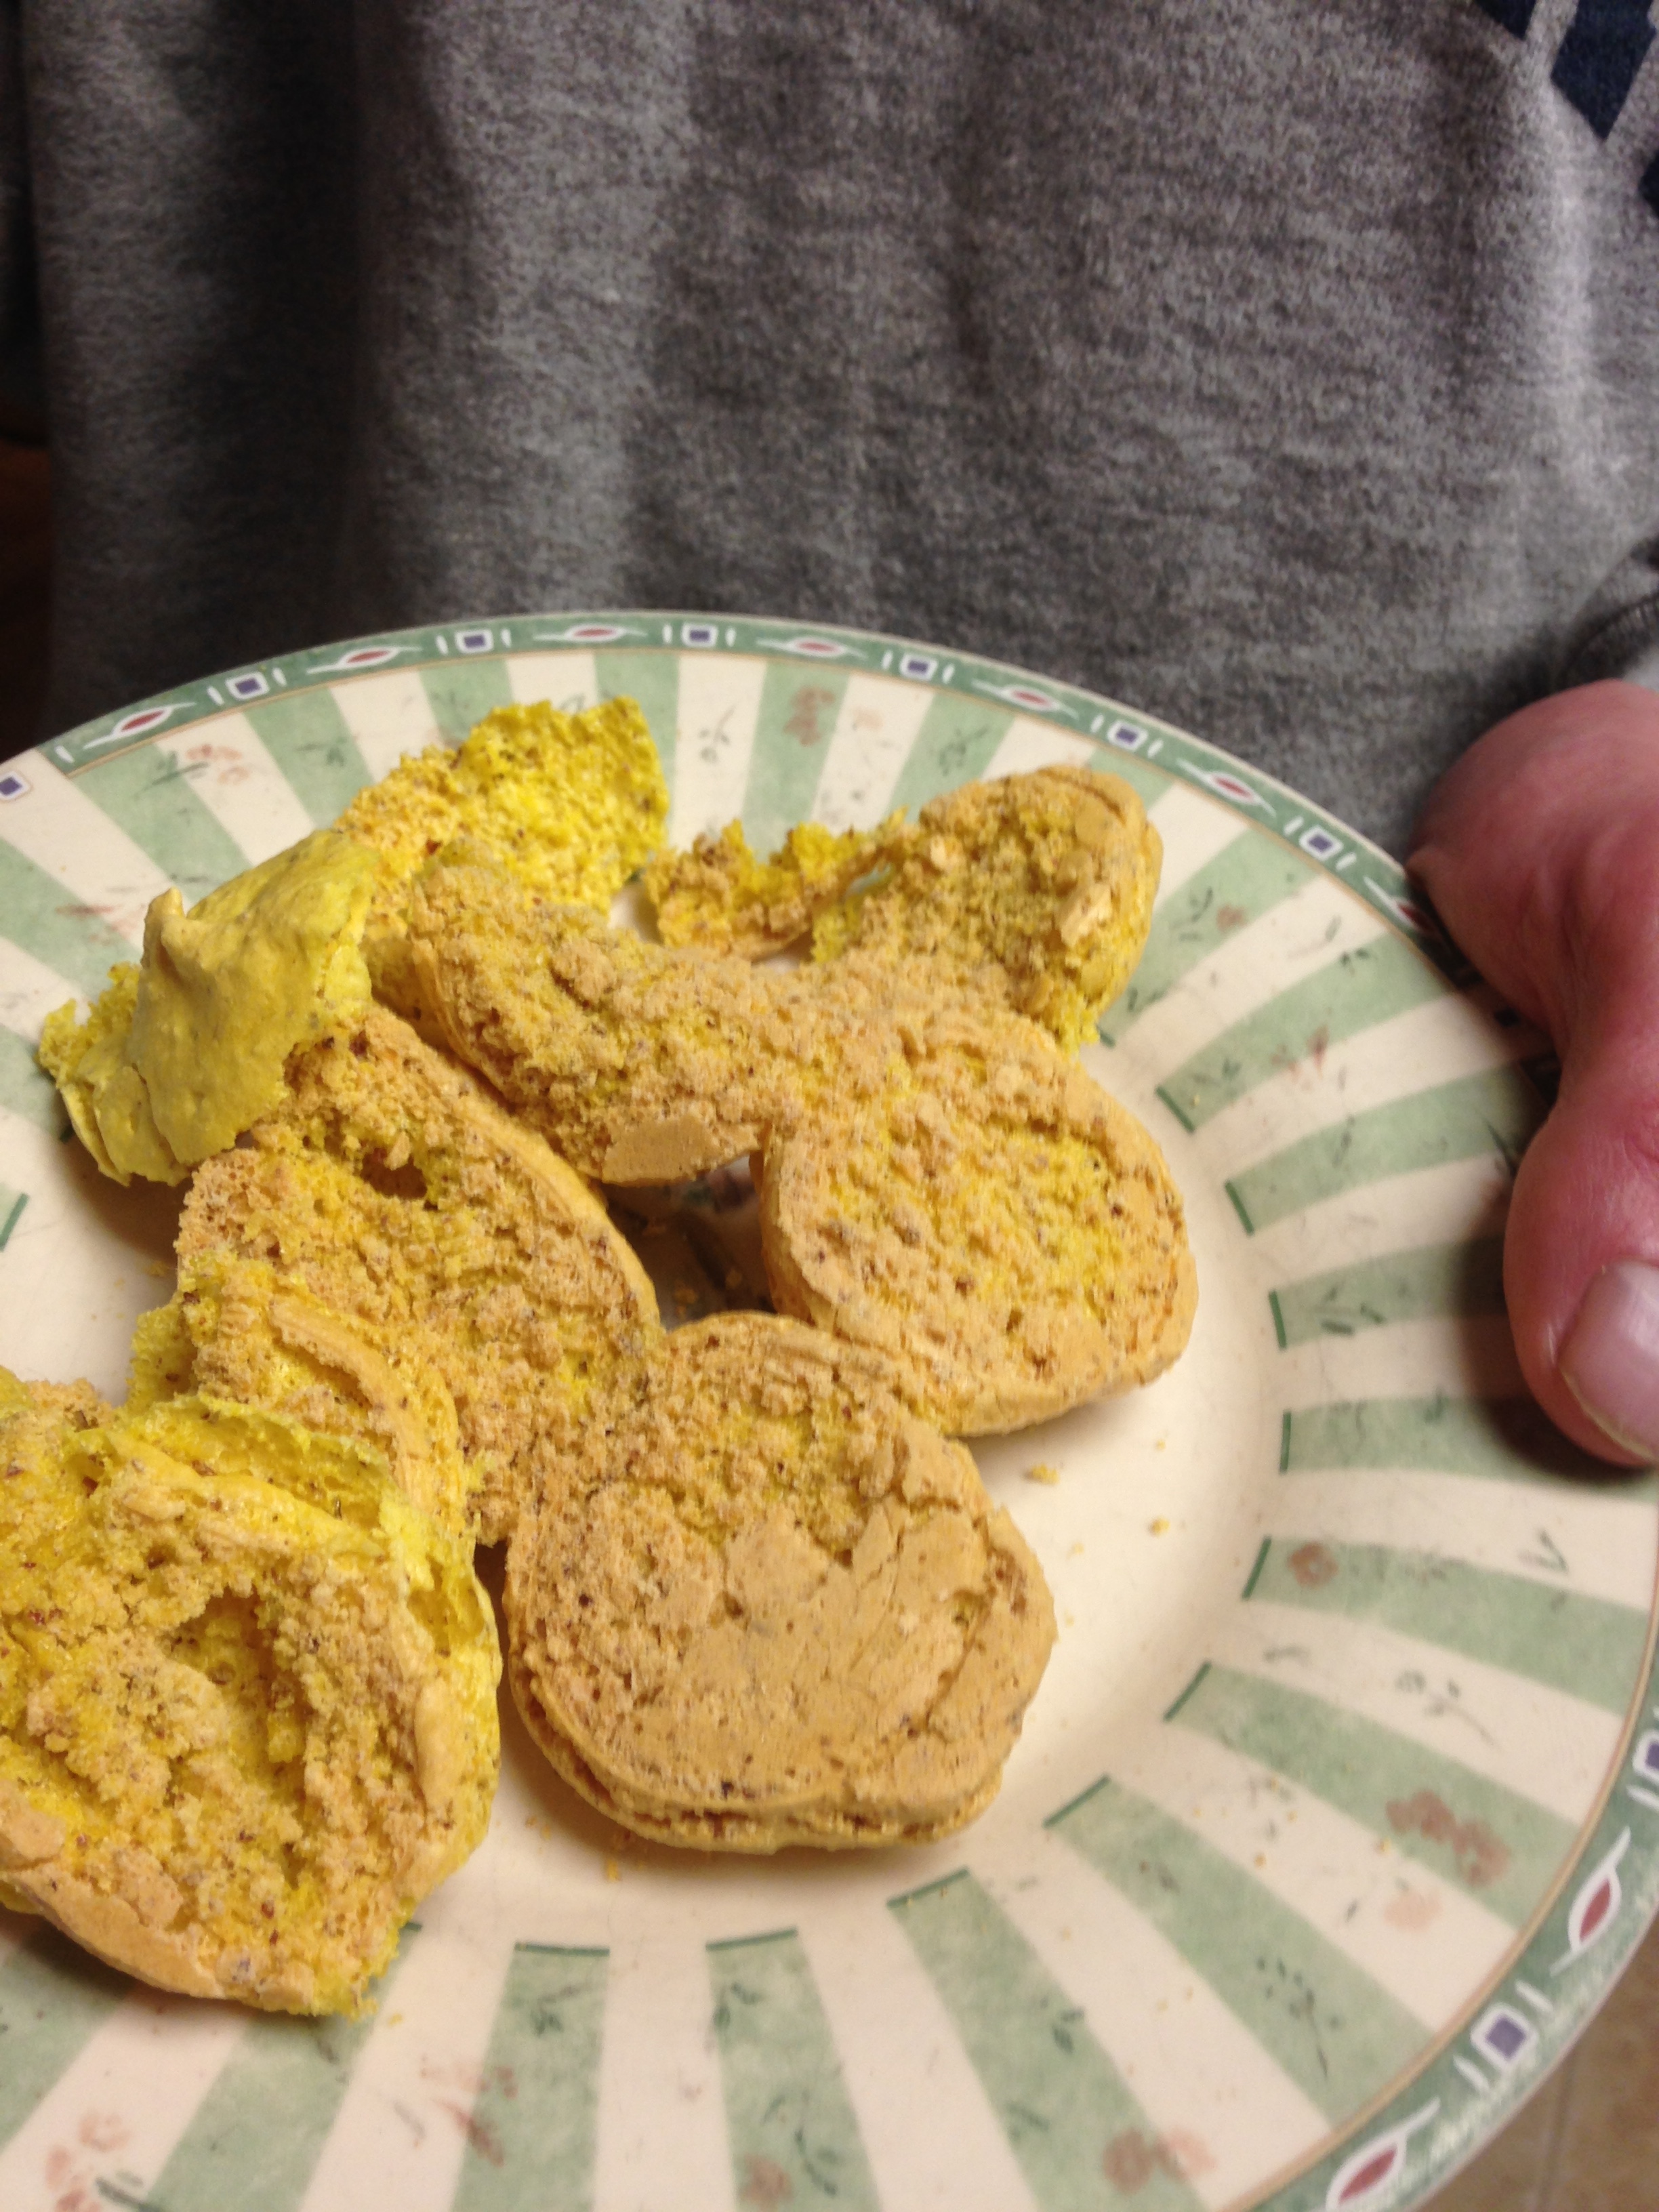
After 20 minutes, I took the trays out of the oven. And then cursed Amazon.
No 5 star rating for you.
But I had a helper in disposing of these cookies. My husband said he was glad these didn’t come off the tray because his original plan was to just poke a hole in some cookies and declare them “broken.”
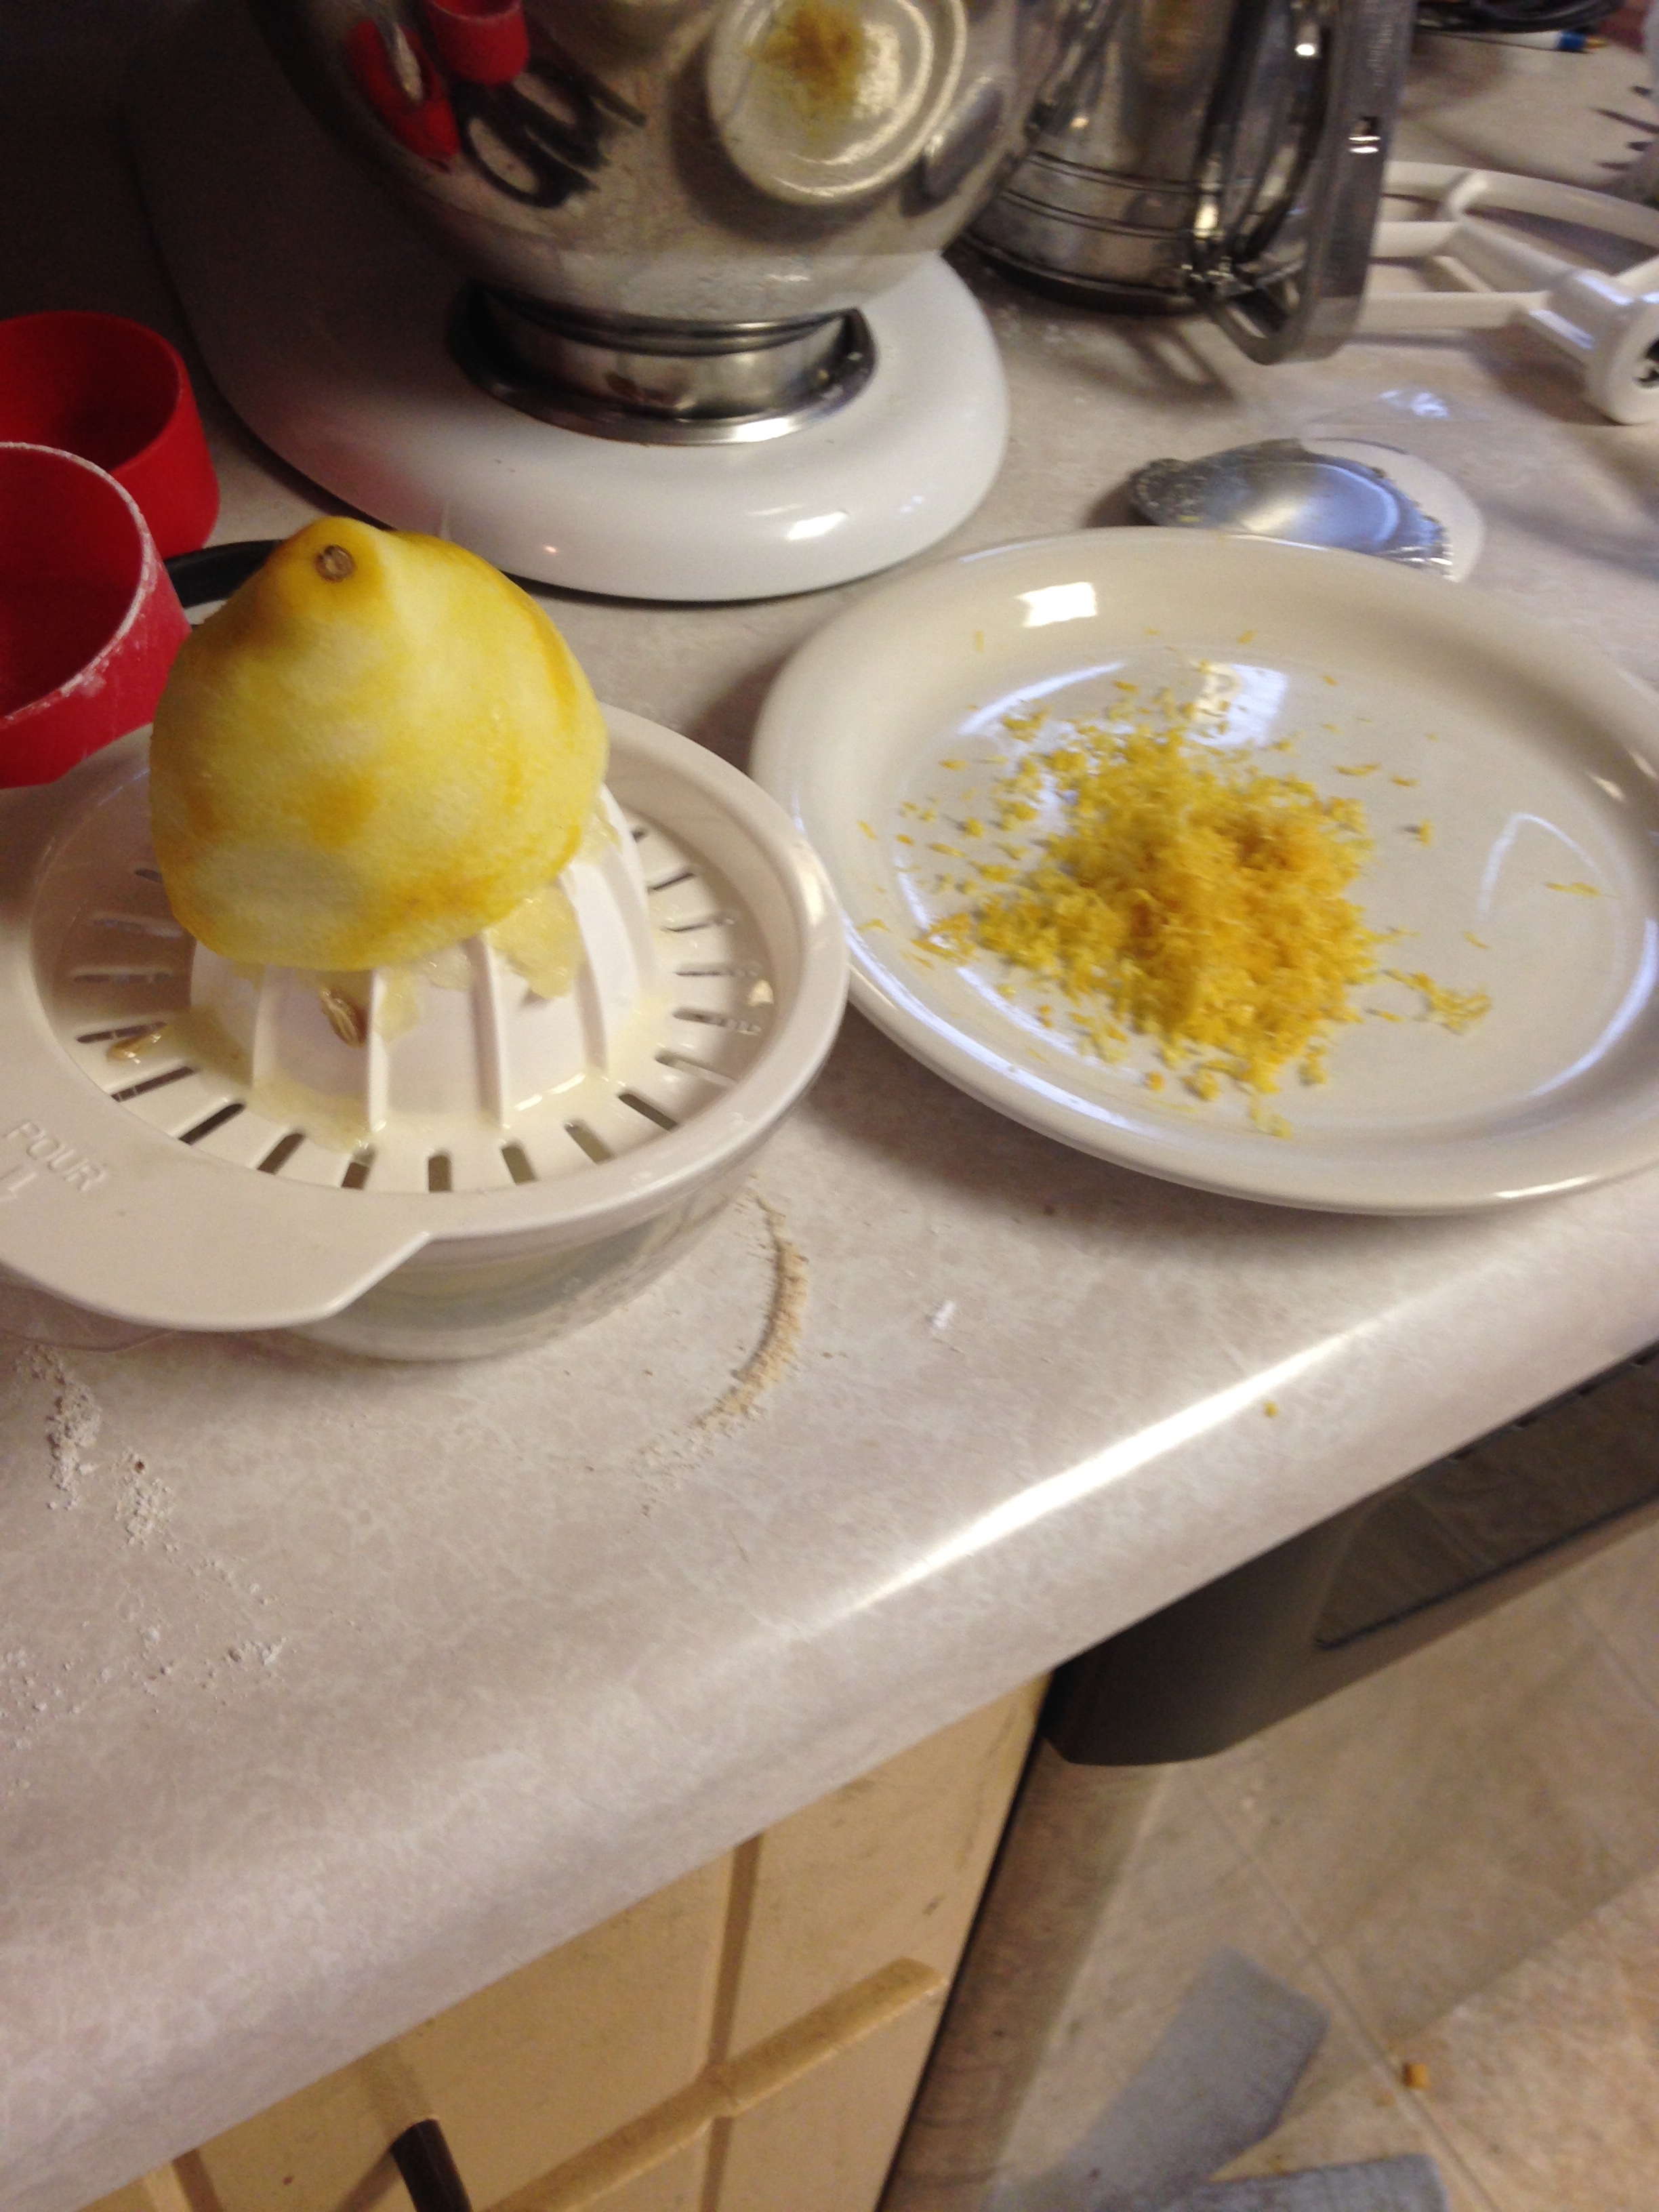
For the filling, I used another recipe which was pretty straight-forward. No crazy ingredients required. However, it called for only 1 teaspoon of lemon zest, which we *all* know by now is not enough. I’m not sure how much actually went in, but I know it was the entire zest of one lemon.
I then put that through another pastry bag and squirted my lemony-goodness on a cookie, topping it with another. I should have had more restraint so these would look prettier, but come on, it’s lemon filling. If a little is good, more is better. Right Christina?
(We have a theory about lemon curd, as in the Trader Joe’s variety is good with just a spoon and elicits pornographic sounds from our mouths.)
4large egg whites (or 5 small) 140g (4.94 ounces) 1/3 cup or 70g (2.47 ounces) caster sugar [*US cups 1/3 cup plus 1 tsp]
1 1/2 cups or 230g (8.11 ounces) pure icing sugar [US cups 1 1/2 cups plus 4 tsp] OR 1 3/4 cups 230g (8.11 ounces) icing mixture [US cups 1 3/4 cups plus 4 tsp] 1 cup or 120g (4.23 ounces) almond meal [US cups 1 cup plus 3 teaspoons] 2g (0.07 ounces) salt (tiny pinch)
gel food colouring (optional)
(*cup measurements are metric cups where 1 cup=250ml in the USA cups use customary units so 1 cup = 236ml so you need to add a little bit extra as detailed in the recipe.).
Macaron Recipe Directions
Preheat the oven to 150 degrees C (300 in American Fahrenheit)
Place egg whites and cater sugar in a bowl and mix with electric mixer until stiff enough to turn the bowl upside down without it falling out, continue to whip for 1-2 more minutes. How long this takes will depend on you mixer. Add gel or powdered food colouring and continue to mix for a further 20 seconds.
Sift the almond meal and icing sugar and salt twice, discarding any almond lumps that are too big to pass through the sieve. Fold into the egg white mixture. It should take roughly 30-50 folds using a rubber spatula. The mixture should be smooth and a very viscous, not runny. Over-mix and your macarons will be flat and have no foot, under mix and they will not be smooth on top.
Pipe onto trays lined with baking paper, rap trays on the bench firmly (this prevents cracking) and then bake in the oven for 20 minutes. Check if one comes off the tray fairly cleanly, if not bake for a little longer (make sure you are using NON-stick baking paper or they will stick).
While macarons are drying, prepare the lemon buttercream. In a mixing bowl with whisk attachment, beat the butter until fluffy. Add powdered sugar, heavy cream, lemon juice, lemon zest, vanilla extract and salt and beat until well combined. Fill pastry bag and go to town.
Cookies today: 20 (but remember, they are sandwich cookies AND I had an Amazon fail)