December 5: Salted Dulce de Leche Thumbprint Cookies

Standard

Ingredients:

  • 1/2 c. unsalted butter, softened
  • 1/4 c. packed light brown sugar
  • 1 t. vanilla extract
  • 1 egg yolk at room temperature
  • 1 1/4 c. all-purpose flour
  • 1/8 t. salt
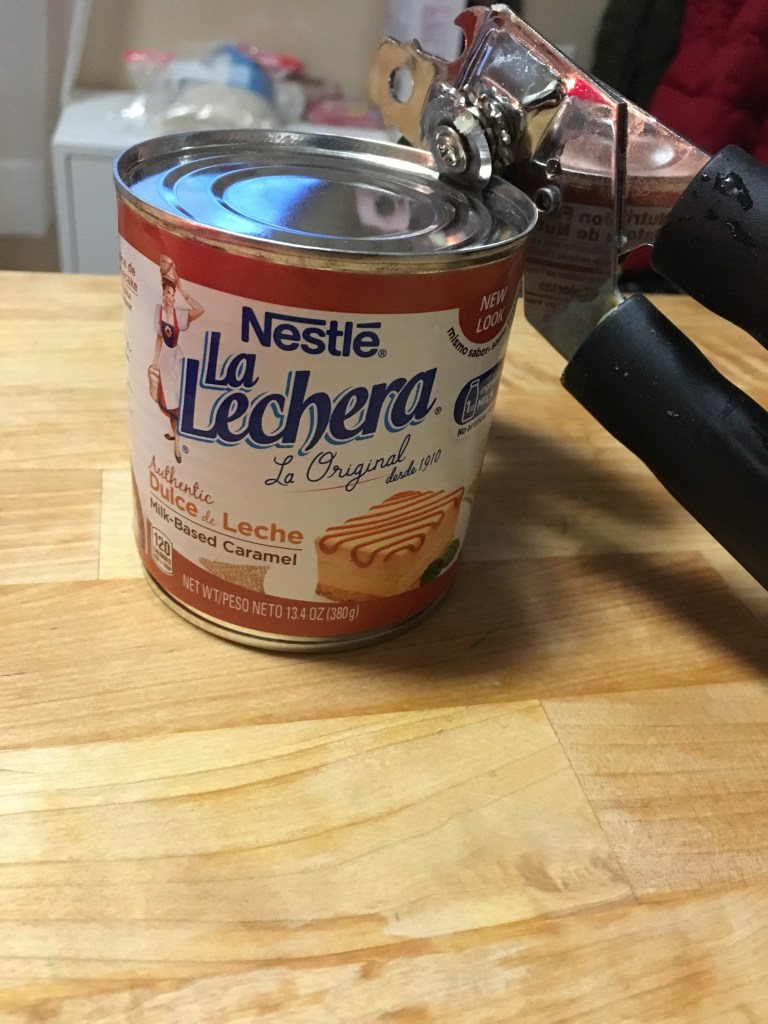
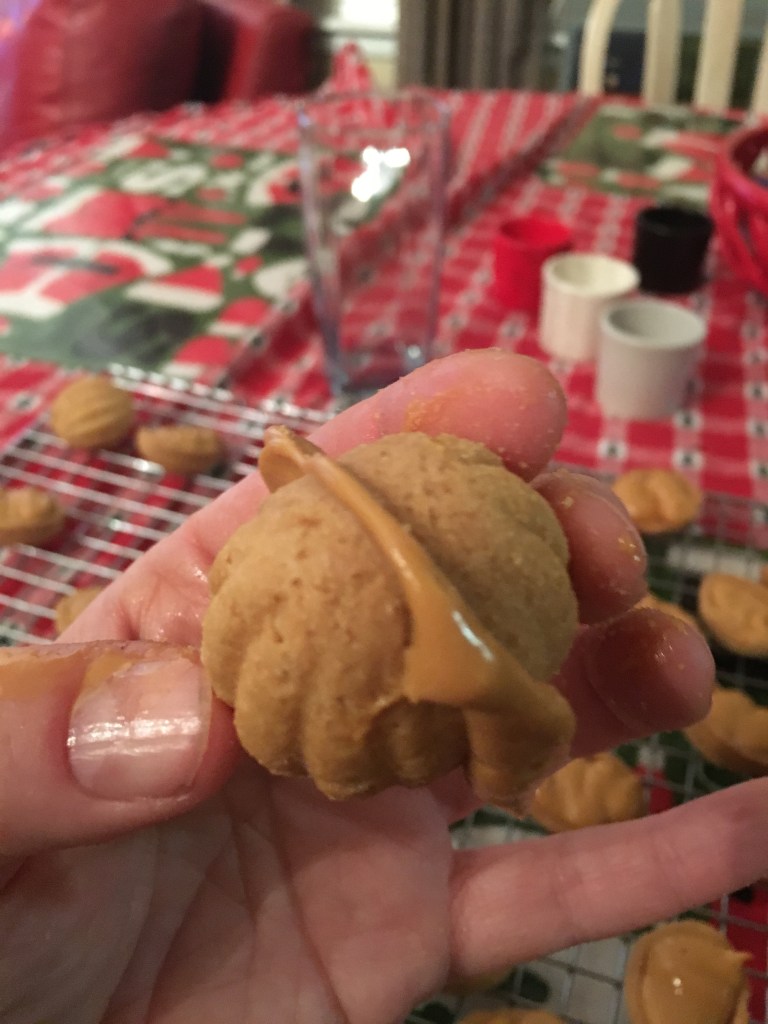
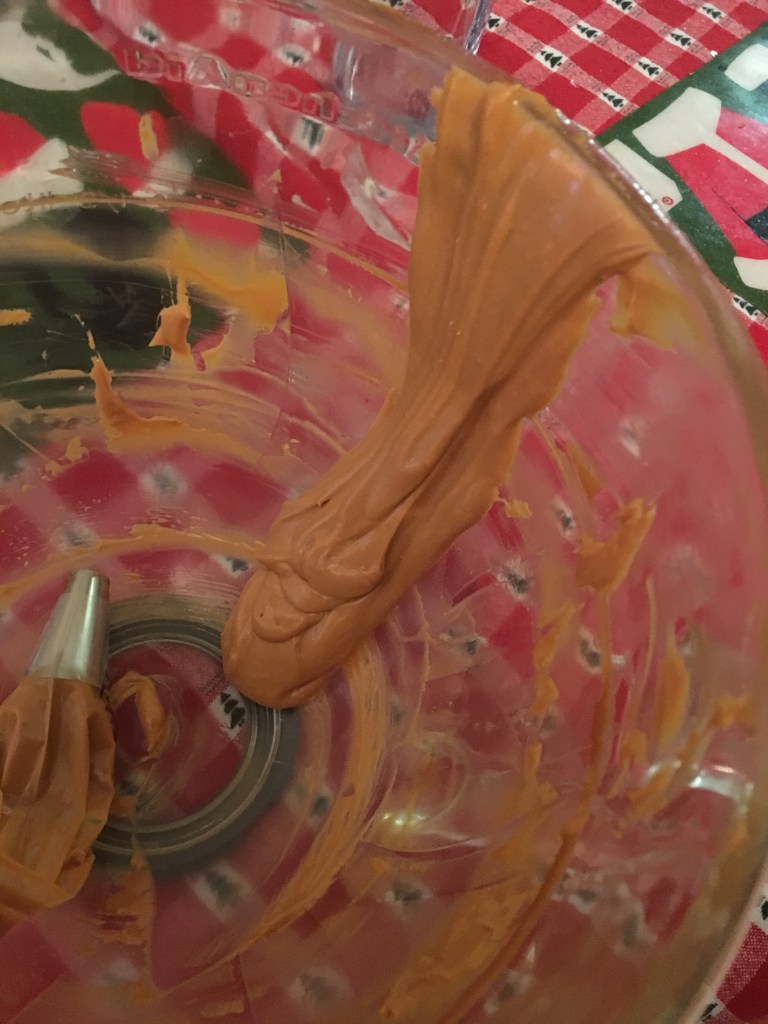
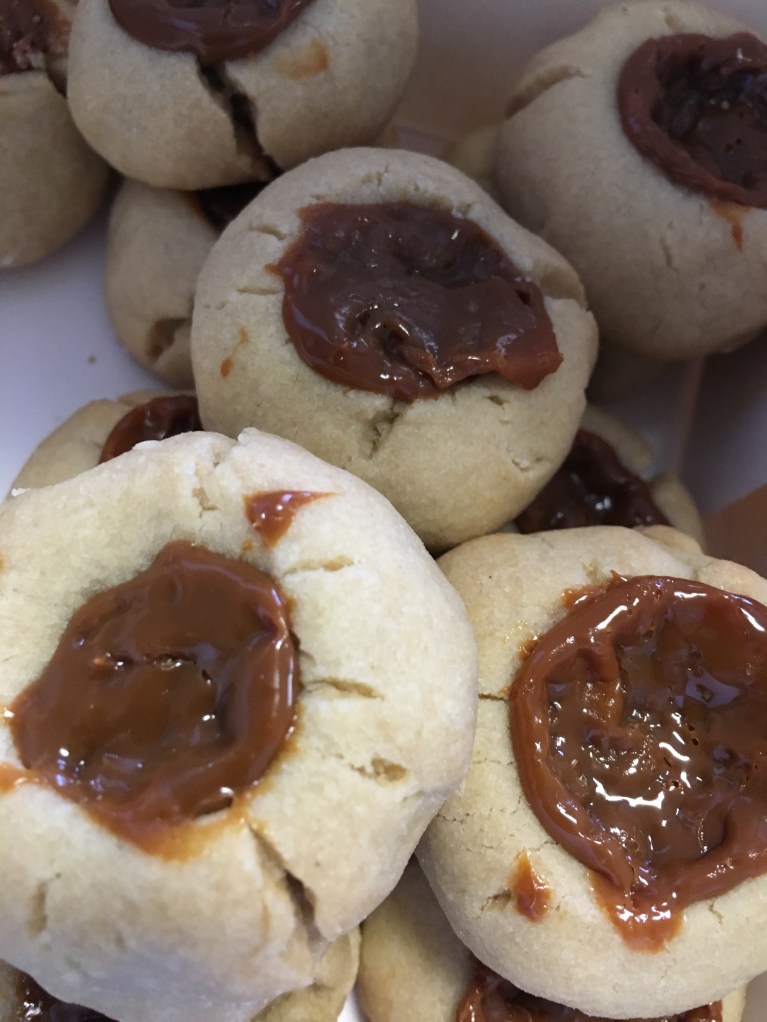
  • 1/4 c. dulce de leche
  • 2 T sea salt

Instructions:

  • In a large mixing bowl, beat together the butter and sugar with an electric mixer on medium speed for 3 minutes. Beat in the vanilla and egg yolk.
  • In a separate bowl, combine the flour and salt. Stir with a whisk. Gradually stir the flour into the butter and mix just into blended.
  • Shape the dough into a ball, cover, and chill for at least 1 hour.
  • Preheat oven to 350 F.
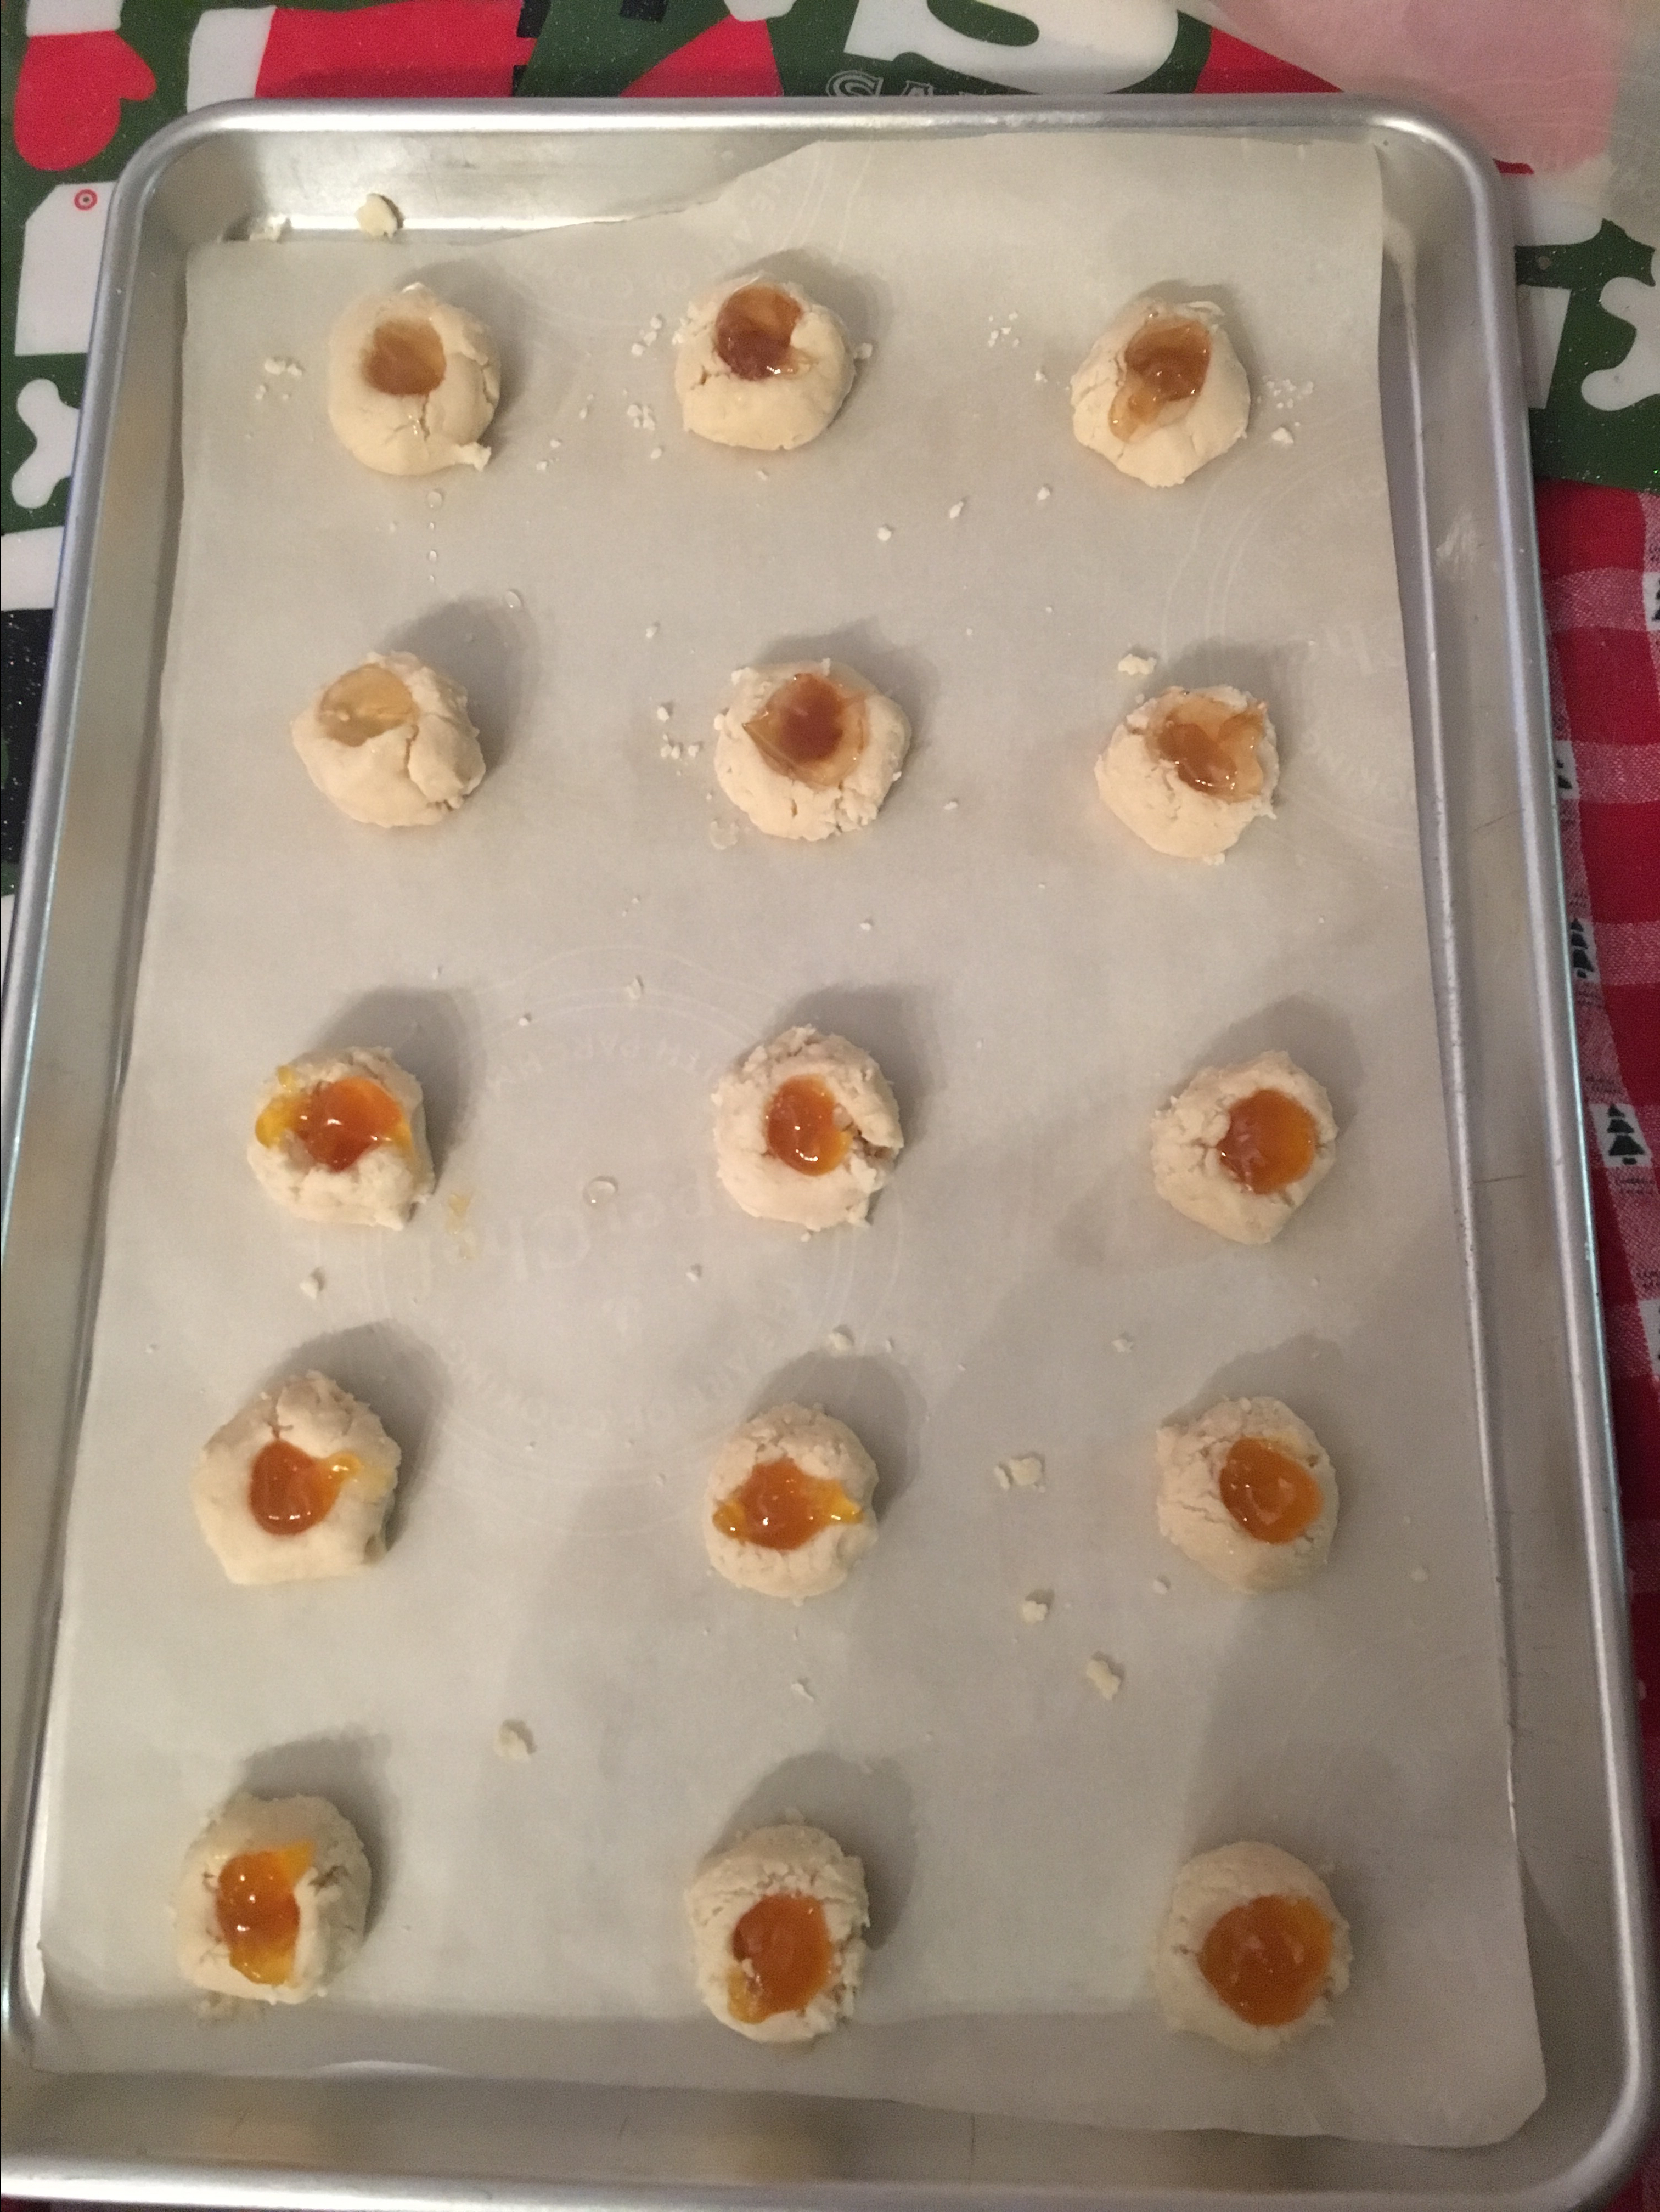
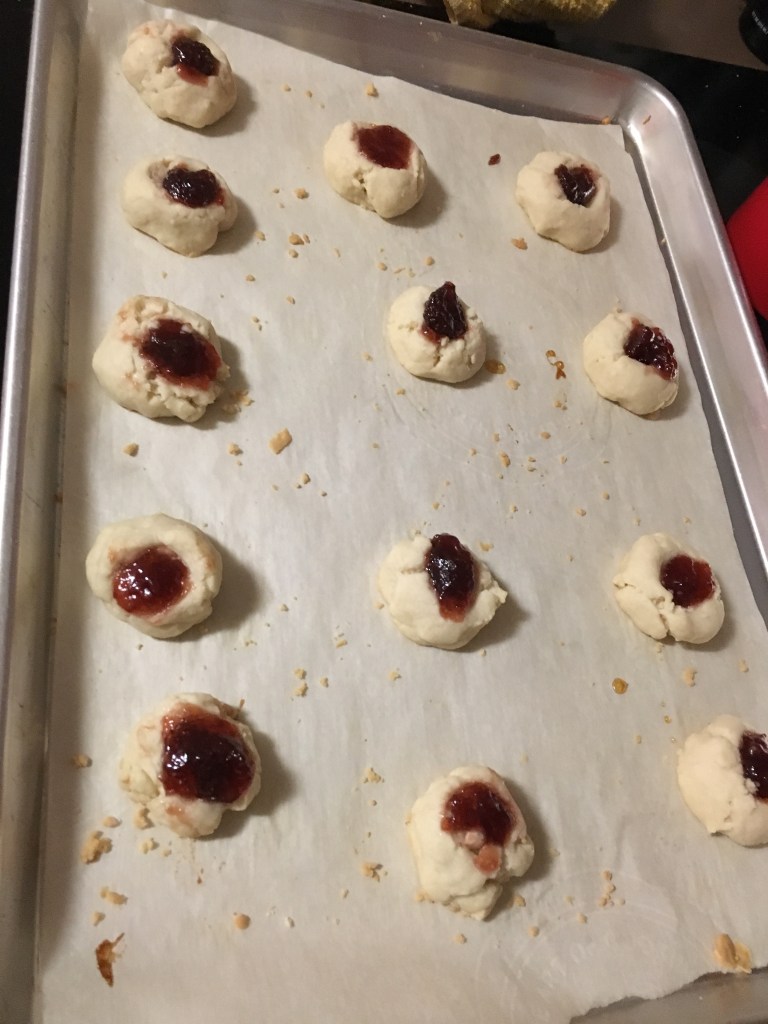
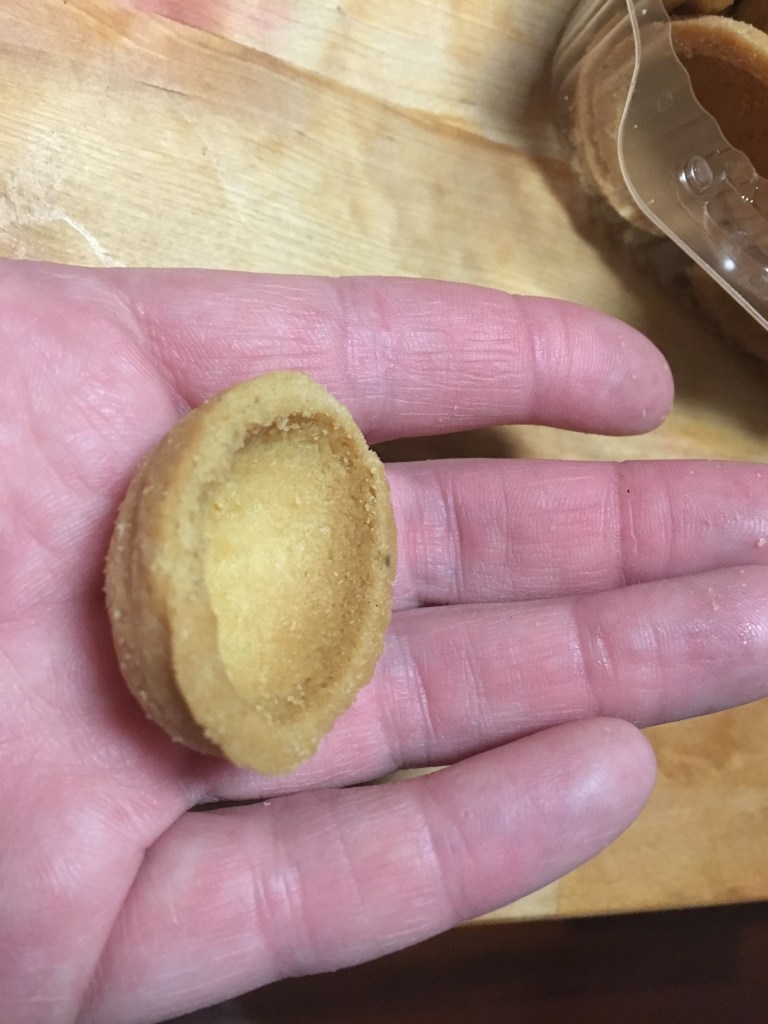
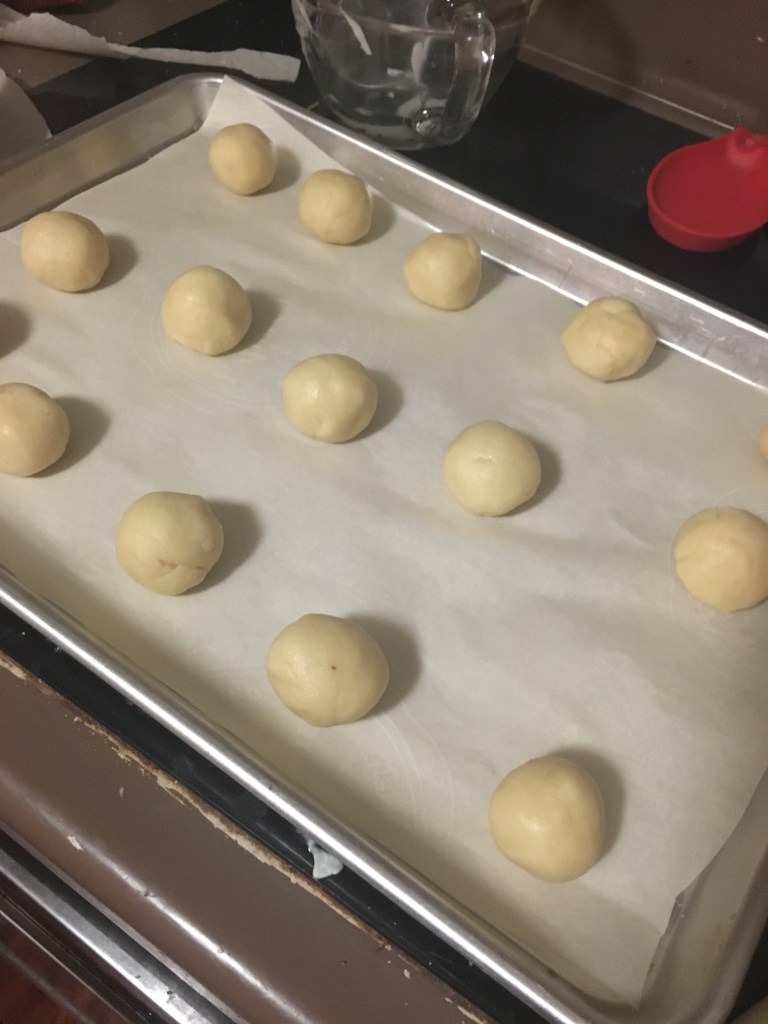
  • Shape the dough into 1 T size balls and place them 2 inches apart on a parchment-lined baking sheet. Using your thumb or the back of a teaspoon, press a slight indentation in the center of each ball. Take care not to press too hard down. If the edges crack while make the indention, simply pinch them back together to smooth them out. Otherwise cracks are okay.
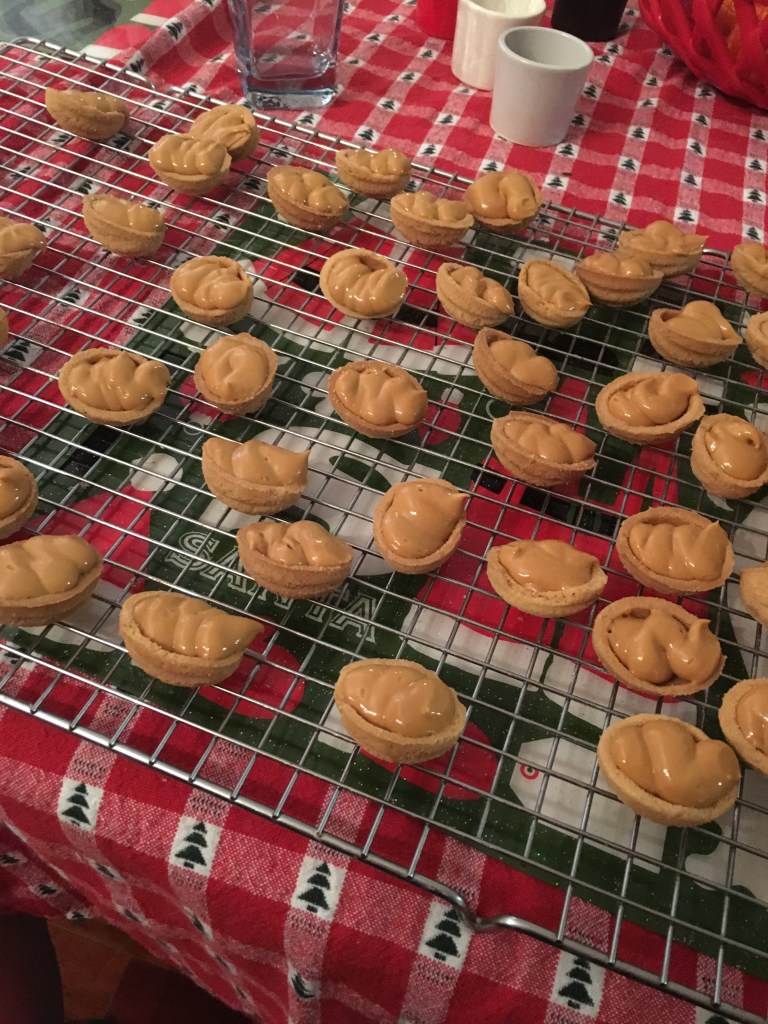
  • Fill the indents with 1/4 teaspoon dulce de leche. Bake for 10-12 minutes or until the bottom edges are slightly browned.
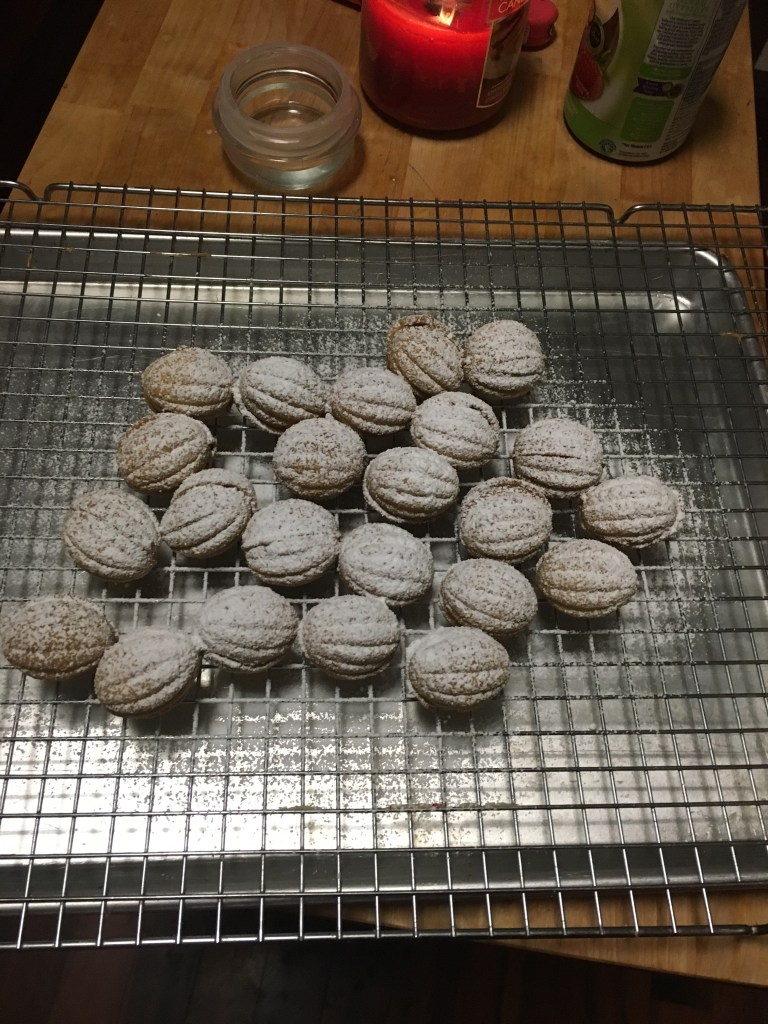
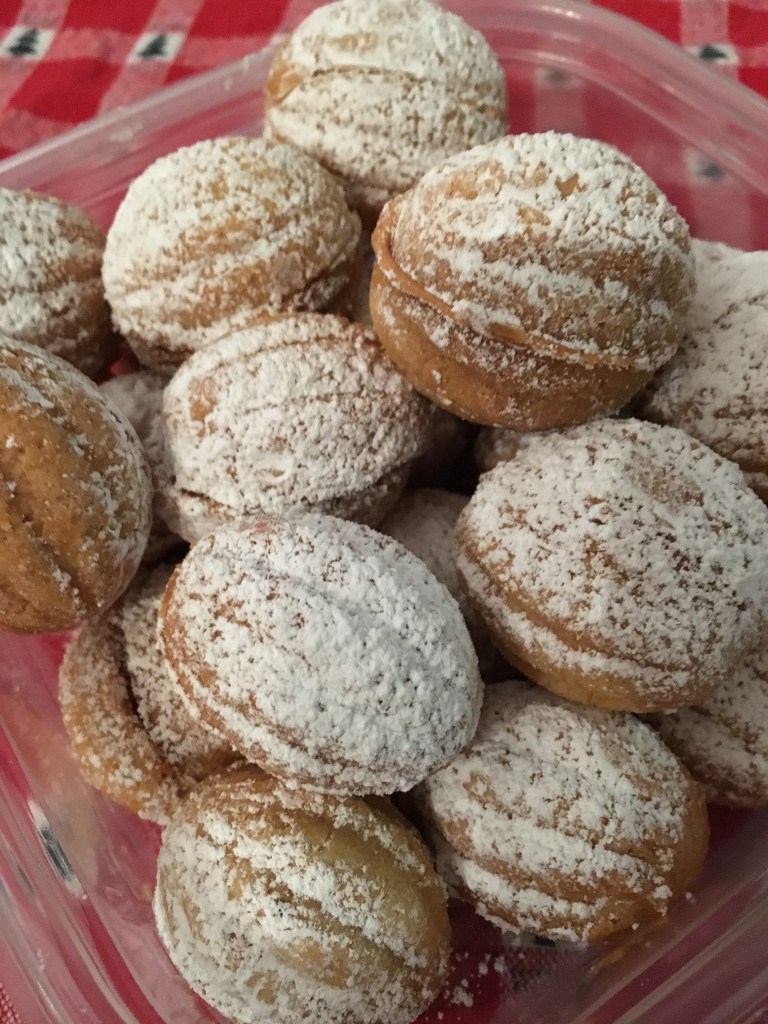
  • Cool the cookies on the pan for 5 minutes before transferring them to a wire rack to cool completely. Sprinkle the tops lightly with sea salt.

My man-friend had a birthday (shocking!) and a mom (even more shocking, considering he had a birthday) that shared with me some cookie recipes she’s made over the years. This was taken from a print out I took a picture of while we were at his mom and dad’s place for a birthday celebration. I can’t quite remember if she said she made this cookie often or not, because she and I split a bottle of chardonnay before (and a little during) dinner.

But I took the fact that I had pictures of recipes in my phone the next morning as a good sign that we had a lovely conversation about Christmas cookies.

The dough came together pretty well. I put it in the fridge for an hour, and when I got it out, I realized my fridge may be set a little too cool.

When I went to ball the dough, I had to sort of chip away at it. But it worked and eventually all the dough thawed out.

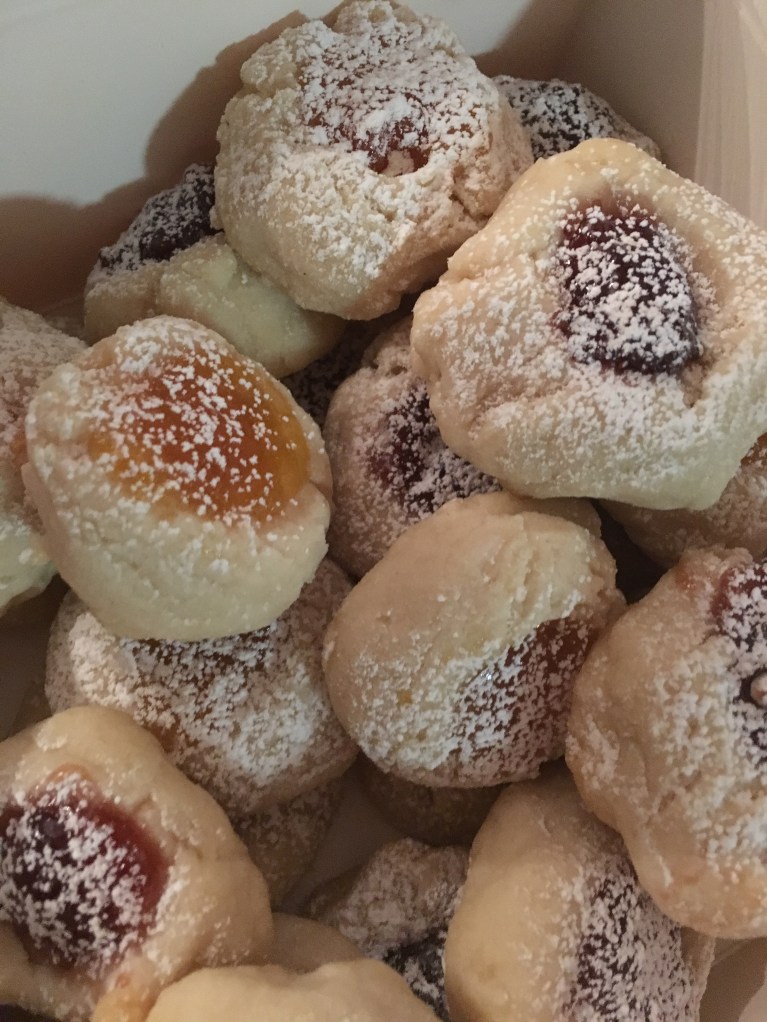
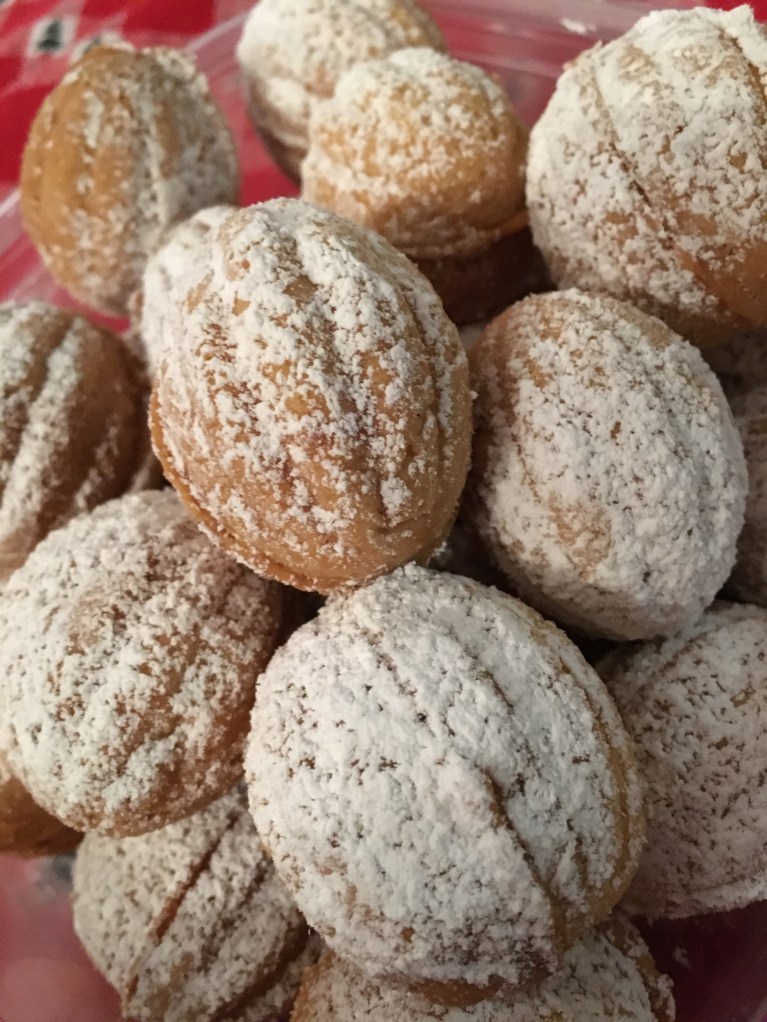
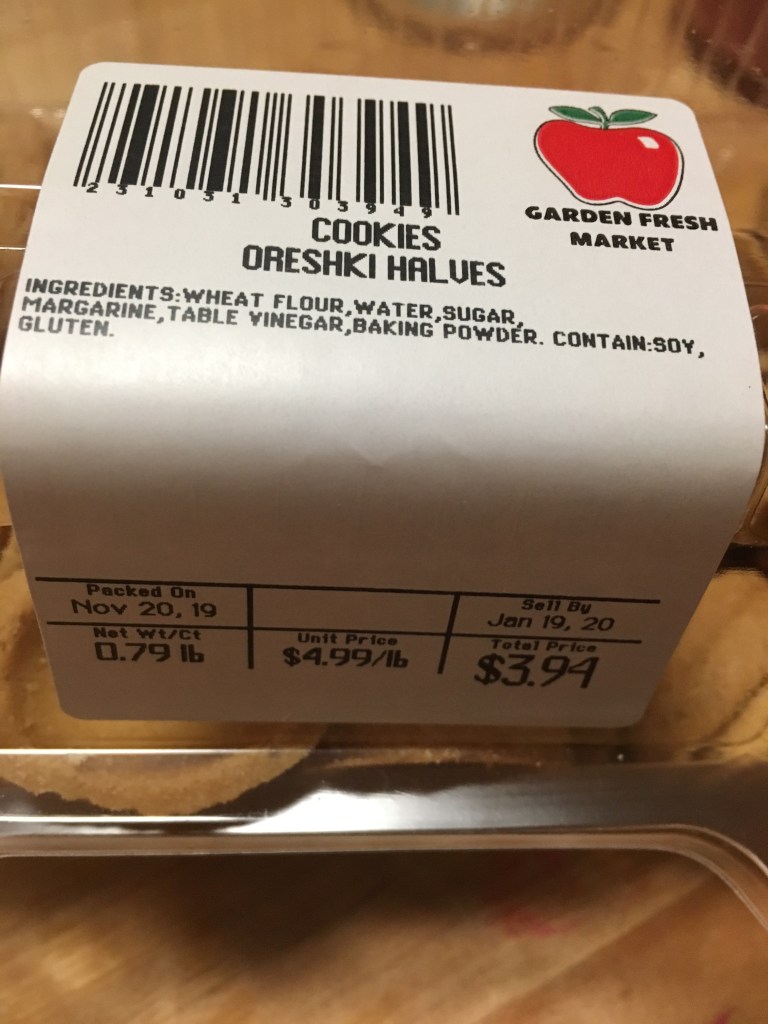
I like thumbprint cookies, and I definitely like dulce de leche, so this is one I was looking forward to.

And I really can’t believe I’ve never baked with dulce de leche. Or bought it before. Or bought two before, opened both and ate the first one while I baked with the other.

Just add spoon.

At the end of the recipe, you’re supposed to put sea salt on these. I don’t have sea salt. And it was 1 a.m., and I was in my pajamas and not about to leave the house for sea salt.

But they are pretty good, even without sea salt.

December 4: Buttery Jam Thumbprint Cookies

Standard

Buttery Jam Thumbprint Cookies

(from http://www.chewoutloud.com)

INGREDIENTS

  • 1 cup salted butter, softened
  • ½ cup confectioners’ (powdered) sugar, plus ¼ cup more for dusting
  • 2 teaspoons pure vanilla extract
  • ¼ tsp table salt
  • 2 cups all purpose flour
  • ½ cup fruit preserves

DIRECTIONS

  1. Preheat oven to 325°F. Line a baking sheet with parchment paper.
  2. In the bowl of a stand mixer fitted with paddle attachment, blend butter and sugar until fluffy and light, 2 minutes. Add vanilla and salt, scraping down bowl as needed. Switch to low and gently mix in flour, just until combined. Don’t over mix.
  3. Roll tablespoonfuls of dough into 1-inch balls. Place dough balls on parchment lined baking sheets. Press down the center of each ball with a spoon (or your thumb!) making a slight depression.
  4. Fill cookie centers with a teaspoonful of preserves. Bake 12-15 minutes or until golden brown and puffy, but take care not to overbake. Let cool a few minutes on baking sheet, then transfer to finish cooling on wire rack.
  5. When cookies are completely cooled, dust with confectioners’ sugar. Cookies can be kept in airtight container at room temp for a few days.

When I was a kid, the kind of cookie I always reached for had something in the middle. Whether it was a maraschino cherry, or some sort of custard filling, I liked sweets that had something going on in the center. So when I make these, I think about kids that also like cookies with center pizazz.

It’s a pretty simple recipe, and at the end, you can use whatever kind of jam or preserves you want. (Don’t use jelly. I made that mistake one year. It looks like a crime scene.)

Well, I like to push the envelope a little. Remember a few days ago when I said I went to the cool international grocery store near my house? I picked up something cool.

This.

I’d never seen it before, nor do I actually know why one needs rose preserves, but I had a cookie in mind.

In my first batch, I had half apricot preserves and then half rose preserves. They baked as expected. When they cooled, I put powdered sugar on them and tried one of my rose-flavored specimen.

The lighter colored ones near the top are the rose ones.

Have you ever been to Crabtree and Evelyn? My grandmother liked to go, as did my aunt, and they’d have all sorts of fancy soaps at their houses from here. Truth be told, I like that store too (and if anyone out there wants to get me some Gardner’s Hand Therapy, I’d be a happy little baker). However, while I like that store and can reminisce about times with Grandma and Aunt Barbara with their soaps and lotions, I draw the line at eating cookies that taste like fancy soaps smell. And unfortunately, like most things in my life, I learned that one the hard way.

But once that lesson was learned, my apricot — and then later — strawberry jam thumbprint cookies did not disappoint.

I’ll leave the flower flavors to other dishes. Though I’m still not sure what!

(But seriously, if you know what rose preserves are used for, please comment and let me know!)

December 3: Shortbread

Standard

Shortbread (from Old World Garden Farms)

INGREDIENTS:

1 cup butter, room temperature

1/2 cup brown sugar

2 1/2 cups flour

INSTRUCTIONS:

Preheat oven to 325 degrees F.

1. In a large mixing bowl add butter and sugar and cream together.

2. Slowly add flour and mix just until incorporated.

3. On a lightly floured surface work the dough until it forms a ball.

4. Roll out the dough to 1/2 – 1/3 inch thickness.

5. Using cooking cutters, cut into desired shapes. Or cut into small rectangular shapes.

Today’s cookie is a new recipe for me, but it’s so simple, I still feel like I’m cheating. Shortbread is amazing…buttery, delicious, and only three ingredients. I frosted mine to give them a little more appeal, but honestly, my intended cookie-eaters today wouldn’t have cared if they were plain.

Oh yes, my intended cookie-eaters were my students. You see, my school recently acquired a table top oven, with the hopes that some kids will want to take fun baking classes with me.

Normally this holds my computer and not much else!

I wanted to take it out for a spin. This thing is not big by any means, but it did the trick beautifully. Cookies came out like they would at my house, but in smaller batches.

Now, the thing is about baking at a remote location–you have to pack everything up to take there. And this was not a fun part of my day. Between ingredients (even though there were just 3), bowls, frosting, a cooling rack, and few more things, I had to have help bringing all of this into the school today. Plus, acquiring said items made me late for work, and I hate being late. I hope offering my boss the first warm cookie from the oven helped him forgive my tardiness!

Since I work with kids, I had lots of helpers and lots of tasters. My students are 6th-12th grades, so their help resembles more actual help than if I had “helpers” of a younger variety.

But with that also came the downside…larger helpers have larger appetites. Sadly, I have no cookies left. I guess I shouldn’t say sadly though, because these kids were the most enthused and motivated as I’ve ever seen them! And the teachers were excited too! Eventually everyone’s noses led them to where I was with my mini-oven. It was amazing at what the smell of fresh baked cookies can do for people!

Literally all that were left after I remembered to take a picture. And then *these* were gone 5 minutes later!

One of my students said, “We’re baking cookies as a family.” And coming out of the mouth of a 15 year-old aspiring rapper, I was definitely touched. They may not be my own kids, but I think of them as part of my family, too!

December 2: Gingerbread

Standard

The Perfect Gingerbread Cookie

(from Sweetapolita.com)

Ingredients

  • 6 1/2 cups (815 g) all-purpose flour
  • 1 tablespoon plus 1 teaspoon ground ginger 
  • 1 tablespoon ground cinnamon
  • 3/4 teaspoon allspice 
  • 1 teaspoon baking soda
  • 1 teaspoon salt
  • 1 1/4 cups (283 g) unsalted butter, softened
  • 1 cup (220 g) light brown sugar
  • 2 eggs
  • 2/3 cup (220 g) cooking molasses
  • 1 1/2 teaspoons pure vanilla extract

Instructions

  1. In large bowl, sift together flour, ginger, cinnamon, allspice, baking soda, and salt. Set aside.
  2. In an electric mixer fitted with the paddle attachment, cream butter and brown sugar on medium speed until fluffy, about 3 minutes. Beat in eggs one at a time, scraping sides of bowl between additions. Add molasses and vanilla and beat until completely incorporated.
  3. Reduce mixer speed to low and add flour mixture until thoroughly combined, about 30 seconds. Dough should be soft (not dry or crumbly) but not sticky. If sticky, add a few tablespoons of flour until desired consistency is achieved.
  4. Divide the dough in 2, place each half on a large piece of plastic wrap, press down with the palm of your hand and make a disc about 2″ thick. Finish wrapping the disc with the plastic wrap. Chill the discs of dough for at least 2 hours.
  5. Remove one disc and remove plastic wrap. Place on top of a large piece of lightly floured parchment or wax paper (I use a silicone rolling mat underneath to ensure it doesn’t slip while rolling, but you can even dampen counter so the parchment sticks a bit.), then place two 1/4″ wooden dowels on either side of your dough, then another sheet of parchment paper.
  6. Roll dough (this will require a bit of elbow grease for the first few minutes until it softens up a bit) so it’s flush with dowels–they will ensure that your dough is even thickness.
  7. Slide your parchment paper and dough onto a board, then place in refrigerator for about 30 minutes, or freezer for 15 minutes (or more).
  8. Preheat the oven to 350˚F. Line two or three baking sheets with silicone mats or parchment. Remove the rolled dough from fridge, and cut your shapes using the cutters or template of choice, placing them on the prepared baking sheets. Bake until the edges just start to brown, about 8 minutes for medium cookies, and 10 minutes for larger cookies (such as those in the photos).Be careful not to over-bake, or cookies will be dry. Collect remaining dough and re-roll once, repeating cutting and baking steps. Dough rolled out more than once will be a little tough, so it’s best to keep it to a 2-time roll-out maximum. 
  9. Cool sheets on wire racks for 20 minutes, then gently remove cookies and place on wire racks to finish cooling. If cookies are too fragile, you can cool completely on trays.
  10. Decorate with royal icing, candies, sprinkles, and more.

So Gingerbread. It’s the stuff of Christmas dreams and Yankee Candles (but somehow the candles never actually smell like Gingerbread to me). Every year I make this, and every year I vow to just buy a new bottle of molasses. I didn’t this year. Again. That makes 15 years in a row! Through a biblical-esque miracle much like loaves and fishes, I had exactly the right amount of molasses this time around. It took about an hour to get it all out and at one point, I was wondering what was wrong with the specific gravity at my house.

I still got a little more out of it too!

But I digress.

I’ve always wanted to make an epic Gingerbread Scrabble board. I’ve thought about it for years, and for some reason, I always had to have it be Gingerbread. I think it has something to do with going to Disney World around Christmastime and seeing the things they build at the Grand Floridian out of Gingerbread.

If it’s good enough for the Mouse, it’s good enough for me.

Good kitty Zelda, watching me make her favorite cookies.

I found my spice girls and went to town. Now, I also did a few actual Gingerbread men too, but more on this later.

I won’t bore you with the details of how I measured and baked and frosted and screwed up so many times, my gingerbread started to go gray from royal icing. Well, if I’m being honest, it’s not about boring you, it’s about reliving the trauma.

There was math involved. And rulers. And at one point, I googled “equation for Scrabble board squares” and I was then mocked by Google.

But, it turned out pretty cool. I don’t think I’ll be eating this, but the whole point is I COULD. If there’s a problem and I’m the only survivor, I can live for at least 2 weeks on my Scrabble board.

Oh, and about the actual Gingerbread Men and Women. I made a few. One of my students comes to school everyday wearing a different heavy metal t-shirt. So I made this for him.

Breaking the law, breaking the law…

Honestly, it’s way cooler than the Gingerbread Scrabble game, and way less aggravating!

December 1: Oreshki

Standard

Well folks, here we are again at the start of another December. I’m proud to say this is my 15th year doing this crazy cookie thing–it may not have always been documented, but it’s always been baked!

Before I get into today’s cookie, the kick-off cookie, the cookie that starts it all (you get the picture), I want to let you know of a style change I’ll be making. Instead of putting the recipe at the end of the post, I’ll be putting it at the start. Why? Because I’ve *also* scrolled through cooking/baking pages looking for the recipe, just like you do, and it’s annoying. While I hope you stick around and read my color commentary on the cookie at hand, I want to make sure you get what you need out of this first.

Oreshki (from Alonya’s Cooking)

INGREDIENTS:

  • 2 eggs
  • 1/3 cup sugar
  • 1 stick unsalted butter softened
  • 6 1/2 tbsp mayonnaise
  • 1/8 tsp baking soda
  • 1 tsp vinegar
  • 1/4 cup cornstarch
  • 2 cups all-purpose flour
  • FILLING:
  • 1 stick of unsalted butter softened
  • 1 14oz can dulce de leche
  • 1 tsp sour cream

DIRECTIONS:

  1. Make the filling first, as it needs time to set; beat together the filling ingredients and refrigerate until needed.
  2. TO MAKE ORESHKI: In a medium bowl beat the eggs and sugar until pale and frothy; set aside.
  3. In a separate small bowl beat the butter until smooth then add the mayonnaise and mix to combine. Set aside.
  4. Dissolve the vinegar with baking soda and set aside.Sift together the flour and cornstarch into a large bowl.
  5. Add the egg mixture, butter mixture and soda mixture and beat everything together until a soft dough forms.
  6. Cover and refrigerate dough for at least 1 hour before handling.
  7. Once dough is cold enough to work with; scoop out 1 teaspoon full of dough into each oreshki mold.Lightly mold in the dough into the cookie iron.
  8. Cover mold with the lid and bake in a preheated 375 degree F oven for 30-35 min or until golden.
  9. Invert cookies onto a tray and continue to work with remaining dough chilling the dough in-between the handling.
  10. Cool cookies completely before filling.
  11. TO ASSEMBLE ORESHKI: Fill each cookie half with the filling mixture and combine the cookie halves to form a walnut shape cookie.
  12. Refrigerate shells and serve cold at all times. Enjoy!

Okay, now to the good stuff.

So I have a very cool grocery store within walking distance of my house. (Not that I walked there, no, it’s December and I’m not in the South anymore.) It looks boring enough from the outside, like most grocery stores do. However, inside it’s like an international vacation without ever pulling out a passport. They have Asian things, they have Hispanic things, they have Kosher and Hebrew things, and they have Russian and European things.

On this last point, there are a lot of countries in Europe represented here, but there is more Russian/Eastern European things in this grocery store than anything else. (And yes, I know Russian is in Asia.) There’s a large Russian/Eastern European population near where I live…though I don’t know if I’d know this without help of this grocery store.

My point is, they have cool stuff there in other languages that look amazing. I saw these a few weeks ago and haven’t stopped thinking about them.

They looked like walnut shells, but baked, and apparently you fill them with things. As I was contemplating Googling that exact phrase, I saw the name Oreshki on the package and instead Googled that.

I literally saved myself hours in doing that.

I found a number of recipes for this cookie, generally considered a Slavic cookie, and in all of them, the recipe talks about getting a special pan to make these cookie shells. In fact, every recipe I saw talked mostly about how to prepare the cookie part of this, and the filling was mainly an afterthought.

I brought out my Santa mug to soften my first butter of the season.

As I already had the cookie handled, I went straight to the filling. (Though I’m now intrigued with this pan and it’s on my Amazon list.)

Once I found a recipe I thought I could handle, I assembled the filling. In this case, it was literally three ingredients: Dulce de Leche, butter, and sour cream. All things I love.

Mix, chill, and plop.

Or so I thought. I mixed. I chilled. And I plopped…and then discovered I put too much filling in each and had to scoop out a spoonful from half my shells.

Live and learn.

Once I was able to assemble these cookies without a Dulce de Leche lava trail, I sprinkled them with powdered sugar and put them in the fridge. This recipe says specifically to keep them there. I have no problem with keeping these cold, but I live with 2.5 teenagers (my youngest is 12 and a half). Things in the fridge tend to disappear quickly, without a trace, and with no one taking responsibility for the disappearance.

Therefore, these will live safely in the trunk of my car.