December 7: Sour Cream Cookies

Standard

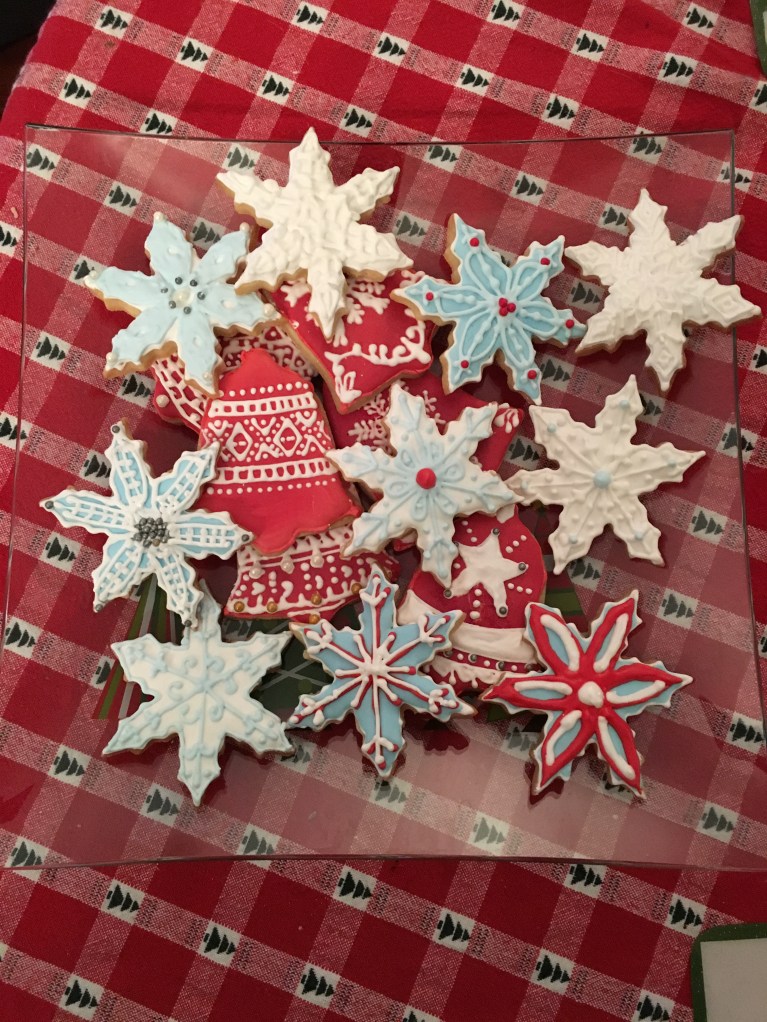
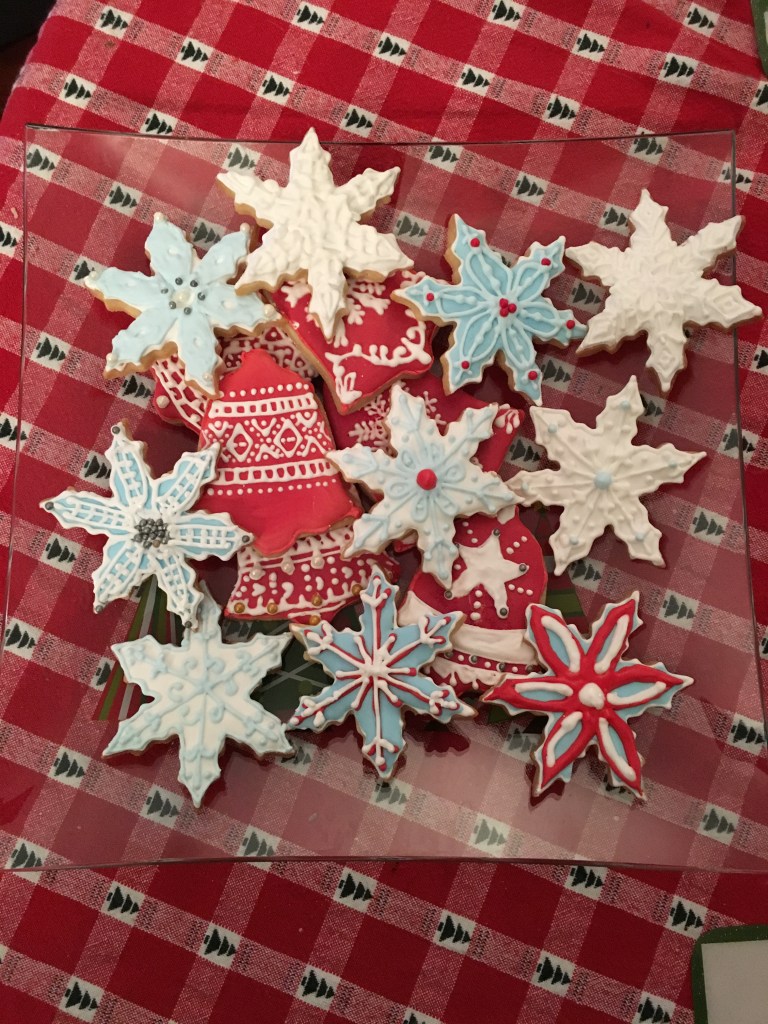
Yeah, I took the lazy way out this time in putting this recipe up. But, I think there’s a lot of character here too. As I was with Man Friend at his parents’ home for his birthday and his mom and I talked about cookies, she pulled out this recipe and let me take a picture of it. She said (if I’m remembering correctly…again, there was some wine involved) that this was an old one she remembers her mother making. “I mean, this was typed,” she said to me.

For those of you that don’t know this, before computers, there were typewriters. You might see some with bearded men wearing skinny jeans at Starbucks. But before they were retro-cool like that, they were just…necessary.

Anyway, I made these and remembered the importance of reading ahead. More on that later.

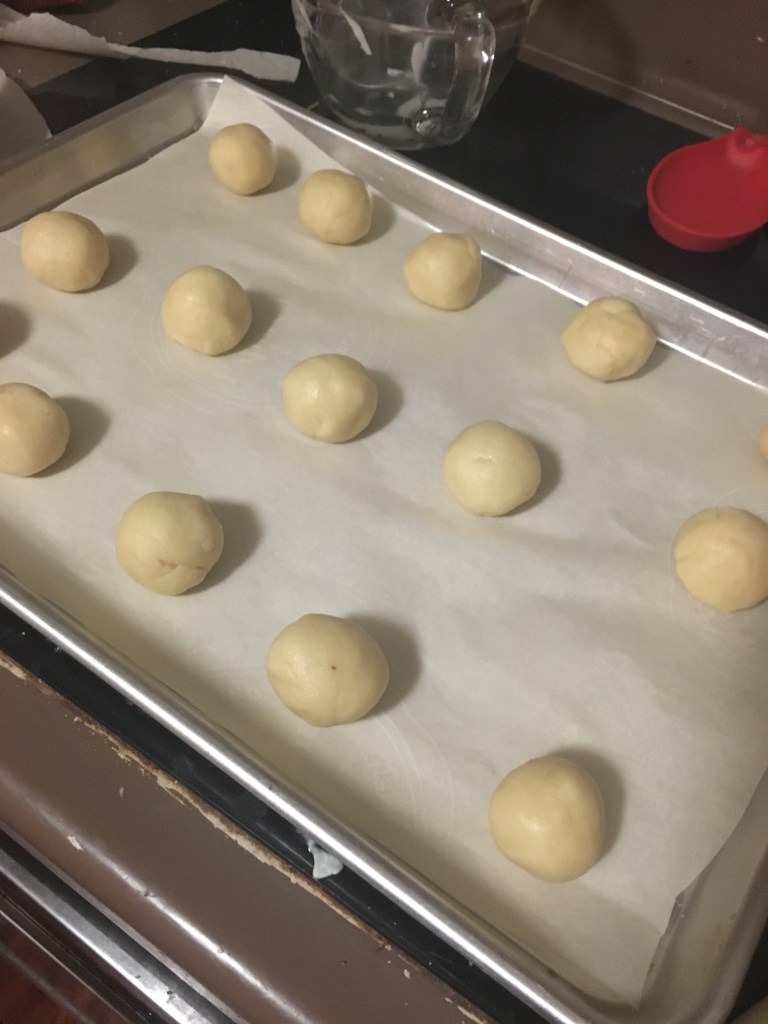
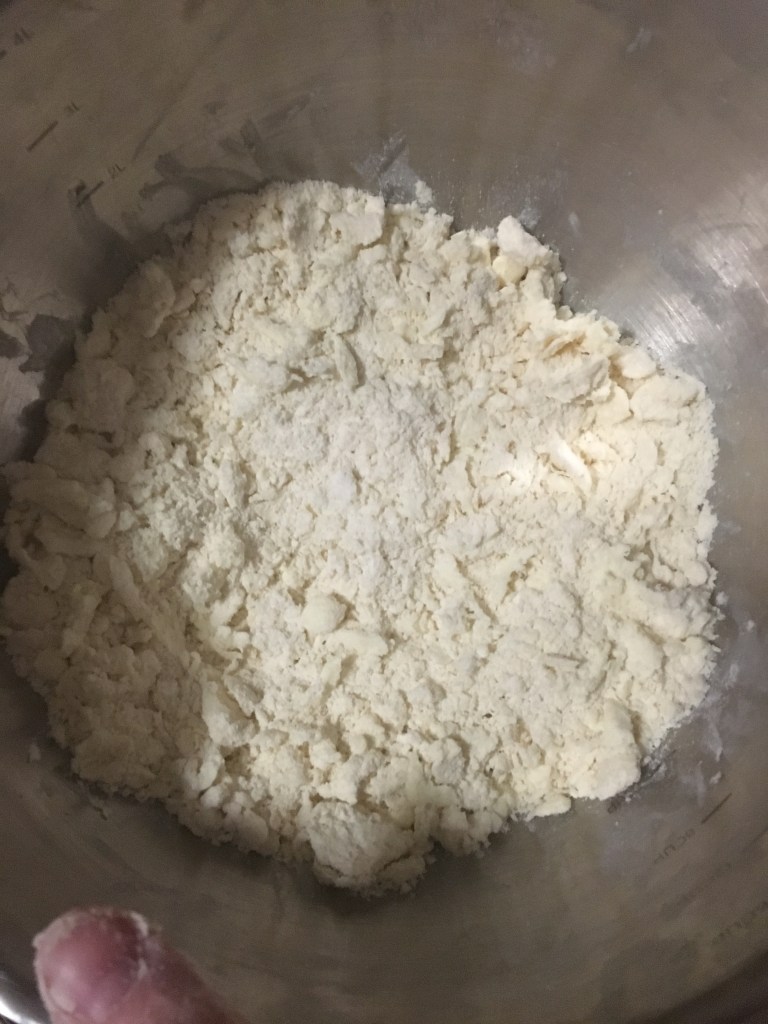
First of all, this recipe starts with a pastry blender. If you don’t have one, you can use a couple of forks. You cut the butter into the flour, making tiny little crumbs of butter covered with flour, if you’ve done it right. You do the same thing for biscuits, some pie crusts, basically anything with high amounts of butter in it.

Butter and flours successfully combined.

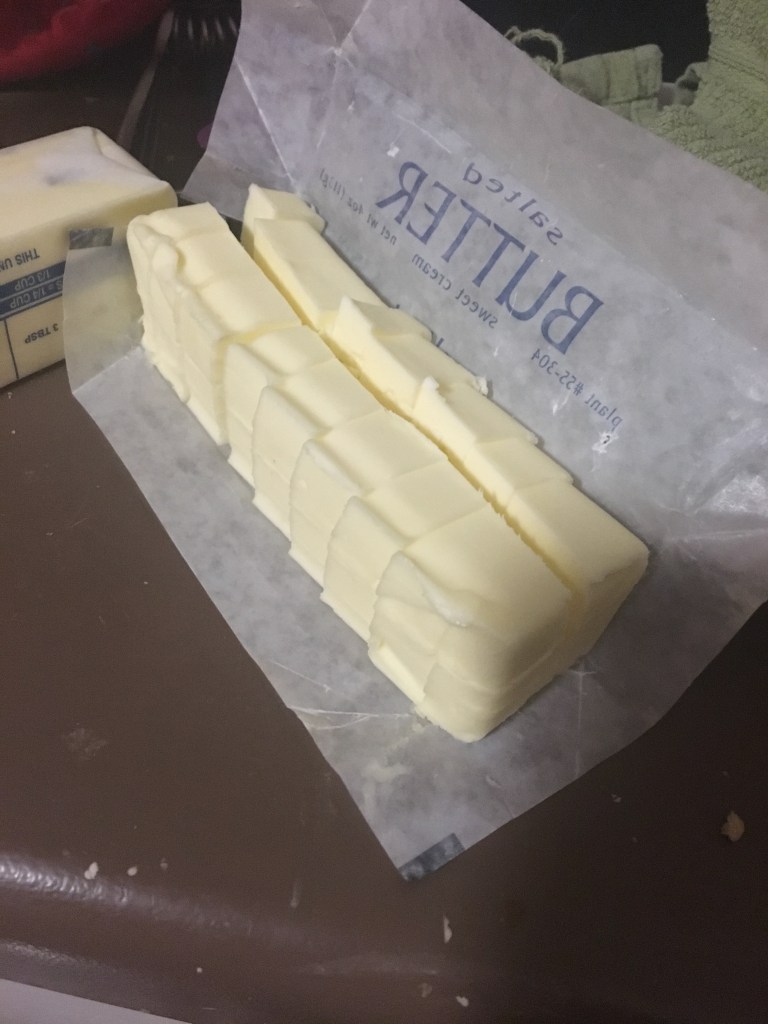
I cube my butter first, which essentially means I make a cut down the length of the stick of butter, then flip it on its next edge and do the same thing. Then I cut the stick like I would to get a pat of putter. Ouila. Butter cubes.

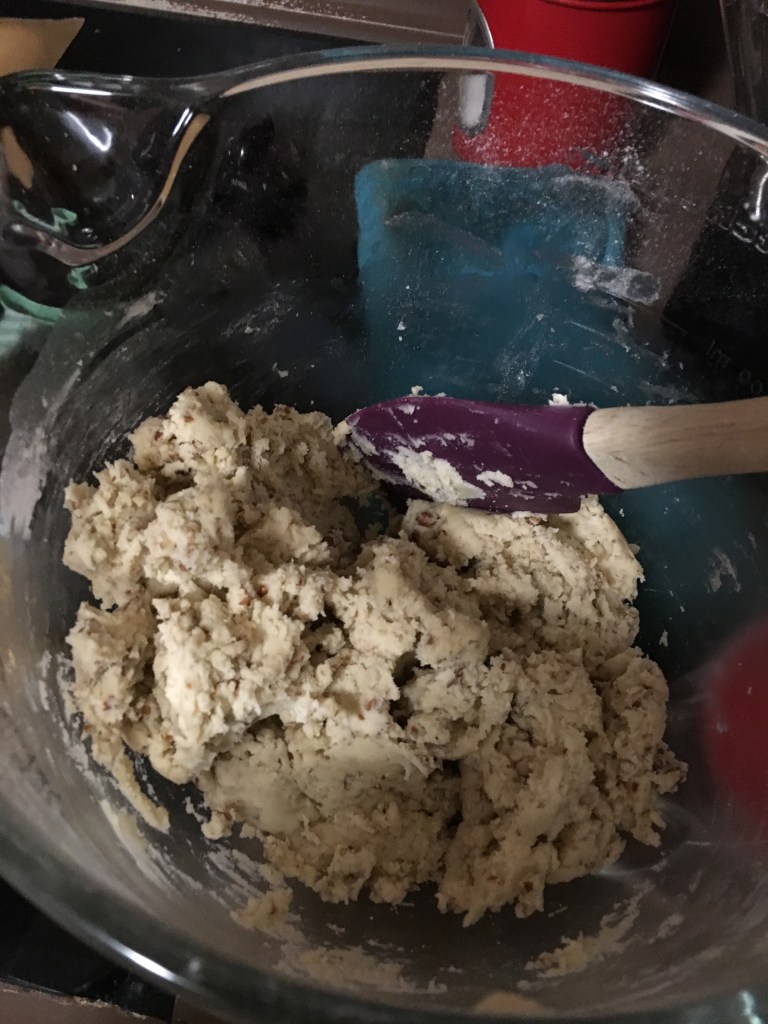
This recipe is called sour cream cookies for a reason. As you’d imagine, there’s sour cream in it. I love sour cream. It’s probably my favorite food. A half cup of sour cream and an egg yolk mixed together goes into the flour and butter crumbs. Butter’s also a favorite food; so far, this recipe has allllll the right moves.

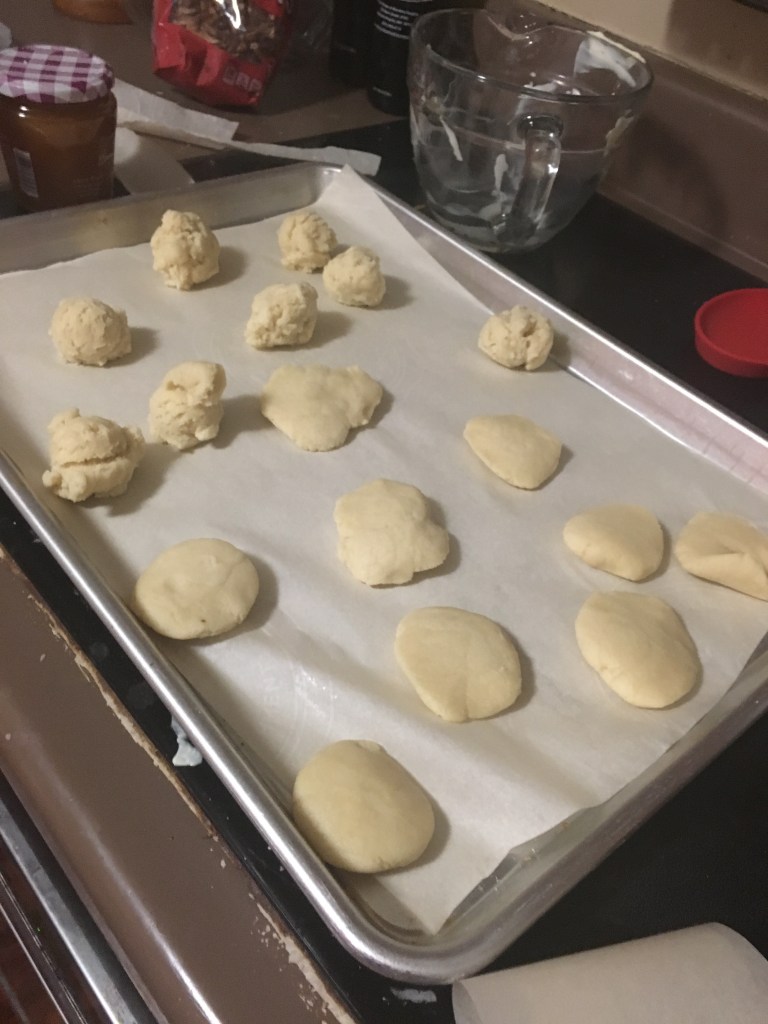
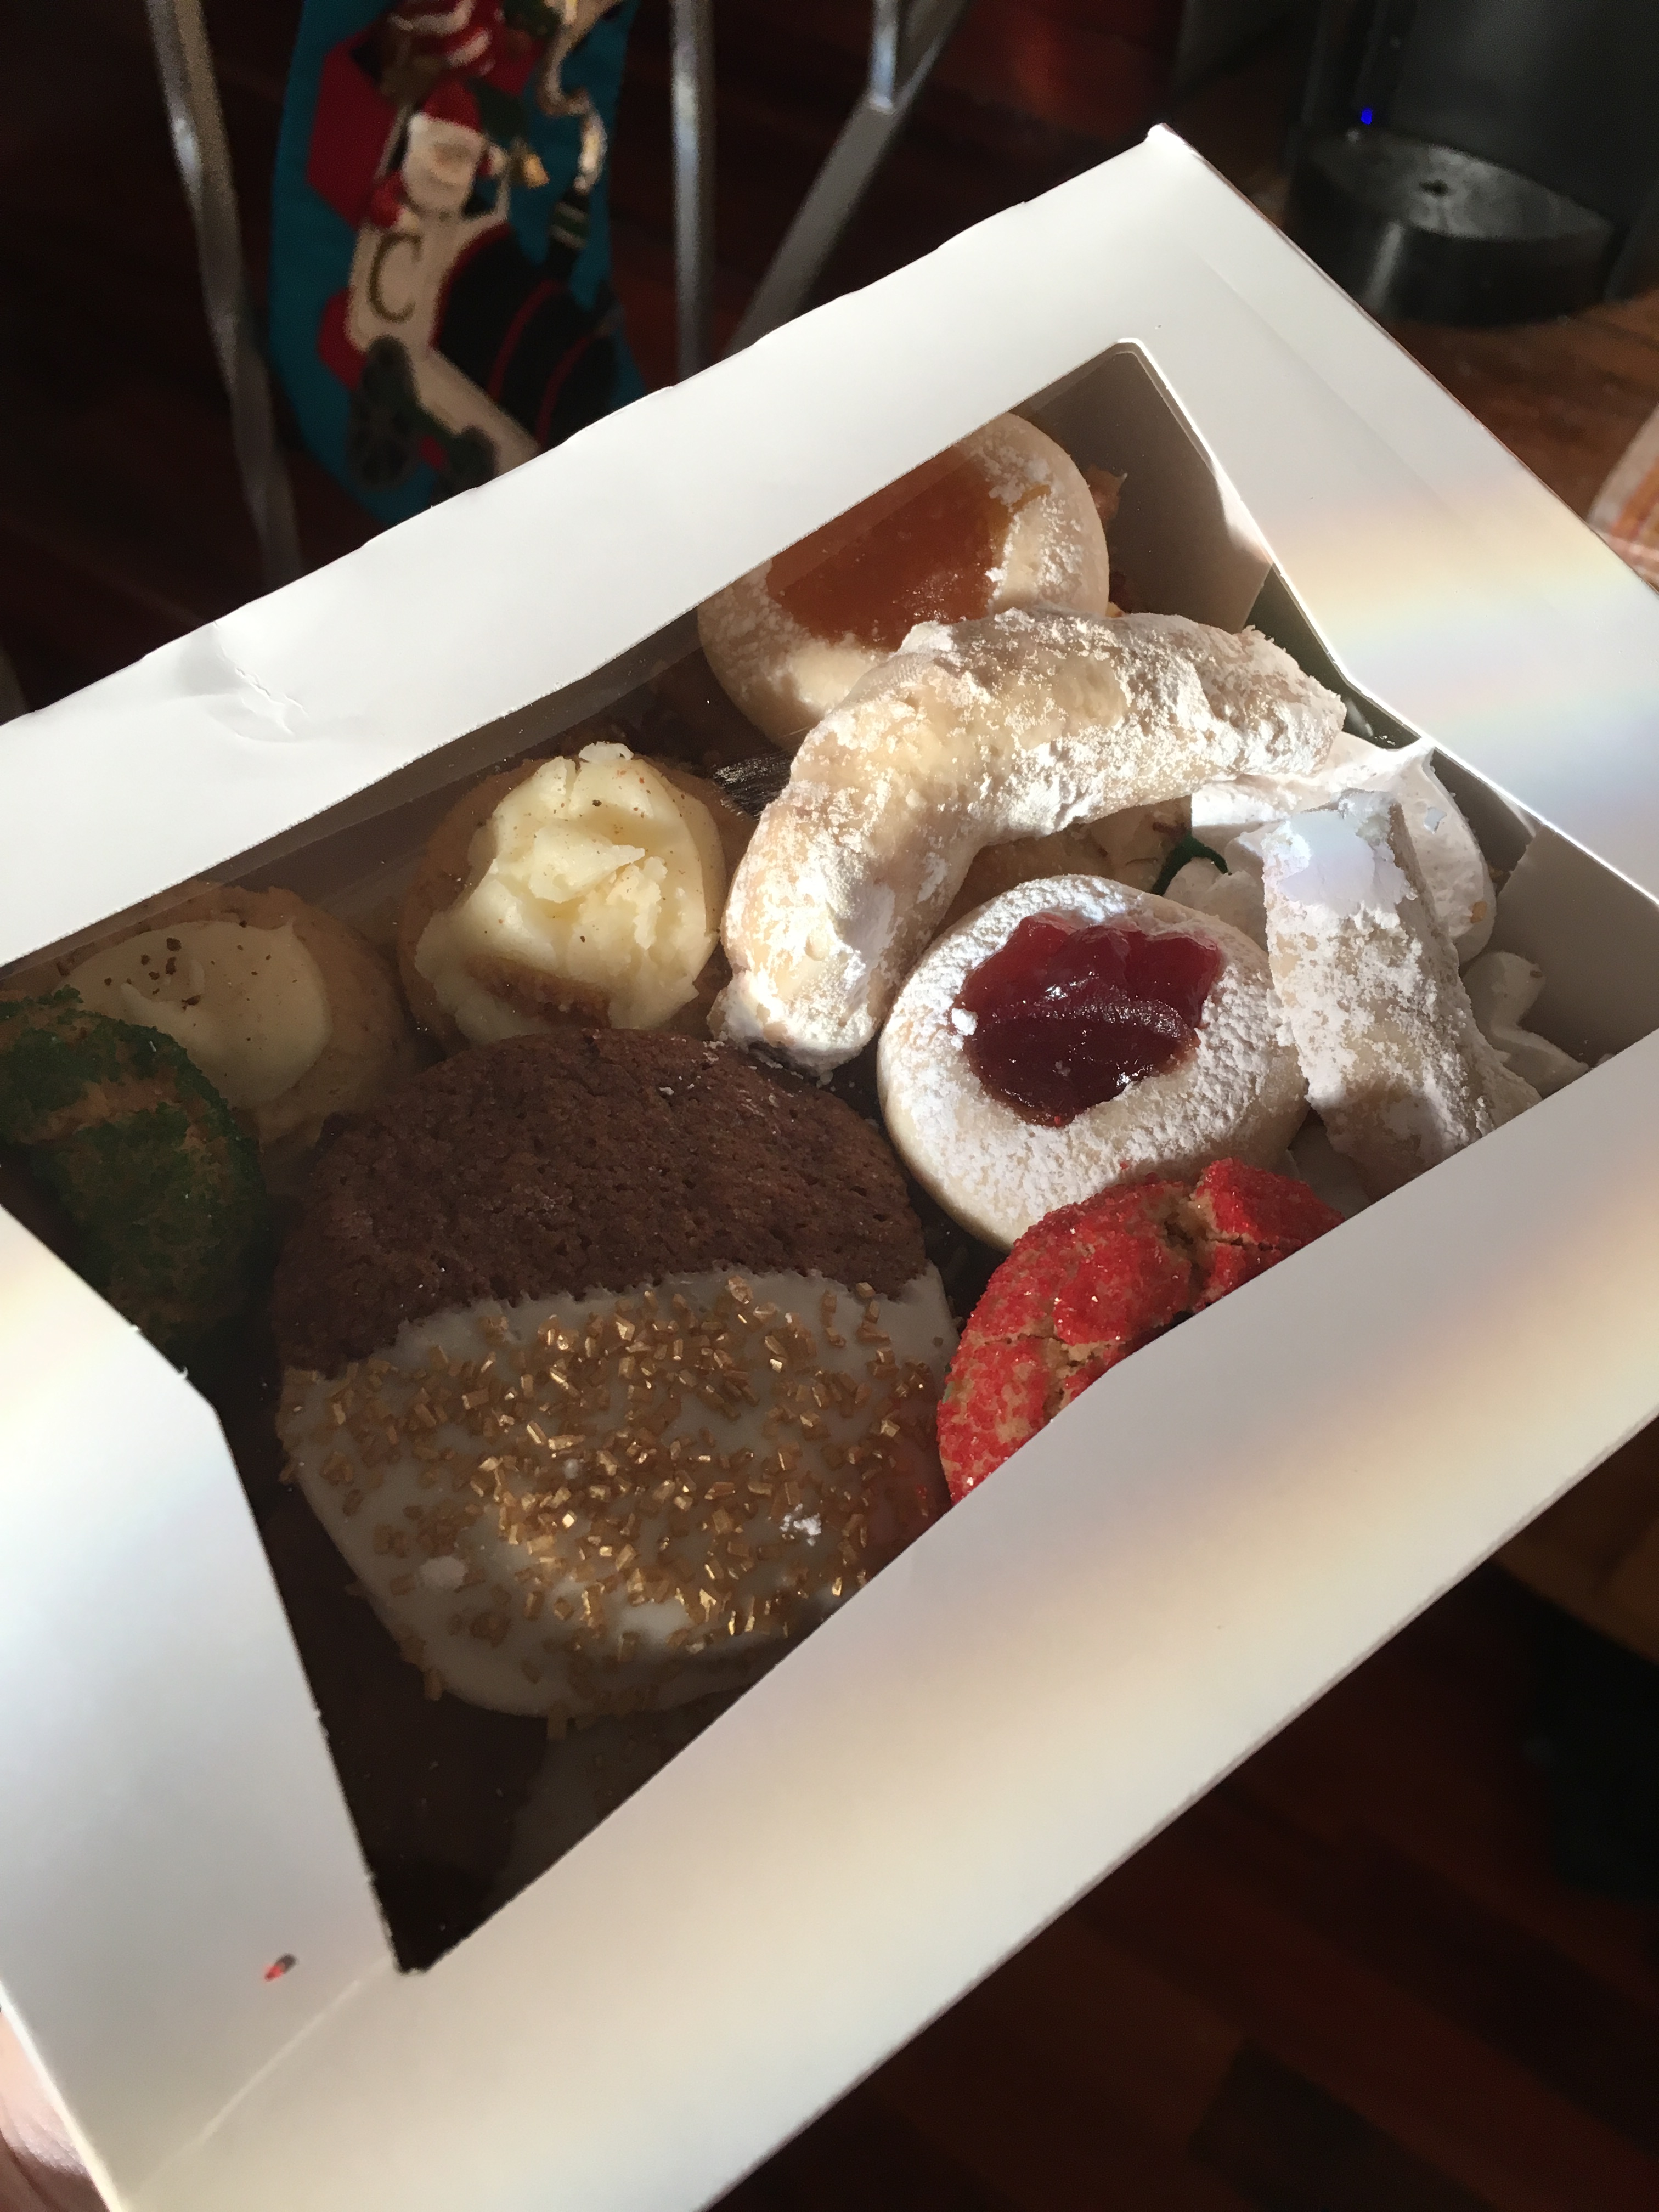
Once it’s all combined, it goes into the fridge. I didn’t do overnight, nor did I split it into 4 different sections. When I was mixing together the fillings, it took me longer than I’d like to admit to understand that this recipe lists three different types of fillings. Not all together. Reading: it’s not for everyone!

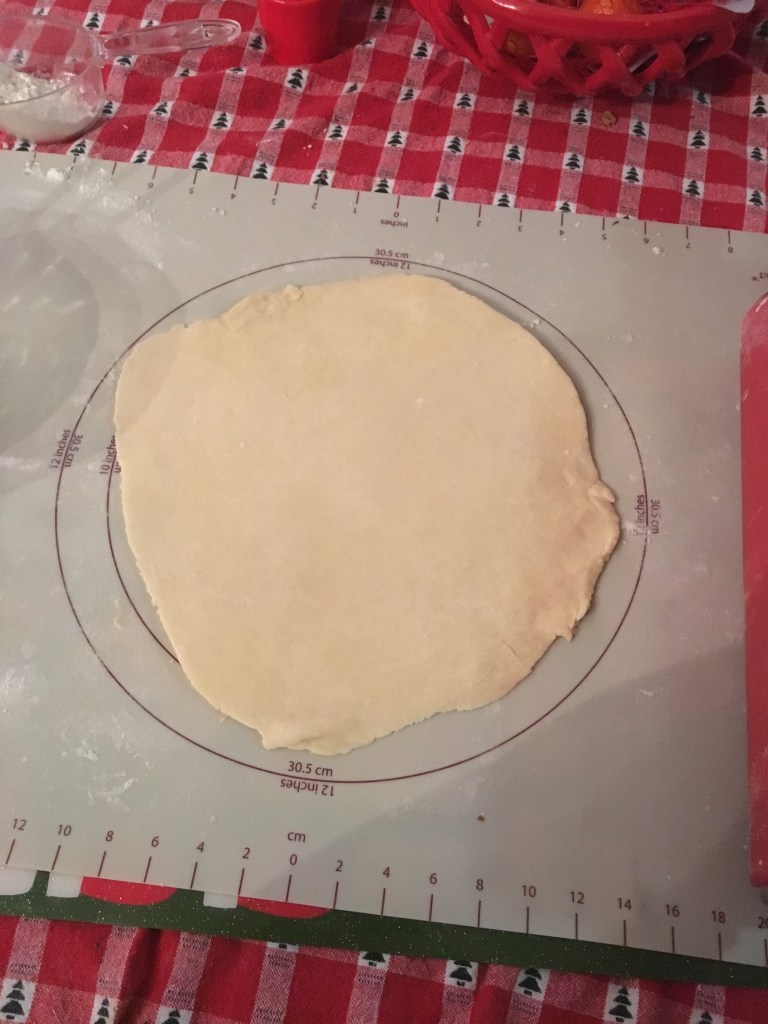
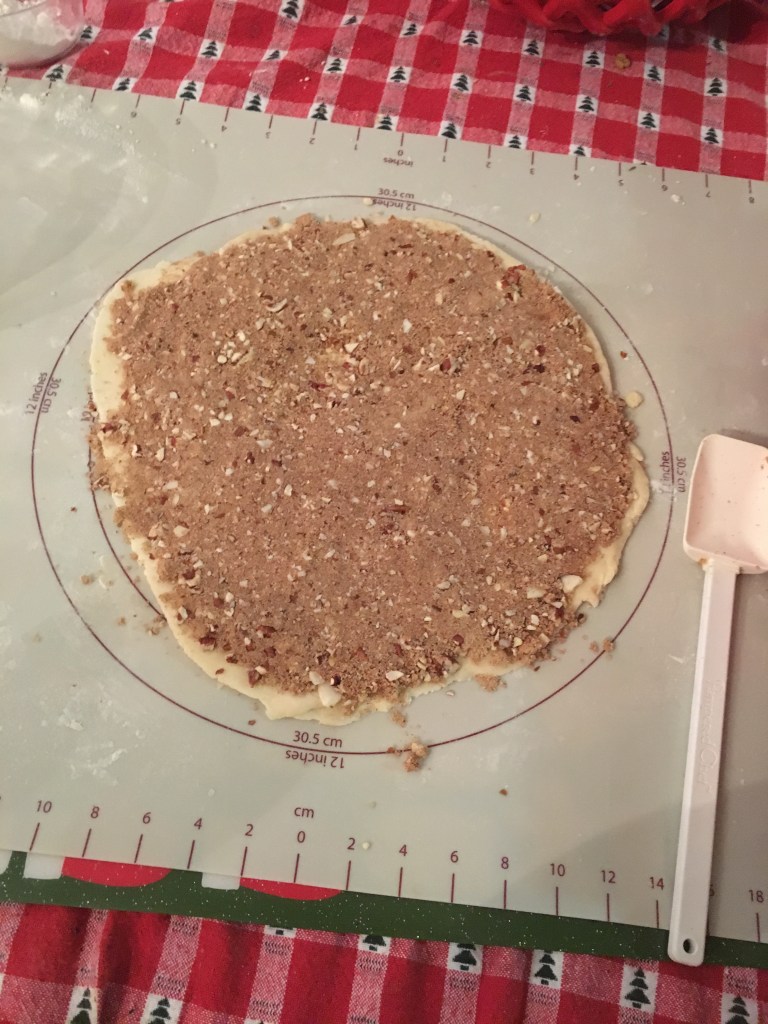
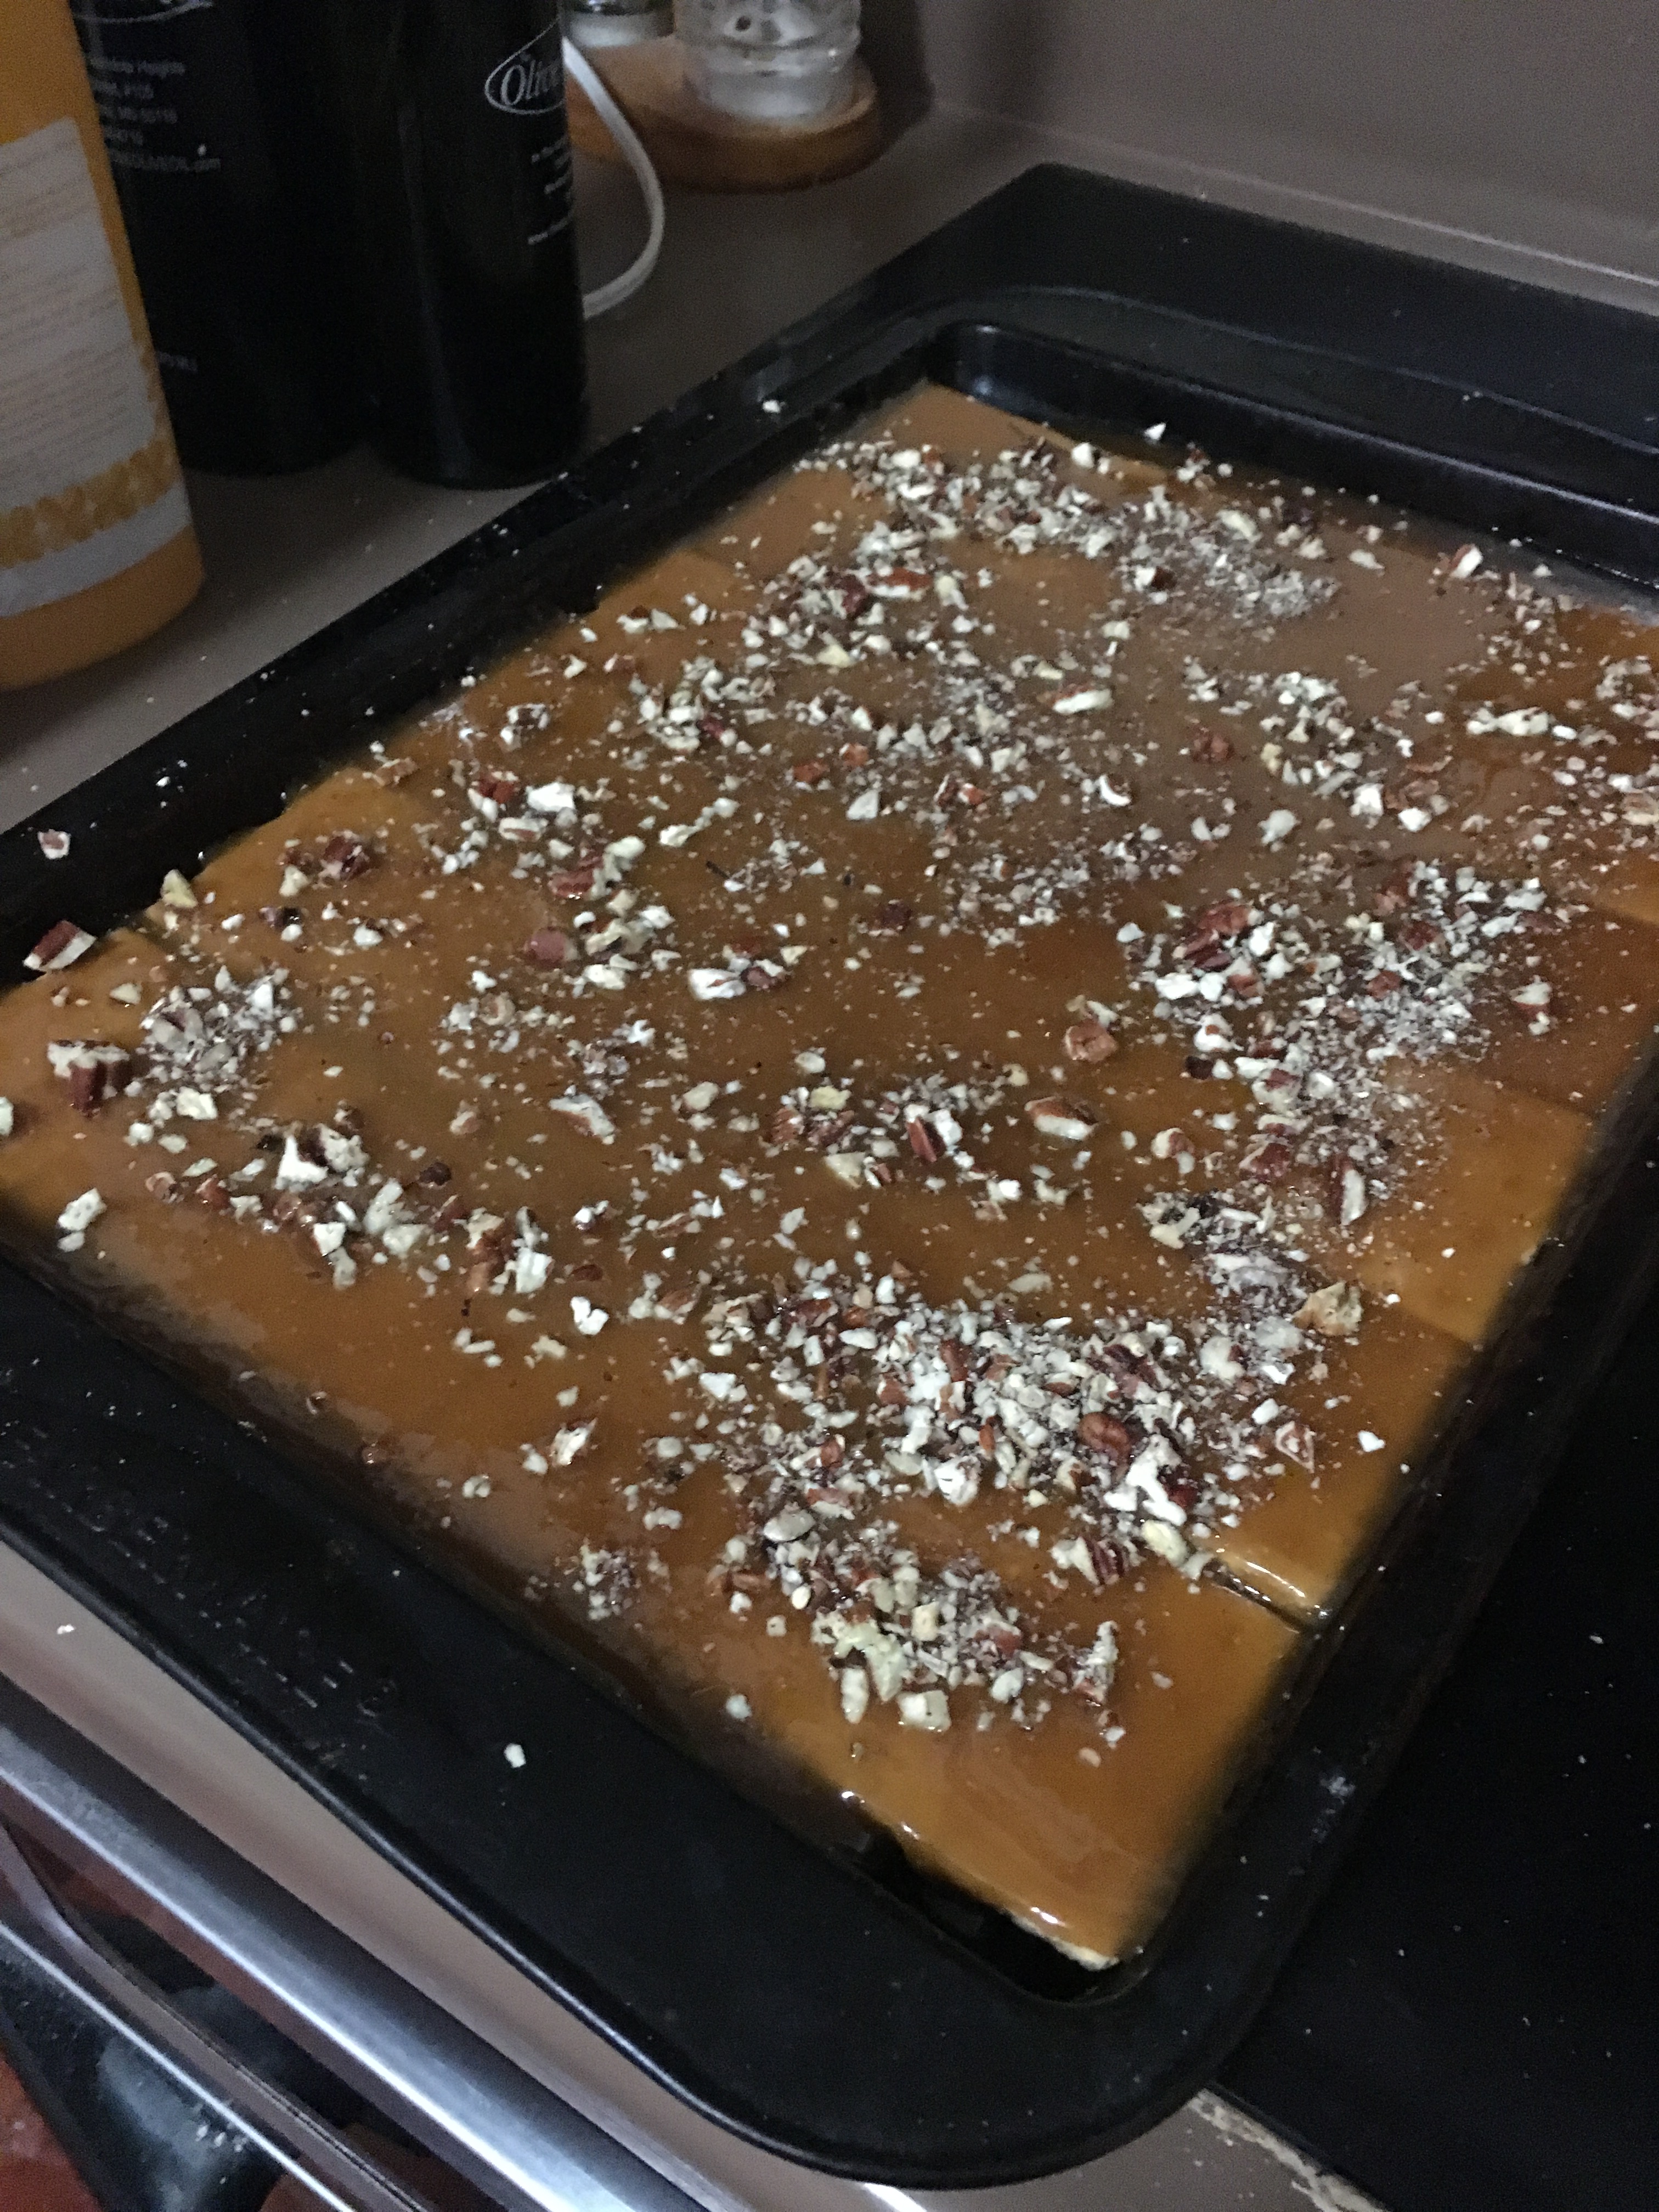
I pulled it out of the fridge and rolled it to a 10 inch circle. Then I tried to put all of the brown sugar mixture in it on one go. Note: don’t do this.

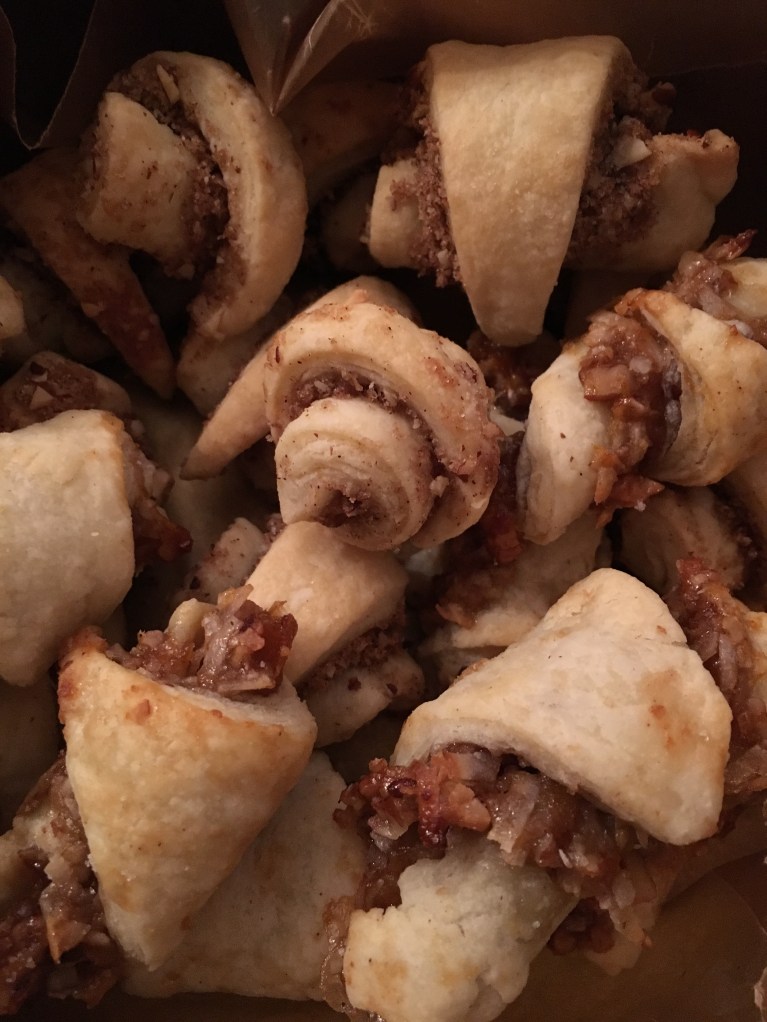
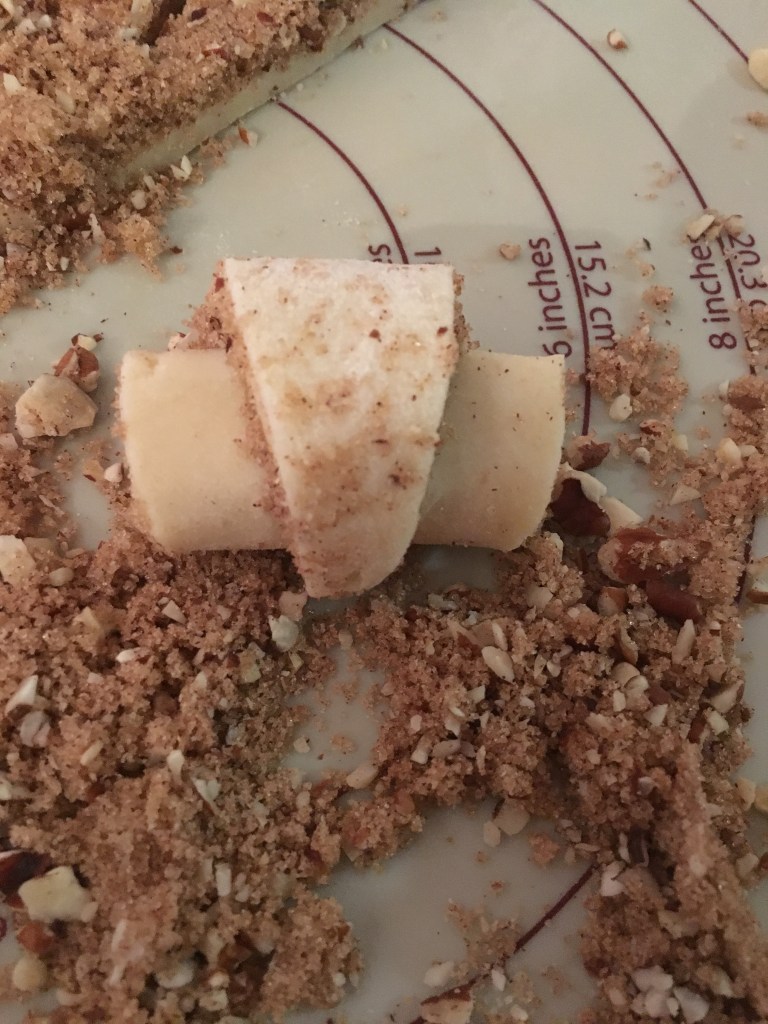
When in the oven, some of the cookies expanded and unrolled and, while super tasty, aren’t quite what you are supposed to get.

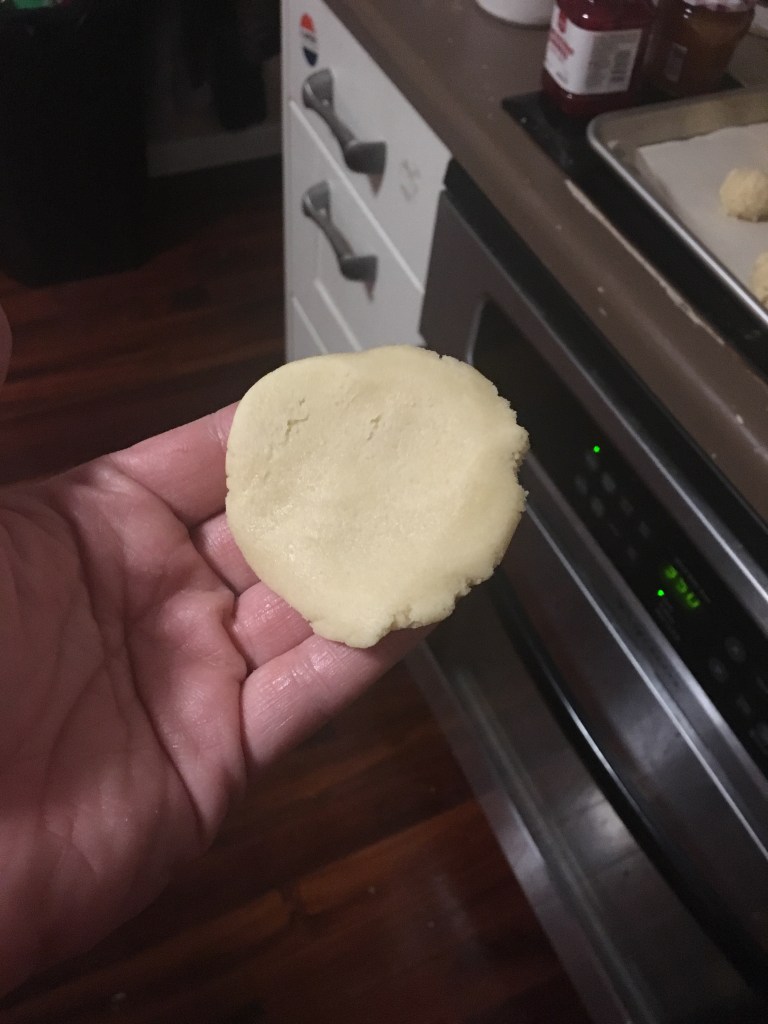
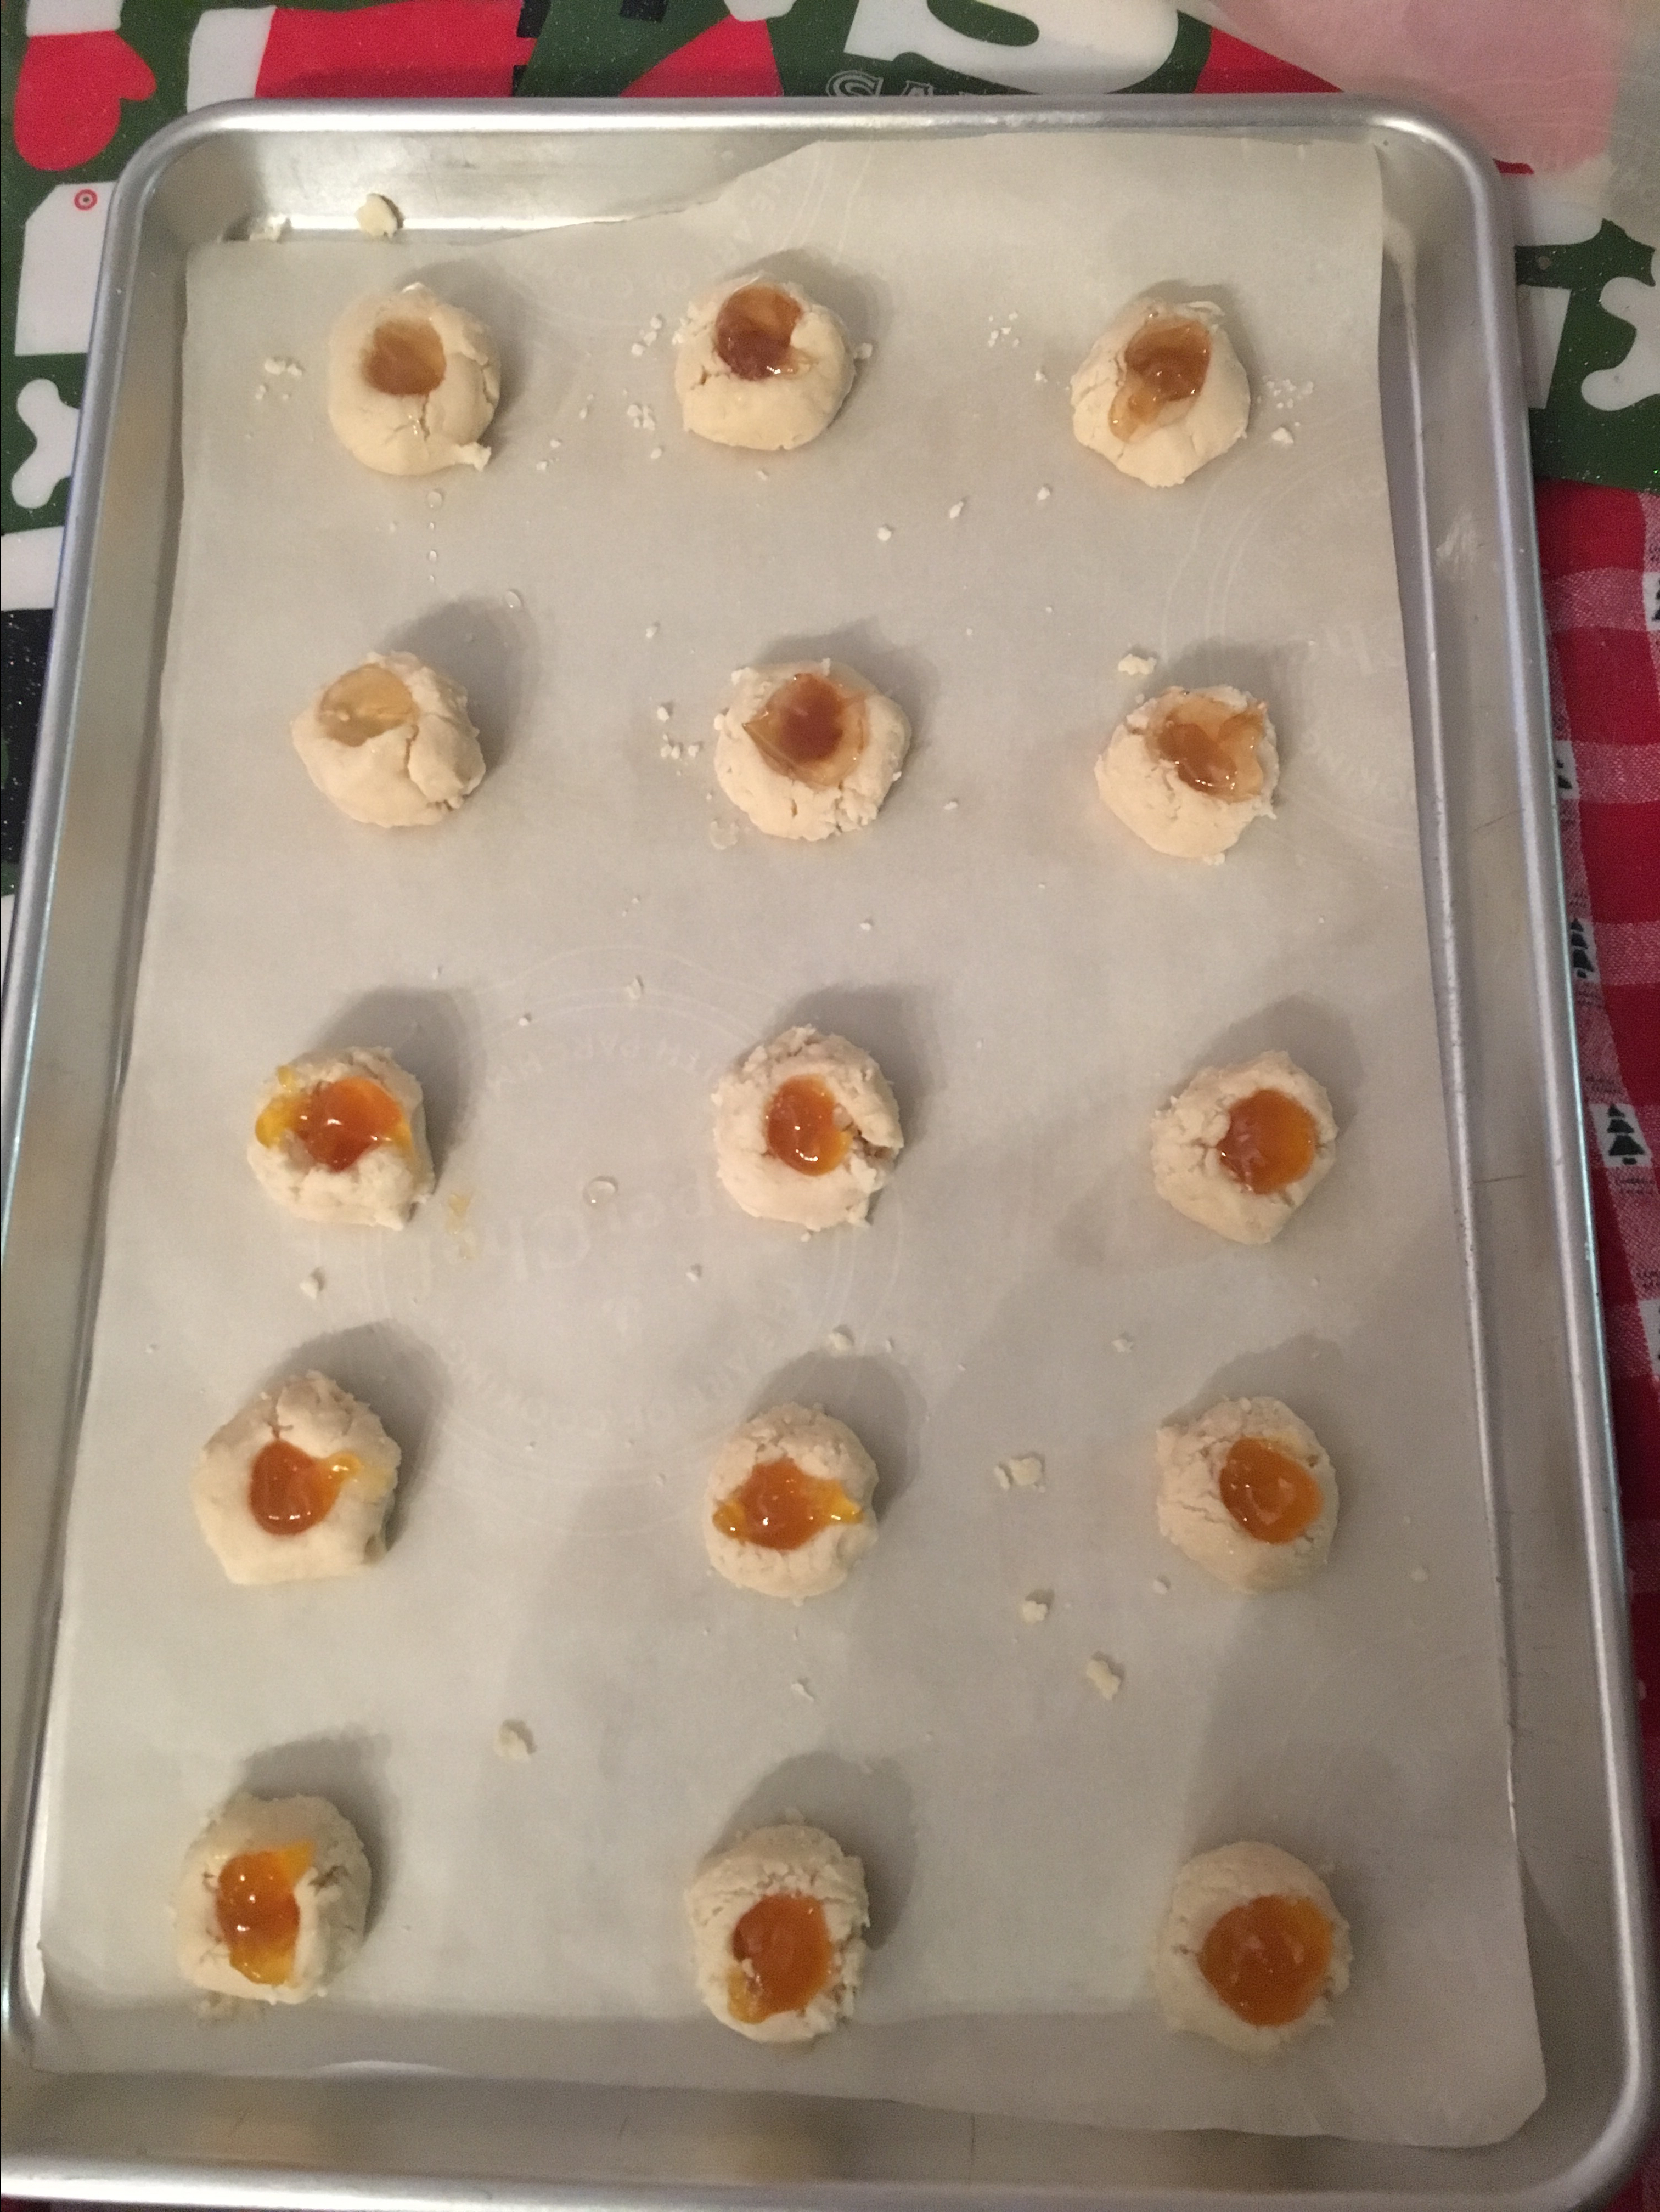
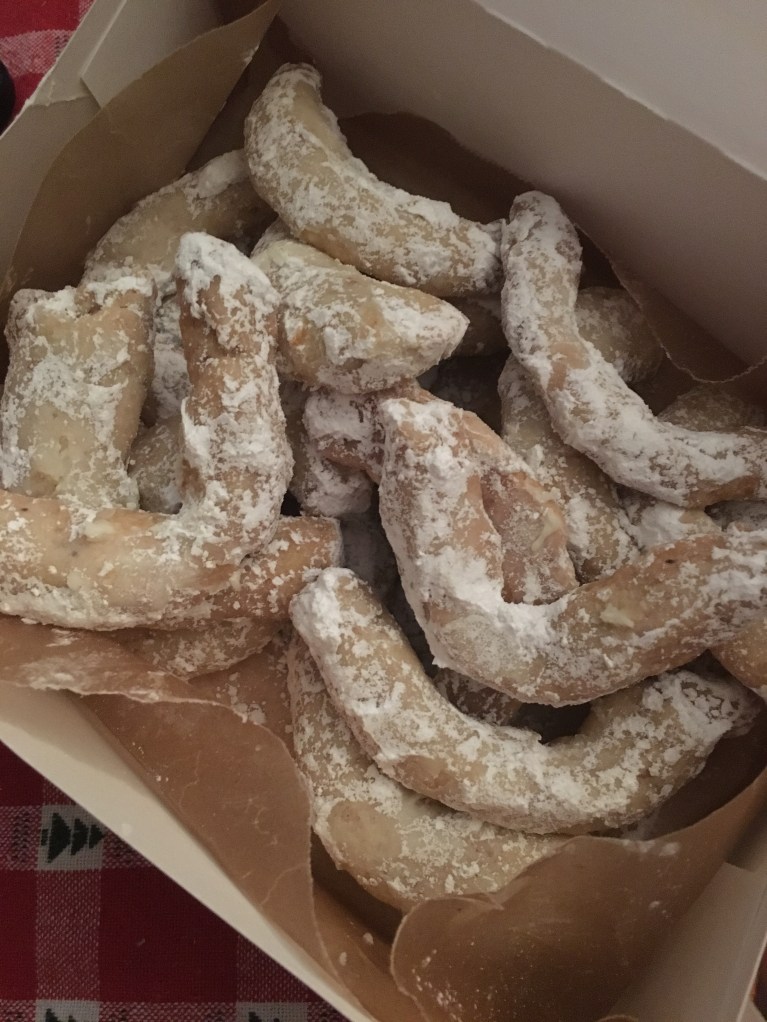
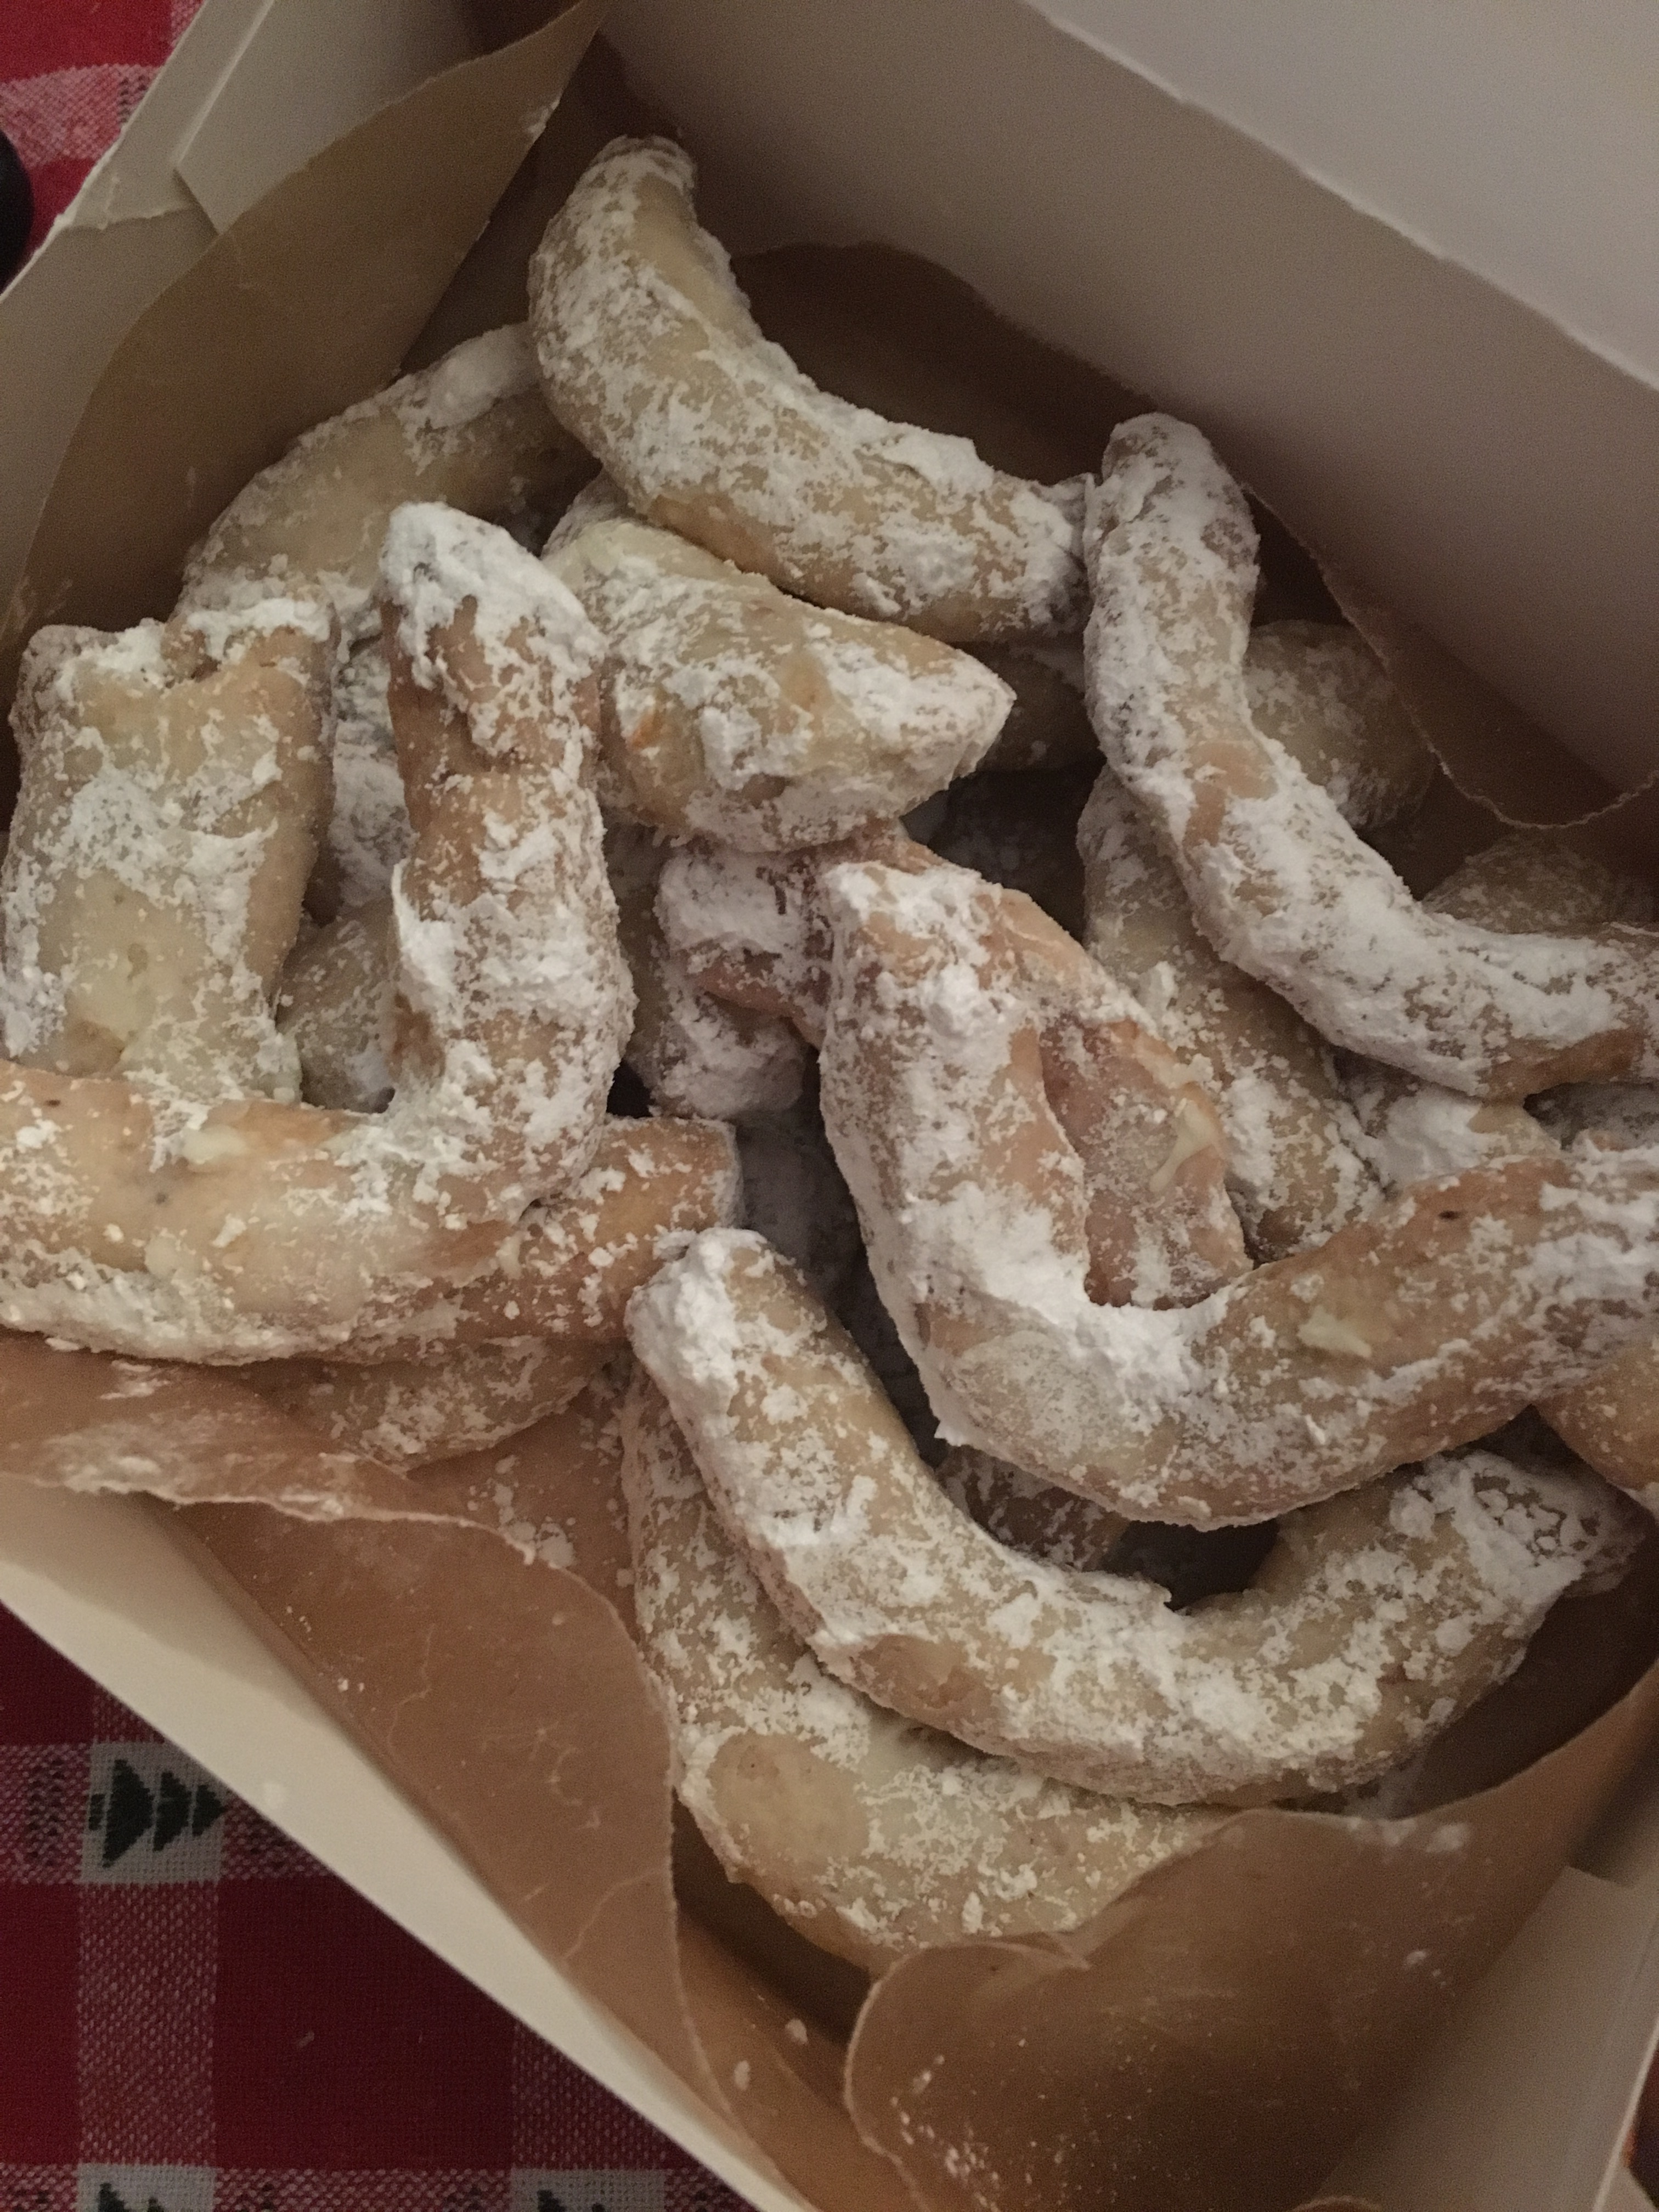
Man Friend’s mother said these are almost like Rugalach cookies, and that was important when I was rolling them up. I used a pizza cutter instead of a fluted pastry cutter, mostly because it’s 2019 and even I don’t have a fluted pastry cutter.

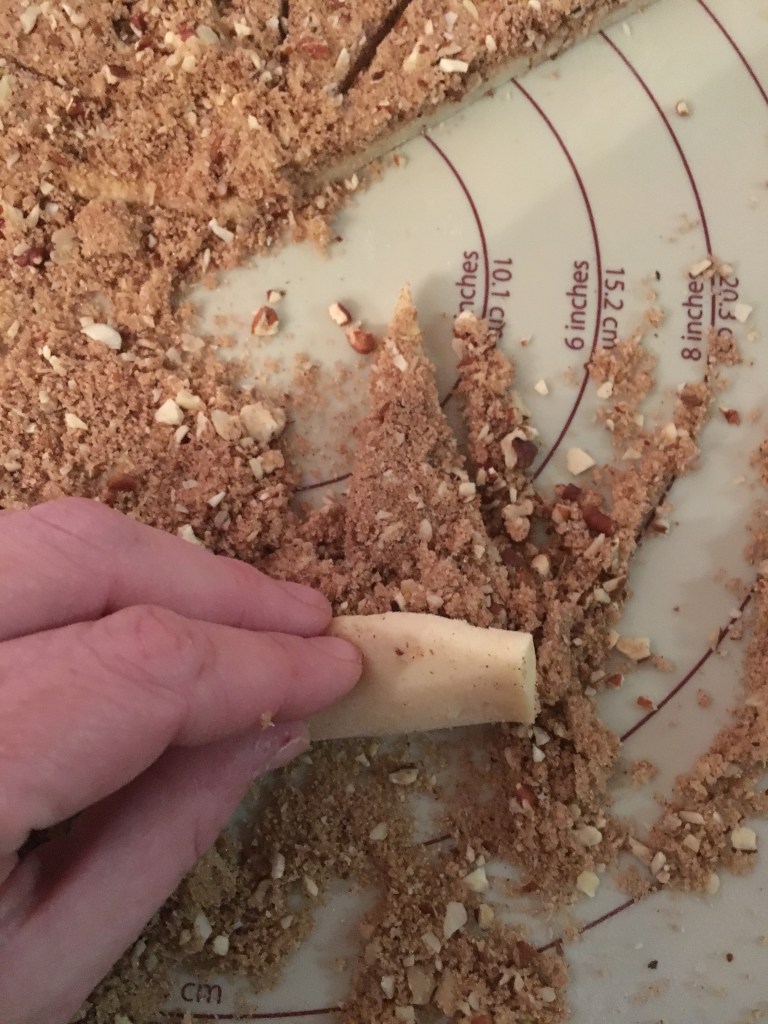
I rolled them up like crescent rolls and put them on the tray.

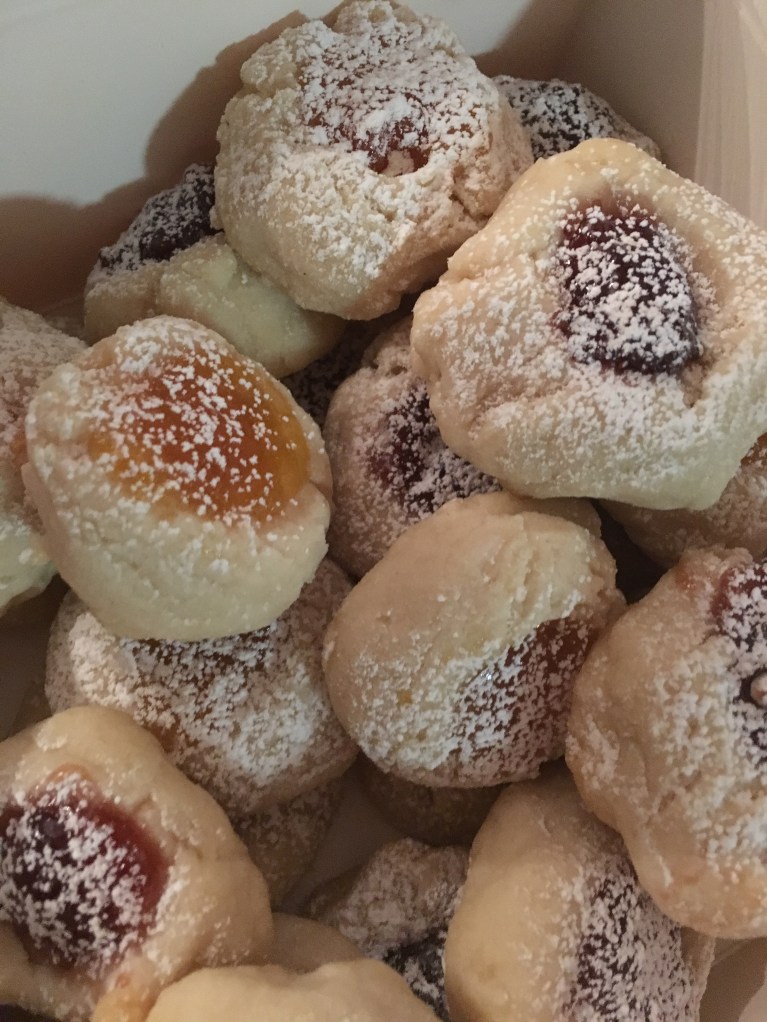
And then I tried it with the other fillings. The one with apricot and nuts was exceptionally good, especially since I wasn’t planning on liking it. It’s definitely an old school filling.

INTENSE Apricot!

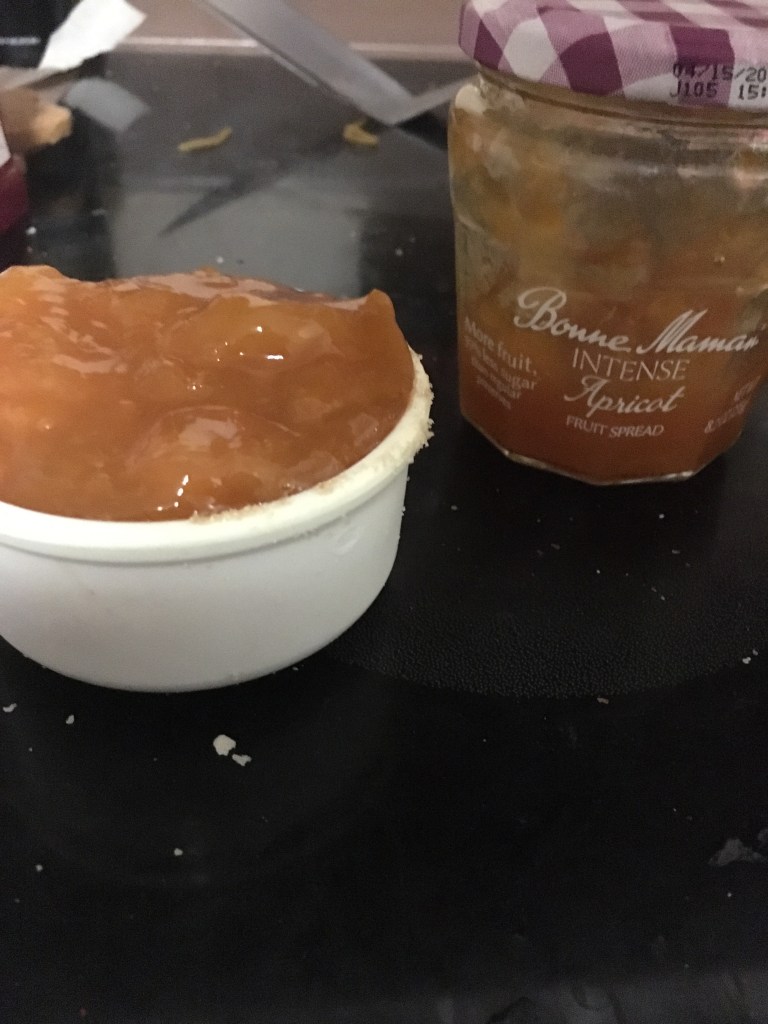
There’s no sugar in this dough, so the filling makes up for it. In the brown sugar, it’s evident. But in the apricot preserves it’s not as apparent. But there’s a good amount in there, which I was worried about.

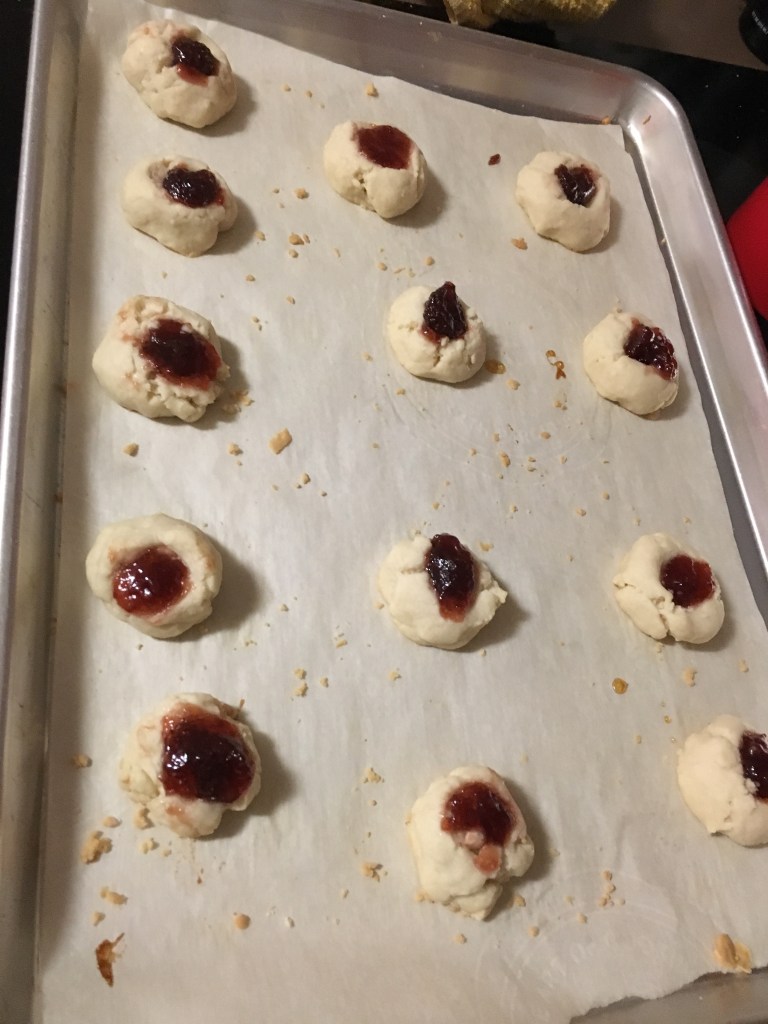
However, I will also warn you, dear readers, to not try to use regular old strawberry preserves, straight from the generic aisle at the grocery store. I did. And those cookies looked like a homicide. I ate the evidence. There’s just not enough fruit in there to make the cookies hold together and not bleed. Bleed strawberry jelly, of course.

A sprinkle of sugar on the tops and they go in the oven. I would make these again, happily, and would do so knowing my kids won’t touch these with a 10 foot pole. Those are my favorite kinds. They just don’t know what they’re missing!

December 6: Cherry Surprise Cookies

Standard

Cherry Surprise Cookies (from Honest and Truly)

Ingredients:

  • 10 T unsalted butter, softened (or coconut oil to make them dairy free)
  • 3/4 cup sugar
  • 1 egg
  • 2 T milk (or rice or soy or almond milk)
  • 1 1/2 t vanilla bean extract (I used almond actually)
  • 1 t baking powder
  • 1/4 t salt
  • 2 cups flour
  • 30 maraschino cherries
  1. Preheat oven to 350 degrees.
  2. Beat butter and sugar until they are creamy and have come back together and the color is lightened. Add egg, milk, and vanilla, and mix to combine. Once it’s mixed together, turn it up to high again for another thirty or so seconds to get it nice and fluffy.
  3. Add the salt and baking powder, and mix well. Then add the flour, and stir slowly until it’s combined.
  4. Prepare your cherries. Place a paper towel in a small bowl and remove the maraschino cherries from their juice. If they have stems, go ahead and remove them and let the cherries dry out a bit on the towel.
  5. Scoop out cookies using a cookie scoop or make little mounds with about 2 tablespoons of dough each. This is what you’ll use to start the cookie itself. They don’t need to be pretty yet, as we’re just focused on making sure that your cookies will all be approximately the same size.
  6. Next, start making the surprise. Pick up a dough mound and carefully flatten it in your hand. You want it to be a little over two inches in diameter, but they don’t have to be perfect circles.
  7. Place a cherry in the center of your flattened disc and fold the edges up around it. Crimp and seal the opening and roll the balls in your hand until they are completely sealed and nicely rounded. Place on a cookie sheet. Make sure they are a couple inches apart, though they don’t spread as much as many other cookies and can be a little closer than normal.
  8. If you’re dipping them in sugar, now is the time to do it. Place your sugar or sprinkles in a small dish and gently press the top of your cookie into the sugar before placing the cookie onto the cookie sheet.
  9. Bake in your 350 degree oven for 12-15 minutes until lightly golden around the edge and the outside is starting to crack. Cool on your cookie sheet for 5 minutes, then move to a cooling rack to cool completely. Store in an airtight container on the counter for up to a week.

I have been looking for the same cookie recipe for the better part of a decade. It has almond extract and maraschino cherries. The dough is almost like a butter cookie, and the cherry sits in the middle of it, totally hidden.

This isn’t it.

But it’s pretty close.

Butter cookie-based, maraschino cherries, and almond extract…okay, this recipe calls for vanilla bean extract, but I used almond because I love almond.

I mixed it together, poured a bottle of maraschino cherries in a strainer and rinsed, dried said cherries, and took mounds of dough and turned them into mini cookie dough pancakes. The cherries found a home in the dough, where I rounded them into balls.

I also dipped the cherry balls in red sugar. I have a small problem with sprinkles, as I’ve mentioned before. Here’s the current collection:

And I like looking for different colors, sizes, and mixes. But for these, I just used regular old red sugar.

For the first batch, I just dipped the tops in red sugar. This was before I knew the cookies would spread the way they did. And the result out of the oven looked like slightly pornographic cookies, if that particular industry was interested in middle age women.

So for the next batch, I rolled the whole cookie in red sugar, and we had success.

Once they cooled, my taste-tester and I determined that these were pretty darn good.

Maybe not the recipe I’ve been trying to recreate over the years, but still delicious.

December 5: Salted Dulce de Leche Thumbprint Cookies

Standard

Ingredients:

  • 1/2 c. unsalted butter, softened
  • 1/4 c. packed light brown sugar
  • 1 t. vanilla extract
  • 1 egg yolk at room temperature
  • 1 1/4 c. all-purpose flour
  • 1/8 t. salt
  • 1/4 c. dulce de leche
  • 2 T sea salt

Instructions:

  • In a large mixing bowl, beat together the butter and sugar with an electric mixer on medium speed for 3 minutes. Beat in the vanilla and egg yolk.
  • In a separate bowl, combine the flour and salt. Stir with a whisk. Gradually stir the flour into the butter and mix just into blended.
  • Shape the dough into a ball, cover, and chill for at least 1 hour.
  • Preheat oven to 350 F.
  • Shape the dough into 1 T size balls and place them 2 inches apart on a parchment-lined baking sheet. Using your thumb or the back of a teaspoon, press a slight indentation in the center of each ball. Take care not to press too hard down. If the edges crack while make the indention, simply pinch them back together to smooth them out. Otherwise cracks are okay.
  • Fill the indents with 1/4 teaspoon dulce de leche. Bake for 10-12 minutes or until the bottom edges are slightly browned.
  • Cool the cookies on the pan for 5 minutes before transferring them to a wire rack to cool completely. Sprinkle the tops lightly with sea salt.

My man-friend had a birthday (shocking!) and a mom (even more shocking, considering he had a birthday) that shared with me some cookie recipes she’s made over the years. This was taken from a print out I took a picture of while we were at his mom and dad’s place for a birthday celebration. I can’t quite remember if she said she made this cookie often or not, because she and I split a bottle of chardonnay before (and a little during) dinner.

But I took the fact that I had pictures of recipes in my phone the next morning as a good sign that we had a lovely conversation about Christmas cookies.

The dough came together pretty well. I put it in the fridge for an hour, and when I got it out, I realized my fridge may be set a little too cool.

When I went to ball the dough, I had to sort of chip away at it. But it worked and eventually all the dough thawed out.

I like thumbprint cookies, and I definitely like dulce de leche, so this is one I was looking forward to.

And I really can’t believe I’ve never baked with dulce de leche. Or bought it before. Or bought two before, opened both and ate the first one while I baked with the other.

Just add spoon.

At the end of the recipe, you’re supposed to put sea salt on these. I don’t have sea salt. And it was 1 a.m., and I was in my pajamas and not about to leave the house for sea salt.

But they are pretty good, even without sea salt.

December 4: Buttery Jam Thumbprint Cookies

Standard

Buttery Jam Thumbprint Cookies

(from http://www.chewoutloud.com)

INGREDIENTS

  • 1 cup salted butter, softened
  • ½ cup confectioners’ (powdered) sugar, plus ¼ cup more for dusting
  • 2 teaspoons pure vanilla extract
  • ¼ tsp table salt
  • 2 cups all purpose flour
  • ½ cup fruit preserves

DIRECTIONS

  1. Preheat oven to 325°F. Line a baking sheet with parchment paper.
  2. In the bowl of a stand mixer fitted with paddle attachment, blend butter and sugar until fluffy and light, 2 minutes. Add vanilla and salt, scraping down bowl as needed. Switch to low and gently mix in flour, just until combined. Don’t over mix.
  3. Roll tablespoonfuls of dough into 1-inch balls. Place dough balls on parchment lined baking sheets. Press down the center of each ball with a spoon (or your thumb!) making a slight depression.
  4. Fill cookie centers with a teaspoonful of preserves. Bake 12-15 minutes or until golden brown and puffy, but take care not to overbake. Let cool a few minutes on baking sheet, then transfer to finish cooling on wire rack.
  5. When cookies are completely cooled, dust with confectioners’ sugar. Cookies can be kept in airtight container at room temp for a few days.

When I was a kid, the kind of cookie I always reached for had something in the middle. Whether it was a maraschino cherry, or some sort of custard filling, I liked sweets that had something going on in the center. So when I make these, I think about kids that also like cookies with center pizazz.

It’s a pretty simple recipe, and at the end, you can use whatever kind of jam or preserves you want. (Don’t use jelly. I made that mistake one year. It looks like a crime scene.)

Well, I like to push the envelope a little. Remember a few days ago when I said I went to the cool international grocery store near my house? I picked up something cool.

This.

I’d never seen it before, nor do I actually know why one needs rose preserves, but I had a cookie in mind.

In my first batch, I had half apricot preserves and then half rose preserves. They baked as expected. When they cooled, I put powdered sugar on them and tried one of my rose-flavored specimen.

The lighter colored ones near the top are the rose ones.

Have you ever been to Crabtree and Evelyn? My grandmother liked to go, as did my aunt, and they’d have all sorts of fancy soaps at their houses from here. Truth be told, I like that store too (and if anyone out there wants to get me some Gardner’s Hand Therapy, I’d be a happy little baker). However, while I like that store and can reminisce about times with Grandma and Aunt Barbara with their soaps and lotions, I draw the line at eating cookies that taste like fancy soaps smell. And unfortunately, like most things in my life, I learned that one the hard way.

But once that lesson was learned, my apricot — and then later — strawberry jam thumbprint cookies did not disappoint.

I’ll leave the flower flavors to other dishes. Though I’m still not sure what!

(But seriously, if you know what rose preserves are used for, please comment and let me know!)

December 20: White Velvet Cut-Outs

Standard

I’ll make a real sugar cookie before Christmas, because I don’t really consider these sugar cookies. They’re actually a little better than that. I make them nearly every year, and the cream cheese gives it a nice smooth texture and mellowness. It’s so good, in fact, I’d rather give them to people that savor them rather than eat them mindlessly by the dozen (like one tends to do with regular sugar cookies).

Plus, I’ve gotten into royal icing and flooding and making my own pastry bags this year, and I wanted to try decorating some cookies on my own before the kids get off from school.

My mother is an artist, and let’s just say I’m…not. I’m a writer and a poet, and while those are surely artistic endeavors, I can’t color in the lines to save my live. Never have been able to. (Looking back now, this must have frustrated my mom, kinda like how it frustrates me when my kids end a sentence in a preposition or opt for a haiku when the school assignment is to write a poem of their own. #thestruggleisreal.)

The dough is one you mix together and put in the fridge overnight. Because I’ve been on deadline, let’s just say that this dough might have lived a few nights in the fridge.

And let’s also just say that maybe I was busy with jobs I actually get paid for, so I forgot to take a picture of me mixing this dough together. Hey, something’s got to pay for all the butter I use, you know?

Generally, I make these cookies into bells because that was the first cookie cutter I ever had, and I love it and the person that gave it to me, and I have a hard time letting go.

So I made one pan of bells, but then I decided my antidepressants are working better than ever, so I ventured out into snowflakes. There were no tears. I consider it a moment of personal growth.

So let’s talk royal icing, shall we? I ventured into royal icing at the beginning of the month with my gingerbread people and my Louisiana cookies, and it went pretty well…after a while. So I mixed up some more for these cookies. I think I watched one too many episodes of the Holiday Baking Championship, because suddenly I’m all “You have to flood the cookies” and “these still aren’t dry.” Armed with my royal icing, some pastry bags, and Google images, I decorated my first pretty cookie…well, pretty much ever.

I decorated other bells too, but this one turned out the best.

So then I turned my sights towards my snowflakes and ventured out into other colors. I’m still quite shocked they turned out as well as they did.

I need to get my frosting consistency right and maybe a smaller tip, but for the most part, I’m pretty happy.

These might go in the freezer next to the macarons that no one’s allowed to touch.

White Velvet Cut Outs

(from Gooseberry Patch’s Old-Fashioned Christmas Cookies)

1 c. butter, softened                           1 egg yolk

3 oz. cream cheese, softened              1/2 t vanilla

1 c sugar                                          2 1/2 c flour

Cream butter and cream cheese together. Beat in sugar. Add egg yolk and vanilla, then stir in flour. Gather dough in a ball and chill overnight. To prepare, pre heat oven to 350. Rolll dough out to 3/16″ and cut into desired shapes. Bake for 12 minutes or until edges are light brown.

December 19: Pecan Sandies

Standard

I’m at the tail-end of a writing deadline, but I did take time out to bake. My mom came by to watch my daughter cheer at a basketball and she asked if I’d make her favorite cookies. Who can say no to that?

She even stopped off and bought me vanilla extract because as I started, I realized I was out of vanilla. (I’m now on bottle #3 since the month started.)

Now that I live in the area, things like this can happen…her going to my kids’ activities, me baking cookies, and her going to the grocery store for me. It’s kinda cool.

My mom’s favorite cookies, well at least the ones I make, are Pecan Sandies. I haven’t made them in years, but I figured I could whip these up in a just a little bit and then get back to writing.

It’s just your basic butter shortbread recipe, but with nuts–butter, powdered sugar, flour, and pecans. No fancy ingredients. No chilling in the fridge. Hell, there aren’t even any eggs. Into a 350 degree oven for 12-15 minutes, and then let them cool. When they are cool to the touch, roll in powdered sugar.

These are also known as Mexican Wedding cookies, I hear, but for me, they’re just Mom’s cookies.

(And now, back to the job that pays me.)

Pecan Sandies

Ingredients

  • 1 cup butter 2 sticks
  • 1/2 cup confectioner’s sugar plus more for rolling baked cookies
  • 2 cups all-purpose flour
  • 1 cup chopped pecans
  • 1 teaspoon vanilla extract

Directions

  1. Preheat oven to 350º F. Line a baking sheet with parchment paper and set aside. 
  2. Cream together butter and sugar with electric mixer. Add in the flour and vanilla extract and mix until well combined. Slowly stir in the pecans. 
  3. Scoop a teaspoon of the cookie dough and roll between your palms to form a ball. Place the ball of cookie dough onto the prepared baking sheet. Bake until lightly golden, about 12 minutes. Remove from oven and allow to cool to the touch. Roll in confectioner’s sugar. 
  4. When ready to serve and once the cookies have completely cooled, roll or dust them with a bit of additional confectioner’s sugar, if you prefer.


December 18: Mint Meltaways

Standard

We are one week from Christmas and 6 days away from the end of this year’s cookies. My cookie table is looking quite crowded with this month’s abundance.

After making the world’s largest meatloaf last night, I ran out of eggs. I didn’t feel like going to the store today, so I remembered back to a few years ago when I was in the same situation. Mint Meltaways (auto spell check keeps trying to change this to Beltways) contains no eggs, so that is my cookie today.

This is our star today.

The thing with peppermint extract is that’s not like vanilla extract, in that if a little is good, more must be better. Peppermint extract is strong and spicy, and nothing you want to overdo it on. Use the exact amount called for. Don’t improvise. I saw an episode of Holiday Baking Championship on Food Network where someone did, and he was eliminated. I bet whenever he smells peppermint extract, he becomes sick with failure.

Anyway, enough of my PSA.

I mixed together my dough and brought out another shining star.

If you’ve followed my blog for a few years, you’ll recall how I’ve tried various different colors for this, all in the name of fun. One year, it was black. One year it was Oscar the Grouch pulp green. This year, I wanted to do red. But not just any red. The best red. No offense to Wilton, but their reds suck, and this one by AmeriColor is the best red around. I mean, besides me.

I plopped my red balls on a tray and baked them. The recipe says bake until golden, but there’s no golden in my blood-sacrifice red mint cookies. I timed it pretty well and they came out nicely.

The mint frosting (again, do not add more–1/4 teaspoon is just enough) whips up pretty quickly. I used a star tip to put a dollop of minty goodness on each. Generally, I have peppermint dust to sprinkle on the tops of these cookies, but not today. I put a little red ball on each, which kinda makes them look like strange red nipples, but hey, more mature people may not think they look like anything but fun festive cookies.

Mint Meltaways

(from tasteofhome.com)

Ingredients

  • 1 cup butter, softened
  • 1/2 cup confectioners’ sugar
  • 1/2 teaspoon peppermint extract
  • 1-1/4 cups all-purpose flour
  • 1/2 cup cornstarch
  • FROSTING:
  • 2 tablespoons butter, softened
  • 1-1/2 cups confectioners’ sugar
  • 2 tablespoons 2% milk
  • 1/4 teaspoon peppermint extract
  • 2 to 3 drops red food coloring, optional
  • 1/2 cup crushed peppermint candies

Directions:

In a small bowl, cream butter and confectioners’ sugar until light and fluffy. Beat in extract. Combine flour and cornstarch; gradually add to creamed mixture and mix well.

Shape into 1-in. balls. Place 2 in. apart on ungreased baking sheets.Bake at 350° for 10-12 minutes or until bottoms are lightly browned. Remove to wire racks to cool.

In a small bowl, beat butter until fluffy. Add the confectioners’sugar, milk, extract and, if desired, food coloring; beat until smooth. Spread over cooled cookies; sprinkle with crushed candies.

Store in an airtight container.

December 17: Peanut Butter Blossoms

Standard

I woke up at an ungodly hour this morning. Actually, I’m not sure I ever fell asleep last night. Either way, I was up to see the sunrise. I wrapped presents in the dark. I organized my shoe rack. And then at 7 a.m., I decided it was a perfectly acceptable time to make cookies. 

About 10 minutes after sunrise. This is not something I normally see.

So, as my children were starting to get up for school, I was creaming together shortening and peanut butter. Because my loathe of mornings is something to be taken quite seriously, I think I alarmed all my kids. “Mom, are you okay?” I heard about a dozen times before they left for school.

I think by now we all know the deal with Peanut Butter Blossoms. It’s a peanut butter cookie that you stick a Hershey Kiss in the middle of when they come out of the oven. I used the traditional Hershey recipe, and as always, it’s posted at the end of this entry. 

However, when it came to the part where you roll it in sugar, I wanted to try something fun. I got out my red sugar and green sugar, and rolled them in that instead, just to make them more Christmas-y. I did this last year with Snickerdoodles, and that worked like gangbusters, so why not try with these?

Obviously, the pattern is for all of you. Although, I only took one picture of a tray, and I did the same alternating pattern on the next tray too, so maybe it’s not just about you. 

And as I drank my morning coffee, I was unwrapping Kisses. I remember one year I was doing this while drinking spiced wine at night. It was almost the same, minus the delightful buzz.

I was almost done baking when my daughter texted me, asking if I could bring her eyedrops to school (don’t ask), so I took it as the perfect opportunity to pack up some cookies for the office staff at the middle school. For as much time as I spend there, I need my own parking space and a place on payroll. 

I get asked a lot what I do with all the cookies. I do this. Teachers, neighbors, mailmen, friends…and whatever is left, I bring to my family Christmas at my dad’s house. 

Officially, I was done with cookies at 8 a.m. this morning. I feel like a Marine, only way less important and with way more sprinkles at my disposal.

Peanut Butter Blossoms

(courtesy of Hershey’s)

INGREDIENTS

  • 48 HERSHEY’S KISSES Brand Milk Chocolates 
  • 1/2 cup shortening 
  • 3/4 cup REESE’S Creamy Peanut Butter 
  • 1/3 cup granulated sugar 
  • 1/3 cup packed light brown sugar 
  • 1 egg 
  • 2 tablespoons milk 
  • 1 teaspoon vanilla extract 
  • 1 1/2 cups all-purpose flour 
  • 1 teaspoon baking soda 
  • 1/2 teaspoon salt 
  • 1/3 cup additional granulated sugar for rolling

DIRECTIONS

  • 1. Heat oven to 375°F. Remove wrappers from chocolates.
  • 2. Beat shortening and peanut butter in large bowl until well blended. Add 1/3 cup granulated sugar and brown sugar; beat until fluffy. Add egg, milk and vanilla; beat well. Stir together flour, baking soda and salt; gradually beat into peanut butter mixture.
  • 3. Shape dough into 1-inch balls. Roll in granulated sugar; place on ungreased cookie sheet.
  • 4. Bake 8 to 10 minutes or until lightly browned. Immediately press a chocolate into center of each cookie; cookie will crack around edges. Remove from cookie sheet to wire rack. Cool completely. Makes 48 cookies.

December 16: Almond Crescents

Standard

Greetings from 10 o’clock at night. 

Today, I graded most of the morning (only 11 essays left) and this afternoon I took my son for a haircut and then the kids and I went to Jeanne’s birthday party. (For more on Jeanne, see December 14.

We got home and I realized two things: 1.) I have to get these last 11 essays graded so I can put final grades in and 2.) I hadn’t baked any cookies yet. And while I can grade essays from bed, I can’t bake cookies from there (yet…I have hopes for the future generations to figure out something). So I took my remaining energy and whipped up some Almond Crescents. 

Now, if there’s one thing I know about these cookies, it’s that you can’t sneak one and get away with it. These are the delicious little morsels covered with powdered sugar. They are evidence-inducing, and I like that. Bravely show the world you have eaten one (or more) of these cookies. Own it. 

They are kind of a crumbly cookie to make, but as long as you know that going in, you’ll be fine. 

The recipe calls for a cup of butter, 3/4 cup of sugar, and then 3/4 cup of finely chopped almonds. Thanks to a fantastic coupon last week, I have nuts coming out of my ears, so this was not a problem. 

The flour is then added (I used 2 cups and about 2 Tablespoons), and you mix. Like I said. It’s a little crumbly.

I tried several methods for shaping my cookies and what worked best was quickly dashing my hands under the faucet and then rolling snakes on my cutting board. The water keeps it together until the heat from your hands warms the butter and that then keeps it together. 

Once they are out of the oven, they get a gentle dipping in some powdered sugar. You know, the evidence. 

Almond Crescent Cookies

(courtesy of An Italian in my Kitchen)

Ingredients

  • 1 cup butter
  • 3/4 cup sugar
  • pinch salt (if you use unsalted butter add 1/4 teaspoon salt)
  • 3/4 cup finely chopped fresh almonds, walnuts or pecans
  • 2 -2 1/2 cups all purpose flour
  • powdered sugar 

Directions

  1. Pre-heat oven to 350°  
  2. In a large bowl beat butter until fluffy, add sugar and beat again until fluffy.
  3. Scrape down the sides of the bowl and add nuts, flour  (add 2 cups to start and 1 tablespoon at a time and salt.
  4.  Bring dough together with your fingers.  Break off small pieces and form into a crescent shape.  Place on ungreased cookie sheets and bake for approximately 15 minutes . While cookies are still warm roll in icing/powdered sugar.  Can be frozen.  Enjoy!

December 15: J-Dub’s Toffee Grahams

Standard

I haven’t talked about her much this year, but J-Dub is my friend and baking antithesis. I love her to pieces, which is why I tease her, and the stories I tell (her starting a fire once with chocolate chips and a microwave; her wanting to wrangling both of our little kids instead of making a treat to sell for our MOPS fundraiser; me using her oven for its first baking even long after she moved in…) are absolutely true. 

She loves this picture of us. I just know it.

Much like Clark Griswold dedicates his tree to the Griswold Family Christmas, I dedicate these cookies to J-Dub and the one time she made them. Good things must be celebrated. 

These are pretty simple. I put two sticks of butter in a pot (and then use the wrappers to grease my pan) and add a cup of brown sugar. While it’s coming to a boil, I arrange my graham crackers on my greased cookie sheet (with edges…this is very important). I go edge to edge with the graham crackers and leave only a little space at the end. 

Once the mixture has been brought to a bowl, let it boil for 2 minutes. Then pour on the graham crackers. (Also? My kids normally couldn’t care less about graham crackers. But when I’m using them in a recipe, they ask for some. I don’t get it.) Top with chopped pecans and bake for 10 minutes. When it comes out, it should be bubbly. 

Cut it when it’s still somewhat warm and wait to eat it. Otherwise, you risk pulling out a filling. I’ve done it. It’s expensive. Wait. 

There’s been no word from J-Dub if she’s attempted these or any other baking adventures this year. I feel pretty safe in assuming there haven’t been any. 

J-Dub’s Toffee Grahams

(from Gooseberry Patch’s Old Fashioned Country Cookies)

24 square graham crackers

2 sticks butter

1 c. brown sugar

1 c. chopped pecans

Preheat oven to 325. Arrange cracker squares on a lightly greased cookie sheet with edges around it. In a saucepan, bring the butter and sugar to a boil and boil for 2 minutes. Pour over crackers, covering them well. Sprinkle with nuts and bake for about 10 minutes. Cool slightly and cut into 24 squares or 48 “fingers.”